Category Archives: Laboratory

Building a Stock of PHGL Tumour Baby Cells ….slowly

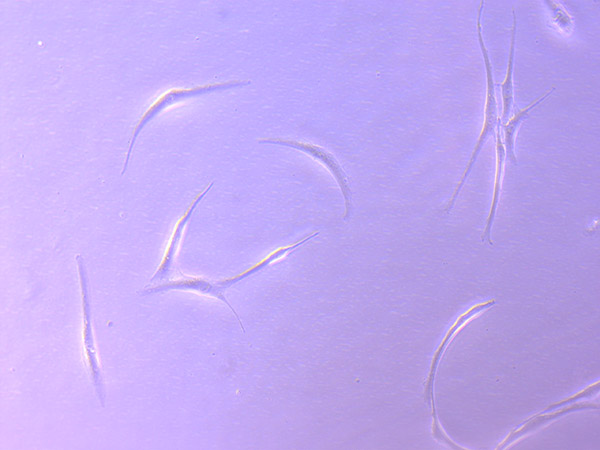
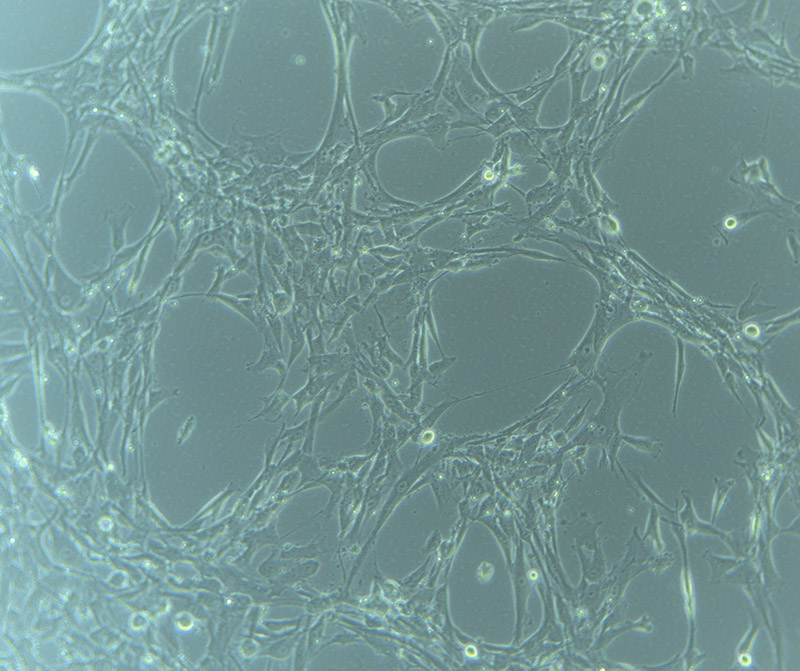
My Tumour Baby cells still remain very sluggish and slow to replicate. I’ve been checking in regularly to chart their growth.

Tumour Baby Cells 17/09/21

Tumour Baby Cells 17/09/21

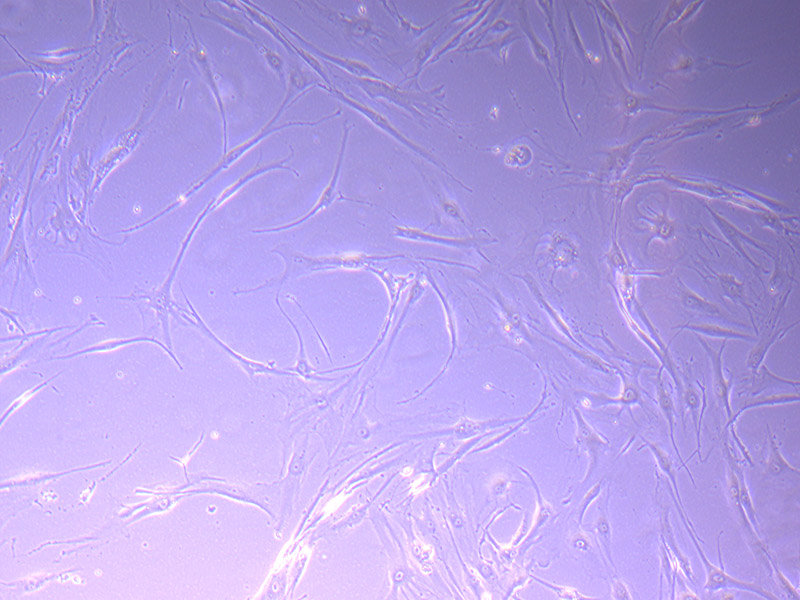
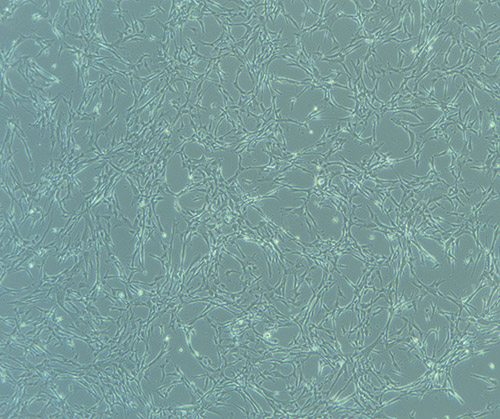
Brightfield microscope images of PHGL TB Cell Growth 17/09/21

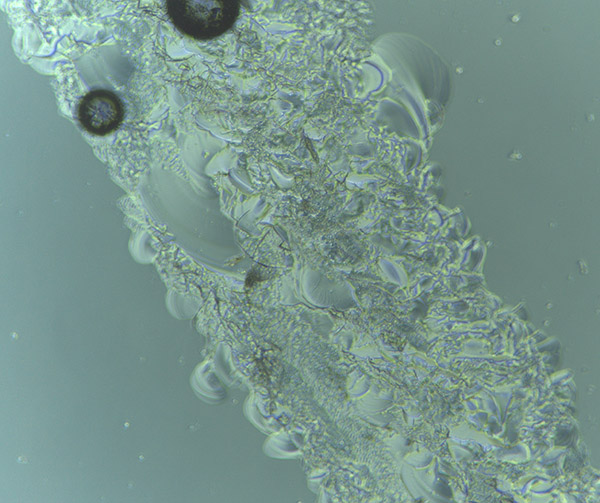
As they have continued to grow, they have started to look less healthy and consistent. They remind me of gamma irradiated 3T3 cells (mouse fibroblasts that have been irradiated to stop replicating).  However, this could also be the result of using media that is not ideal, as we have been using some existing (expired) stock supplies of DMEM while we are waiting for our order to arrive.

Tumour Baby Cells 20/09/21

Tumour Baby Cells 20/09/21

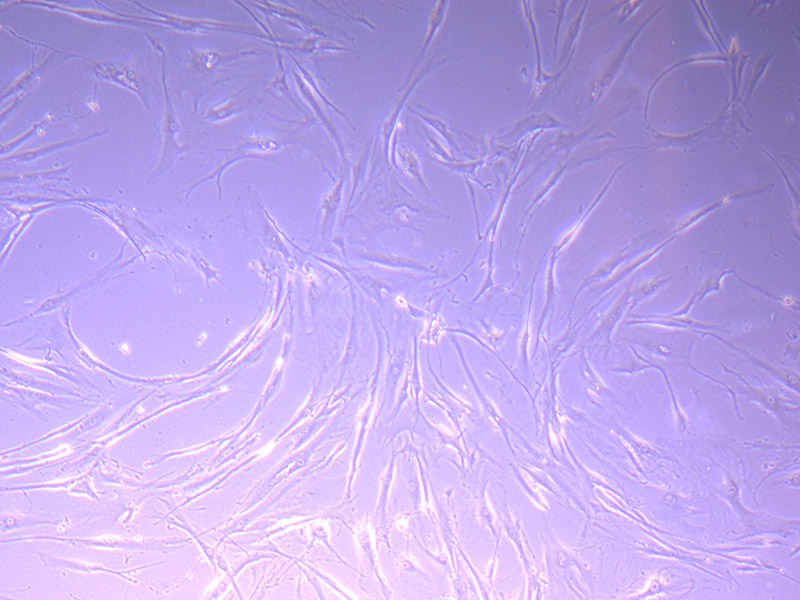
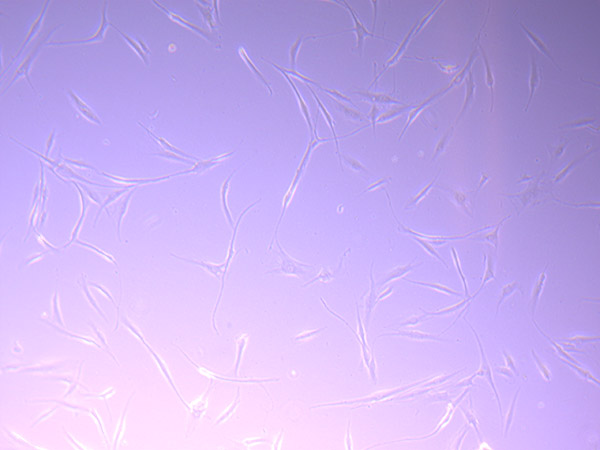
Brightfield microscope images of PHGL TB Cell Growth 20/09/21

By 21/09/21 I decided there were enough cells to split into a second flask and freeze down one vial of cells. This will replenish the vial we used and bring our stock up to three vials.

Tumour Baby Cells 21/09/21

Tumour Baby Cells 21/09/21

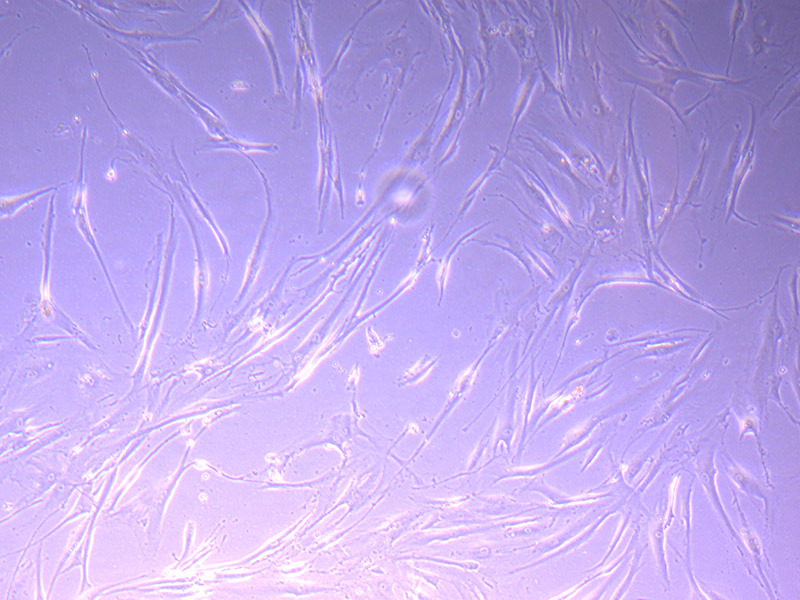
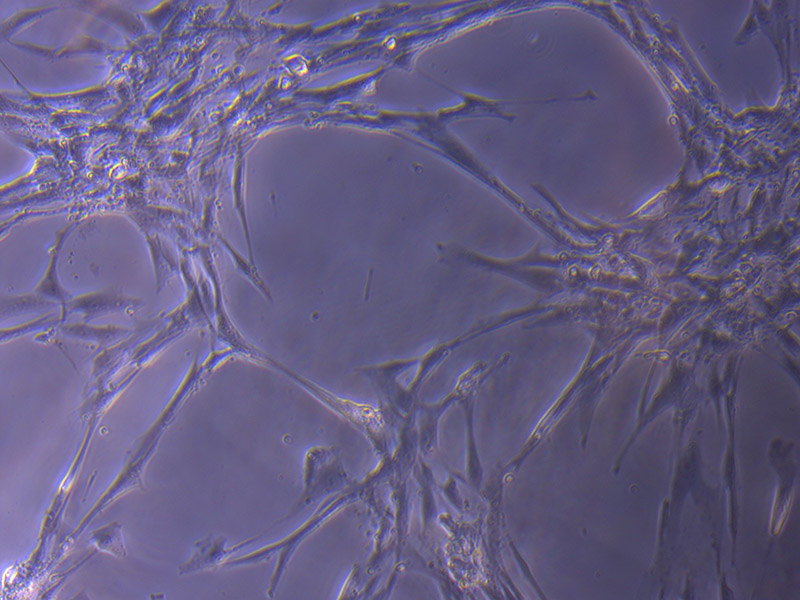
Brightfield microscope images of PHGL TB Cell Growth 21/09/21

Since the Stroke team mainly work with HBVPs, I reviewed standard protocols for fibroblasts to determine an optimum freezer mix. The recommendation from a number of sources is to include a higher rate of FBS at 30%, 10% DMSO (anti-free agent) and 70% media with a min. of 1 x 10⁶ cells. I made up a total of 1.5mL freeze mix (including cells).

When I passaged the cells, I added 1mL new media to the cells solution. Since the cells were not 80 – 90% confluent, I decided to split them at a rate of 2/3.  This means that the final freeze mix was: 150μL DMSO, 450μL FBS, 300μL media plus 600μL of cell mix. 1mL of this solution was added to cryovial and placed in a freeze box in the -80 degree freezer to be transferred into liquid nitrogen in the next day or so.

Since the cells were precious, I added the remaining cell freeze mix to a T25 flask with 5mL fresh media. There were also a few stubborn cells in the original T75 flask, (post passage),  so I added 10mL new media to see if any of them might grow.  Finally, the remaining 400μL cell mix (without freeze medium) to a new T75 flask with 10mL media.

At this point I had made up fresh DMEM media with the new batch of media, but decided to ‘wean’ the cells onto the new media at a 50/50 ratio of old to new. I am hoping that the new media will help the growth rate of the cells.

Cell Timing…

When doing cell culture, one has to remain responsive to the cells themselves. I checked my Tumour Baby cells today, anticipating that they would be ready for passage and freeze down, only to see that they are still a bit sluggish post-thawing.

Tumour Baby Cells

Tumour Baby cells at 16/9/21

They are only about 50% confluent, so I will need to wait until they are 80 – 90% before I split them. I will feed them (i.e. change media) tomorrow, but will likely only be able to passage and freeze them on Monday. I just hope they are at the right stage by Monday morning, as I do not have weekend lab access. This puts pressure on getting the timings somewhat right.  Cells wait for no humans….On a positive note, the new batch of DMEM has arrived so I can make up new optimum media tomorrow.

The HBVPs in contrast are ready for passaging.

HBVP P7

HBVPs P7 at 16/09/21

However, they can hold off for one more day so that they will be passaged, fed and happy over the weekend.

Tumour Baby Cell Growth

I checked in on the tumour baby cells to see how they are growing. This will also help with an estimation of when they need to passaged and I can make up some more frozen stocks.

Overall, they are looking pretty good 🙂 Yay!

Tumour Baby Cells

Brightfield microscope image of Tumour Baby Cells P1 on 14/9/21

They are still a bit sparse, but will likely be ready for passage/freezing this Thursday. That is perfect timing!  I will hopefully be able to make up 3 – 4 vials plus one T75 flask. I might plate them out sparsely again as they will need to grow Friday/Sat/Sun without passaging.

Fixed Cells

The HBVP cells in the Petri Dishes were ready for fixing on the 14/09/21. I followed a very basic protocol which involved removing the media and and fixing the cells with 4% Paraformaldehyde (PFA) solution for an hour.

After an hour the PFA was removed (in the fume hood in a special waste container) and 5mL PBS added to keep the cells moist and avoid them drying out. I will  stain them later with H&E stain when Jo-Maree has time to show me through histology.

HBVP Clear Petri Dish Fixed

Fixed HBVP cells in clear Petri dish. Image taken 16/09/21

HBVP Sigil Petri Dish Engraved Fixed

HBVP Sigil Petri Dish Engraved Fixed

Fixed HBVP cells in engraved sigil Petri dish. Image taken 16/09/21

Overall the cells seem quite well preserved. However, the cells in the engraved Petri dish with the sigil for “protection from accidents” had the best outcome….maybe sigils make me more vigilant.

HBVPs growing well

The Poly-L-Lysine coating has worked well to encourage growth of HBVPs on the base surface of the glass Petri dishes.  They look comparable to the T75 Flask cells.

HBVPs growing in Glass Petri Dish
HBVPs growing on base of glass Petri Dish (no engraving) coated with PLL 13/9/21
HBVPs in T75 Flask 
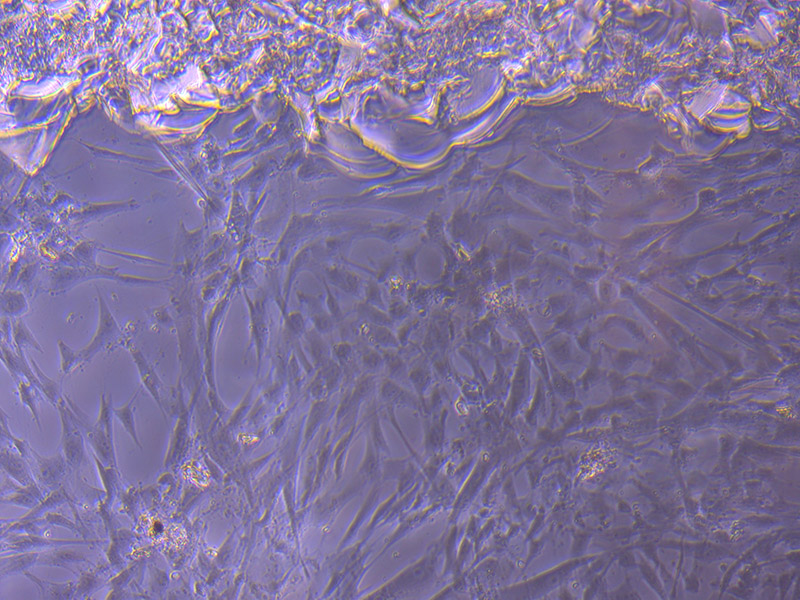
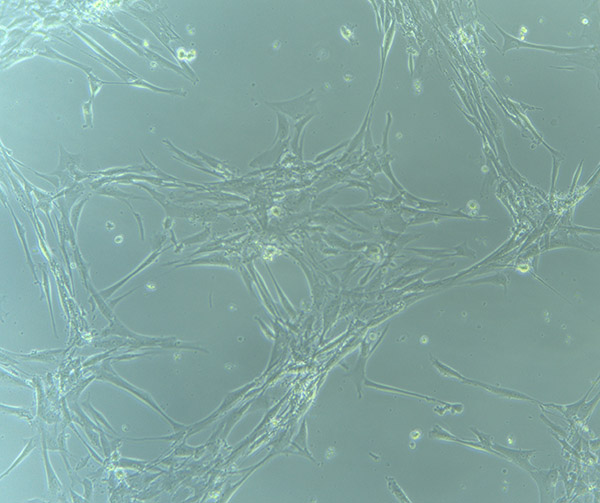
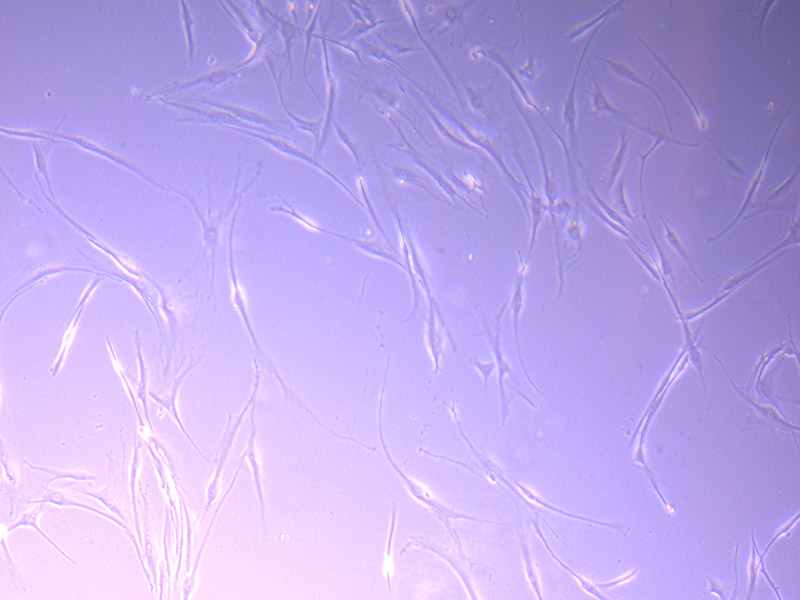
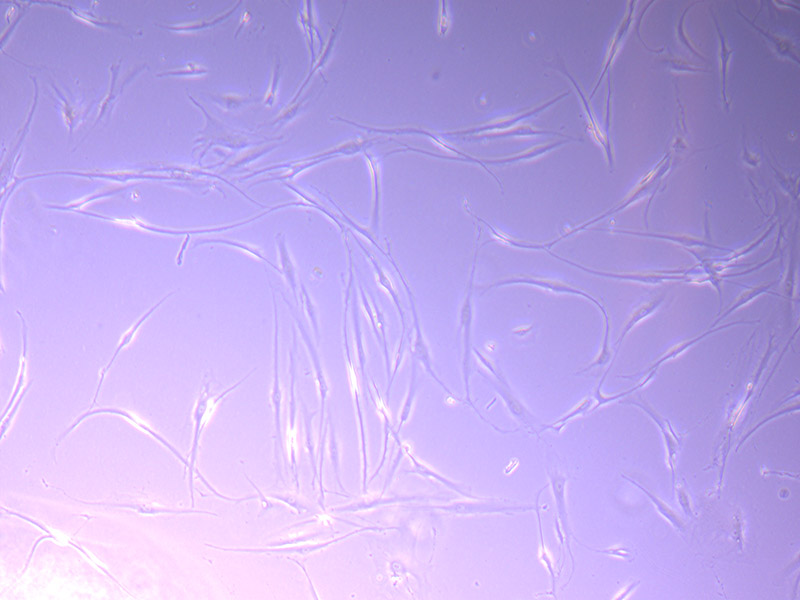
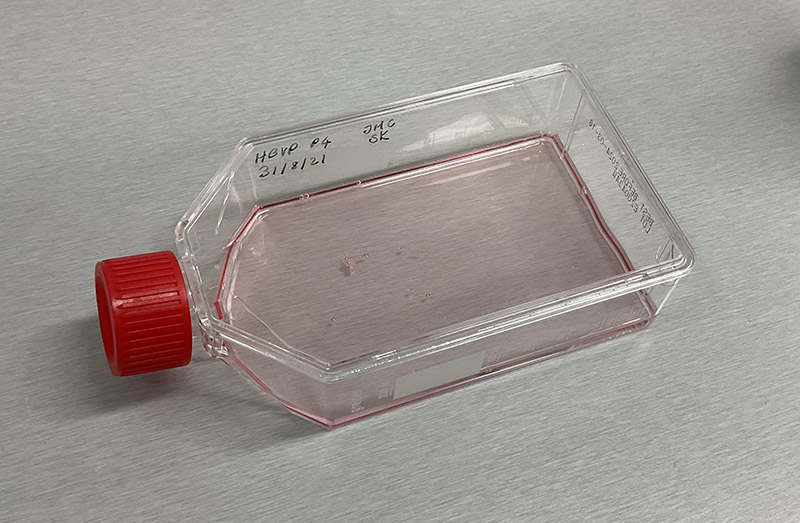
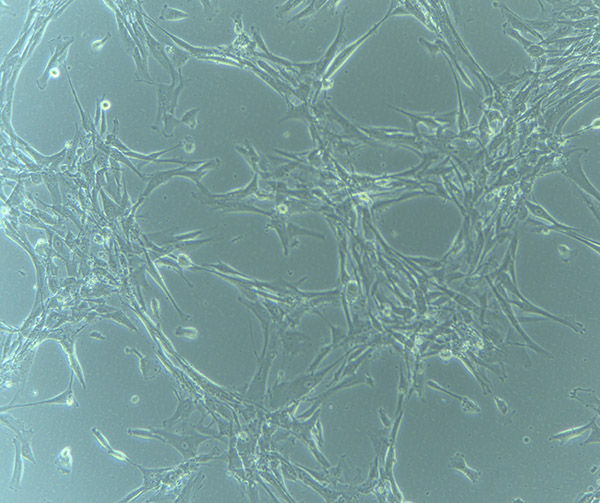
HBVPs growing in T75 Flask – 13/9/21

Cells are also growing well in the engraved Petri dishes although it is hard to see the cells on the engraved surface.

Engraved Petri Dish
HBVPs growing on base of glass Petri Dish (with engraving) coated with PLL 13/9/21

To better get a sense of where the cells are growing, we will fix them with 4% Paraformaldehyde (PFA) and then stain them with hematoxylin and eosin (H&E). Hematoxylin has blue-purple color and stains cell nuclei.  Eosin is pink and stains proteins more generally.

HBVPs ready and on the go!

I am now well into culturing thanks to Jo-Maree’s expert guidance. I am happy to say that it is all coming back to me and I actually feel pretty confident navigating the labyrinthian lab layout and doing routine cell culture.

I also have my own stock of HBVPs in the Stem Cell lab. As you can see they are quite spindly and form little ‘star clusters’ as they grow:

HBVP_P5_090921

Brightfield Microscope image of HBVP cells (P5 – passage no. 5). These cells were passaged on 9/9/21.

These cells grow in Complete Pericyte Medium (CPM) – Pericyte Medium supplemented with FBS, Antibiotics and Growth Supplements. When keeping a lab journal, it is important to record the Lot no. for all items. This allows researchers to track any variations between batches. It is also vital to record the opening date.

Complete Medium

Complete Pericyte Medium – prepared on 9/9/21

The HBVPs grow in standard T75 Tissue Culture flasks in 15mL of CPM (with cell type, passage number, date of passage and researcher initials listed on the vessel).

HBVP cells

HBVP cells (P4 – passage 4) in T75 Flask. 

As part of the experimentation process, I prepared  three 90mm glass Petri dishes.

Protection from Accidents
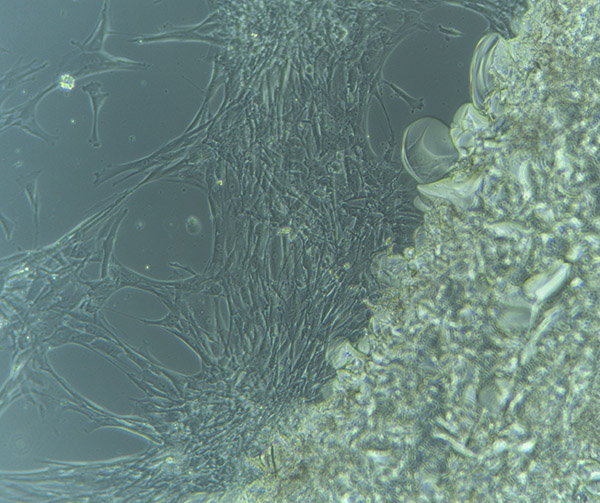
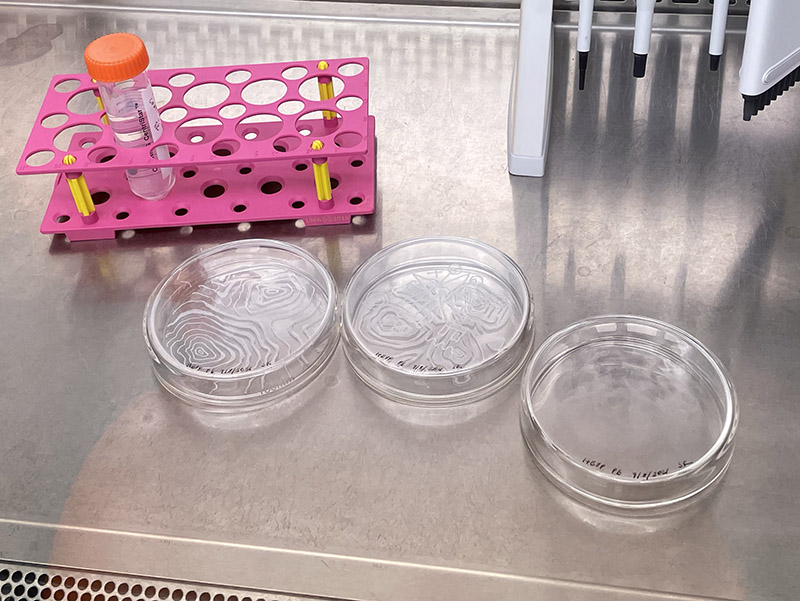
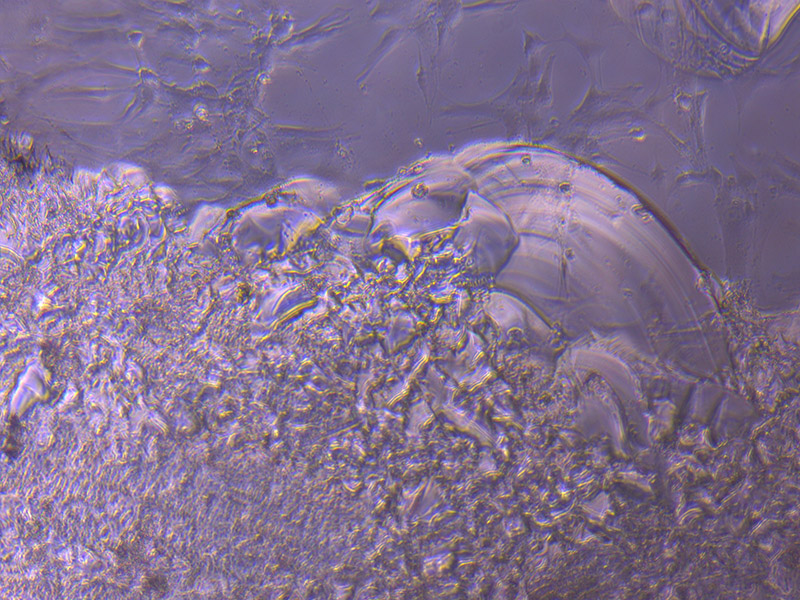
I engraved the base of two dishes with a ripple pattern to see if the engraving would impact on the growth/adherence of the cells. Inspired by the awesome work of Whitefeather Hunter (and my previous collaborative work with sigils), one of these dishes also had an engraved symbol to aid protection from accidents.

As you can see below, the engraving looks quite rugged and sharp as it was done by hand. I am curious to see if the cells will grow on this area.

Engraved Glass

Brightfield microscope image of the engraved glass.

To sterilise the dishes for cell culture, they are placed into paper autoclave bags and sealed with autoclave tape.  They are then placed into an autoclave that steam sterilises the vessels at high temperature. The black lines on the tape indicate that the process was successful and the correct temperature was reached.

Autoclaved Petri Dish

Single Petri dish in autoclave bag – dated 26/8/21

Most cells do not adhere well to untreated plastic or glass surfaces. As such we added a Poly-L-lysine coating to aid cell adherence.

poly-l-lysine

Poly-L-lysine solution.

The Poly-L-lysine solution was diluted with sterile H2O to make up 30mL total (10mL for each Petri Dish).

Coating

10mL of the Poly-L-lysine solution was added to each dish and then incubated for an hour.

Petri Dishes

After an hour, I removed the Poly-L-lysine solution and washed each dish twice with sterile H2O.  I passaged (split) the HBVPs and added approx 1 million cells (in 1mL media) to each Petri Dish and one T75 Flask (plus 14mL media).


Tumour Babies – rise up!

My tumour baby cells are looking good!  So far there are no signs of infection which is excellent, excellent news.

Tumour Baby Cells

Tumour Baby cells – thawed 10/9/21 – viewed 13/9/21

They have been growing for a few days and although they are sparse and sluggish, it is common for primary cells to take a while to recover from freezing. The plan is to grow them up and freeze down some more vials. At the moment, we only have 2 x vials in cryostorage, so there is pressure to build up some additional stocks. I anticipate that they may be ready for passaging at the end of the week.


Preparing the ‘Dirty’ Lab

We are almost ready to culture my little tumour baby cells. Since they are primary cells, we need to work in the ‘Dirty’ Lab area. As previously mentioned, this does not mean that the lab is any less clean or sterile, but rather relates to the type of cells used. Since my fibroid cells are primary cells and untested for mycoplasma and other potentially infectious agents, they cannot be cultured in stem cell and cell line areas.

'Dirty' Room

“Dirty” Cell Culture Lab

The incubator has been out of action, so the first task is to clean the shelves, change the sterile water and decontaminate the interior.

cleaning

Washing the incubator shelves

The incubator we are using has an auto-clean function that super heats the interior to sterilise everything. A nice feature!

incubator

Incubator

Once the incubator has gone through the full cycle (approx. 24 hours), it will be ready to host my cells.

Using the Autoclave

Jo-Maree inducted me into the use of the benchtop autoclave used to sterilise glassware and other consumables (e.g. water) for use in the lab.

Benchtop Autoclave

I was a bit nervous at first, but the actual process is pretty straightforward with clear instructions on the front of the machine.

Autoclave Instructions

The cycle setting depends on the nature of items that need to be sterilised. I will be autoclaving Glass Petri Dishes in autoclave bags. While there is no specific ‘Goods’ listing for glass, Jo-Maree indicated that Cycle 6 – Wrapped Metals – would be most appropriate as the glass can withstand high temperature and is comparable to metal.

I will also need to sterilise some MilliQ Water for cell culture use – e.g. washing dishes, so this would need to go under a different cycle – Cycle 2 for fluids. When sterilising fluids, it is important to only loosely add a cap to the vessel or the bottle can explode.

LAB SCHEDULE

UPDATED LAB SCHEDULE

Now that the project has the formal go-ahead, I am moving into lab mode and have determined some of the key milestones for the next months.

1: Training & Prep: 1 – 2 weeks

Training with HBVP cells include:

  • Thawing and culturing cells, making media, working in a biosafety cabinet and maintaining sterility, light microscopy
  • Learn to use the autoclave and prepare petri dishes and glass vessels for culture
  • Coat petri dishes and glass vessels with poly-l-lysine for cell adhesion, test with HBVP cells
  • Order media, reagents and kits
  • Submit IBC approval forms

2: Cell culture of fibroid cells – 4 – 8 weeks

  • Thawing and culture – grow up and freeze stocks of cells, light microscopy
  • Ask Dietmar to send 3D scaffolds
  • Grow and fix cells in petri dishes and glass vessels
  • Fluorescent microscopy of cells
  • Scanning Electron Microscopy (SEM) of cultured cells
  • Transmission Electron Microscopy (TEM) of cultured cells
  • Timelapse microscopy
  • 3D cell seeding HBVPs and Fibroid cells – see differences in cell response.
  • Wait for IBC approval

PROJECT: 3 months

3: Cell Immortalisation +

  • Immortalisation of primary fibroid cells via established commercial kit (Applied Biological Materials (ABM) or Alstem cell immortalisation kits)
  • Cell genetic profiling
  • Cell culture of immortalised fibroid cells (optimisation of culture methods for 2D and 3D environments, cellular response and proliferation testing)
  • Grow and fix cells in petri dishes and glass vessels
  • Timelapse microscopy

4: iPSC production

  • Reprogramming of primary cells to generate induced pluripotent stem cells (iPSCs) via established commercial kit (e.g. Epi5™ Episomal iPSC Reprogramming Kit available via Thermo Fisher)
  • Development of Gastruloids, Organoids or Neurospheres (self-organised 3D cell masses)
  • Cell culture of reprogrammed or immortalised fibroid cells (optimisation of culture methods for 2D and 3D environments, cellular response and proliferation testing)
  • Timelapse microscopy
  • If iPSC successful – create neurons and heart cells