Tag Archives: cell culture

Ghost Movement Trails in Original Tumour Baby Cell Flask

As indicated in my first post-holiday post, my flasks mostly still have live cells – although some of the more confluent flasks also resulted in mass cell death. Interestingly, my first thawed flask of cells – with remaining cells maintained after the first passage – still has living cells after four months of continuous culture:

P1 Flask - 9/10/21
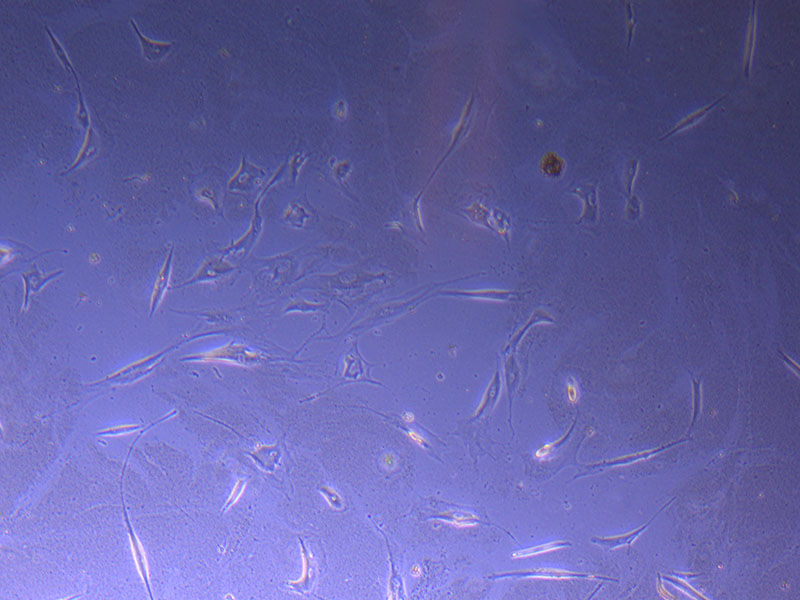
Light microscope image of PHGL TB cells at 13/1/22 showing a main cluster area of remaining cells. 

These cells were originally thawed and plated on 10/09/21. After passage on 21/09/21 the original flask continued to be maintained with a weekly feeding/media change regimen.

P1 TB Flask
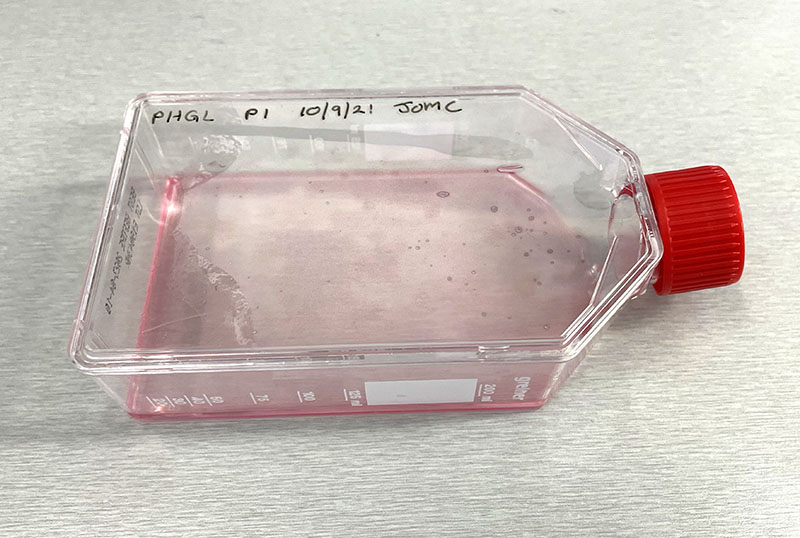
Photograph of P1 PHGL TB flask originally plated out by Jo-Maree on 10/0921. 

Tumour Baby P1 21/09/21Light microscope image of P1 PHGL TB cells taken on 21/09/21 prior to passage. 

Tumour Baby P2 23/09/21Light microscope image of P2 PHGL TB cells (in original flask) taken on 23/09/21 after cell passage on 21/09/21. A few cells remain visible in the flask. 

At present, here are only very small clusters of cells remaining:

Tumour Baby original flask viewed 13/1/22
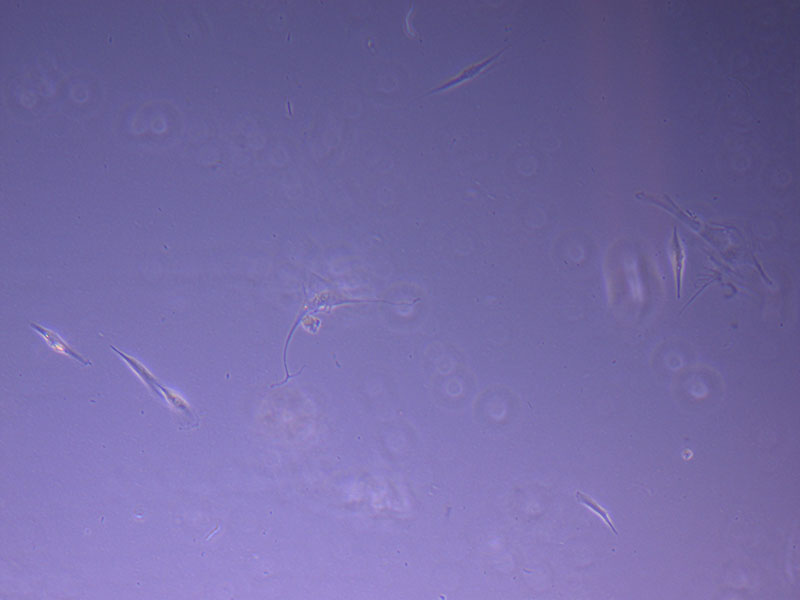
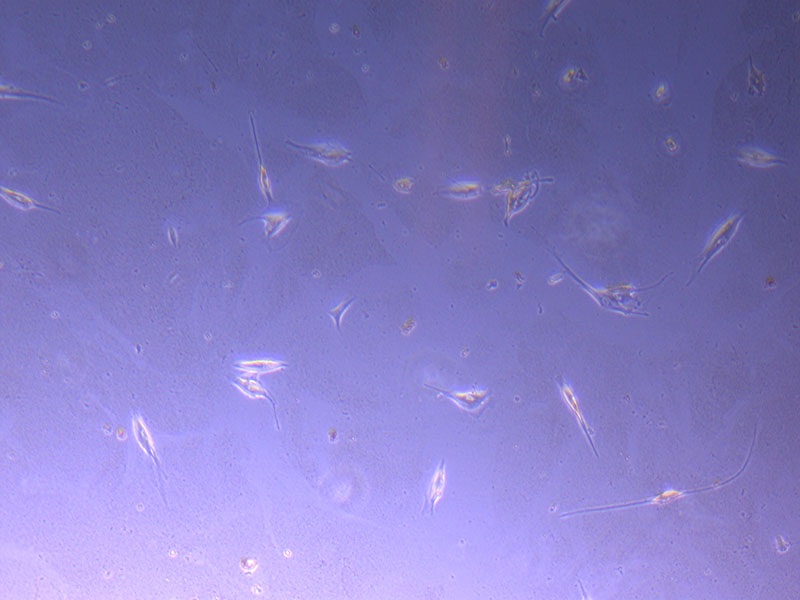
Light microscope image of P2 PHGL TB cells (in original flask) taken on 13/1/22. The image reveals a ‘sprinkle’ of cells beyond the main cluster. 

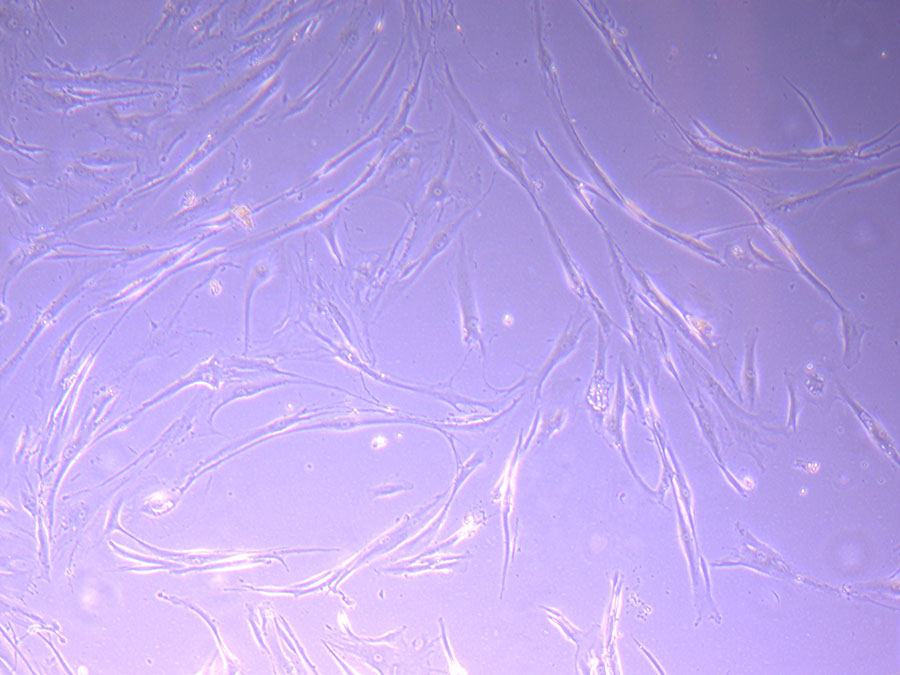
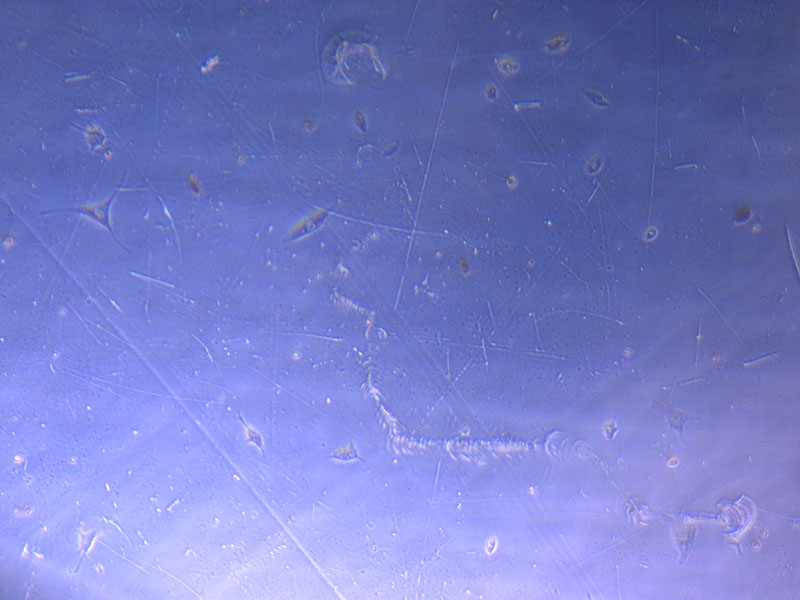
The rest of the flask is filled with the ghostly trails of cellular movement:

Trails of Cell Movement

Trails of Cell Movement
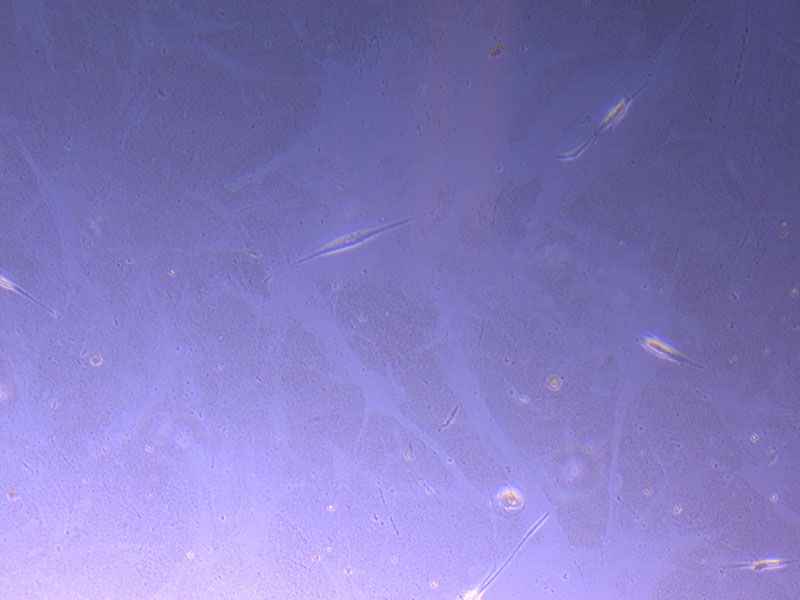
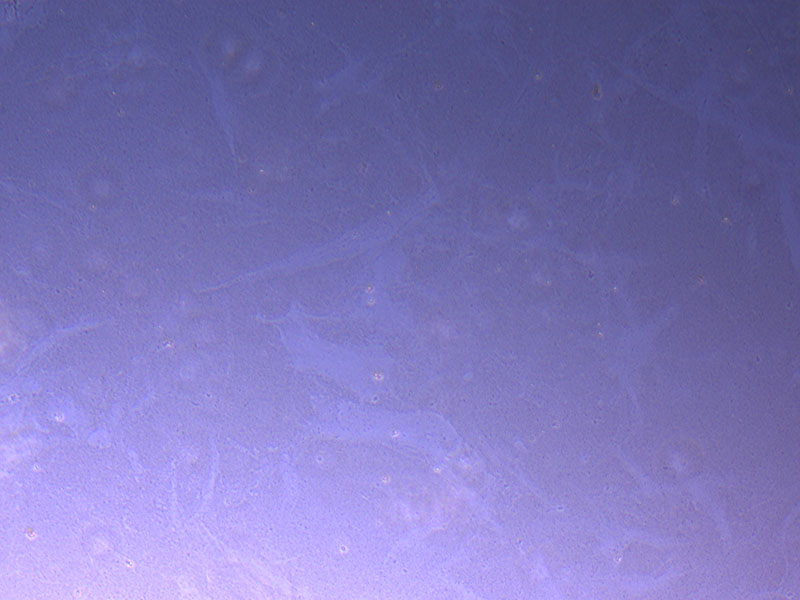
Light microscope images of P2 PHGL TB cells (in original flask) taken on 13/1/22. The image reveals trails of cellular movement and existence. 

Since this is pretty consistent with prolonged culture, I am curious to show Jo-Maree to determine what the ‘residue’ is. It is quite poetic to consider the way in which  traces remain of different movements and interactions. I have decided to continue to maintain the flask until there are no more viable cells, so it will be interesting to see how these traces evolve.


Extent of death post-holiday – Cut Glass and Petri Dishes

Following more detailed review of cell flasks, there are some hardy ‘survivors’ of my lab-free holiday.

Cut Glass CellLight microscope image of cut glass dish with media containing dead cell debris and evidence of a small number of surviving cells. 

After removing the old media, it was easier to see the remaining cells:

Cell Survivors - Cut Glass

Light microscope image of cut glass dish in PBS showing evidence of a small number of surviving cells. 

This image shows even more evidence of cell survival:

Cell Survivors - Cut Glass
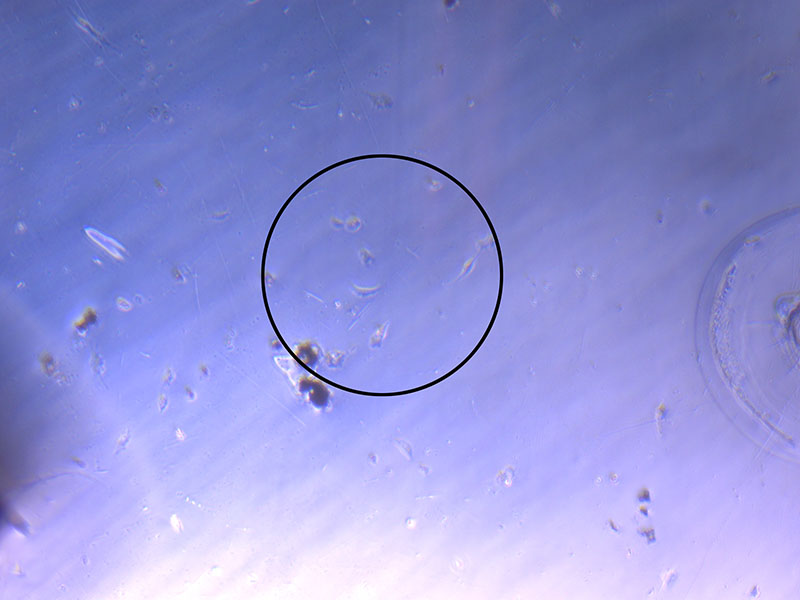
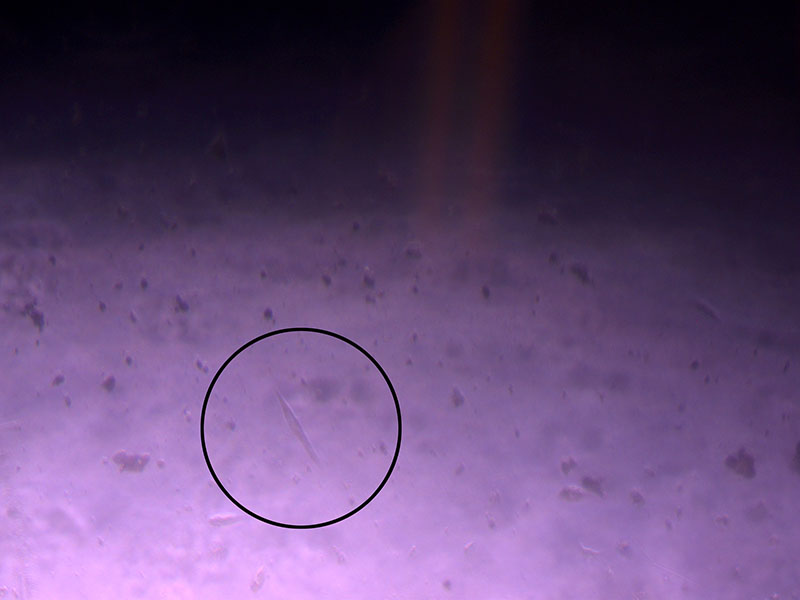
Light microscope image of cut glass dish in PBS showing further evidence of a small number of surviving cells. 

 Cell Survivors - Cut Glass
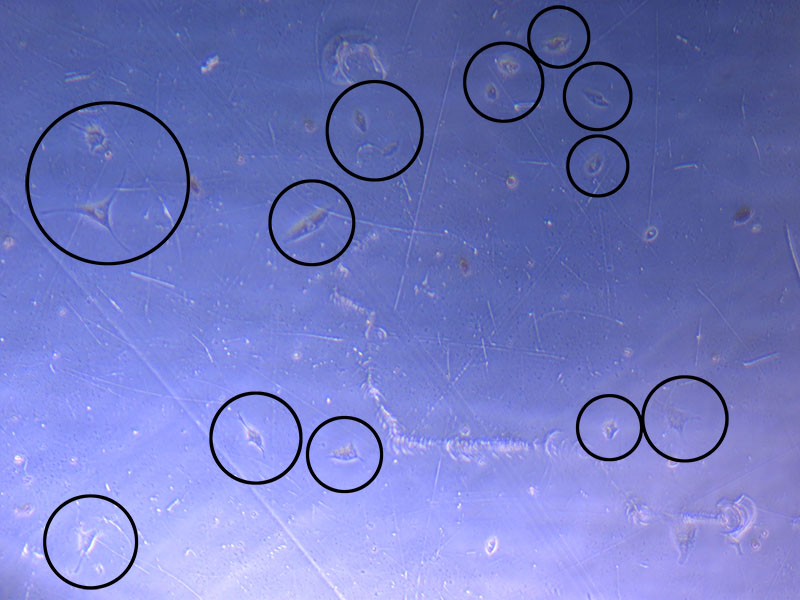
Light microscope image of cut glass dish in PBS with likely cells circled. There are a few additional potential cells visible, but I have only circled the most obvious. 

To get an even better sense of survivors, I will fix (in 4% PFA) and H&E stain 2/3 of the cut glass dishes. The flatter cut glass dish and Petri dish (with more potential for cell survival will be maintained in the incubator to see how they fare over the next week).

Petri Dish 
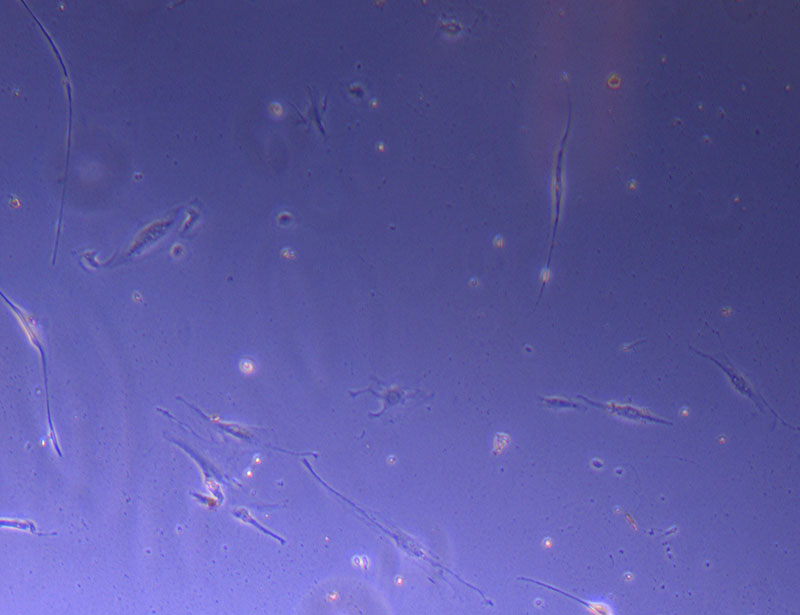
Light microscope image of Petri dish with fresh complete media with live cells. 

I will also fix and stain the glass vessels. It is less likely that these will yield anything interesting, but it will help me troubleshoot how to do the protocol with the tiny openings – it is very difficult to effectively remove the media – even with a 20ul pipette and tip 🙁


Immunostained Cells

The lab has a great set-up for fluorescence microscopy which makes imaging quick and easy.

You just need to load the well plate into the machine and set up basic imaging parameters. You do need to image both DAPI and Phalloidin stains, but the software merges the images for you.

Fluorescent Images of Fibroid Cells

Task Manager

Loading ModeSimple graphic interface with presets ready to complete fluorescent microscopy. 

As discussed in my previous post on immunostaining, the blue dots indicate nuclei and the green structures reveal the cytoskeleton via binding to actin.

Confluent wells: 

DAPI & Phalloidin PHGL Tumour Baby Cells

DAPI & Phalloidin PHGL Tumour Baby Cells

DAPI & Phalloidin PHGL Tumour Baby Cells

DAPI & Phalloidin PHGL Tumour Baby Cells 
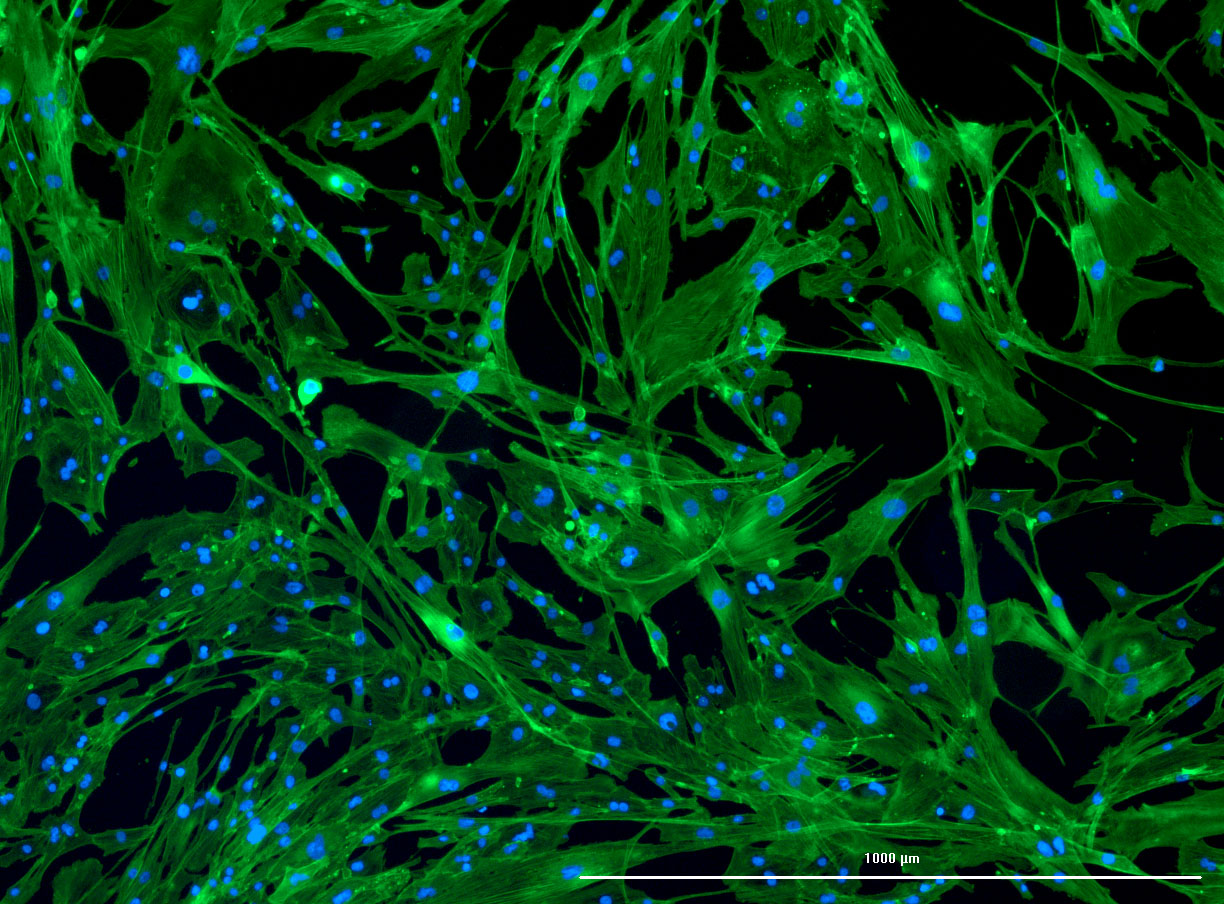
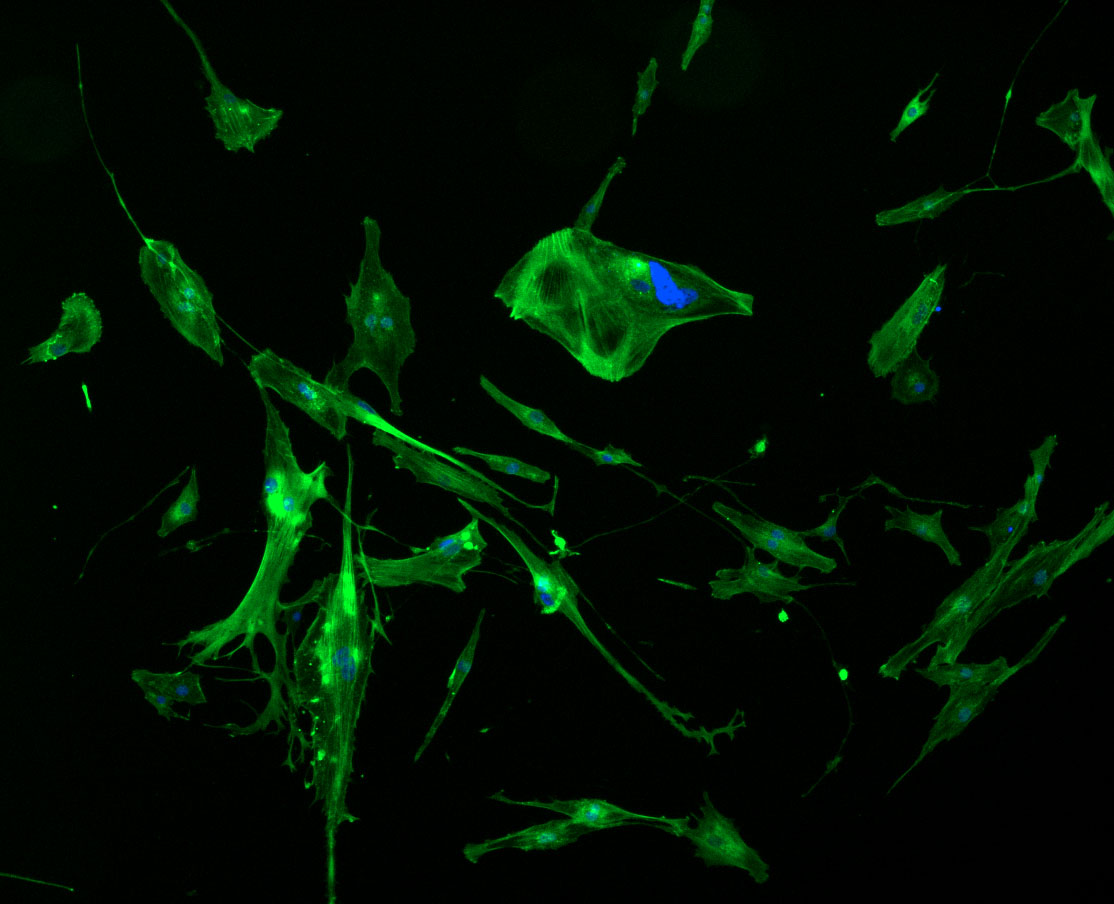
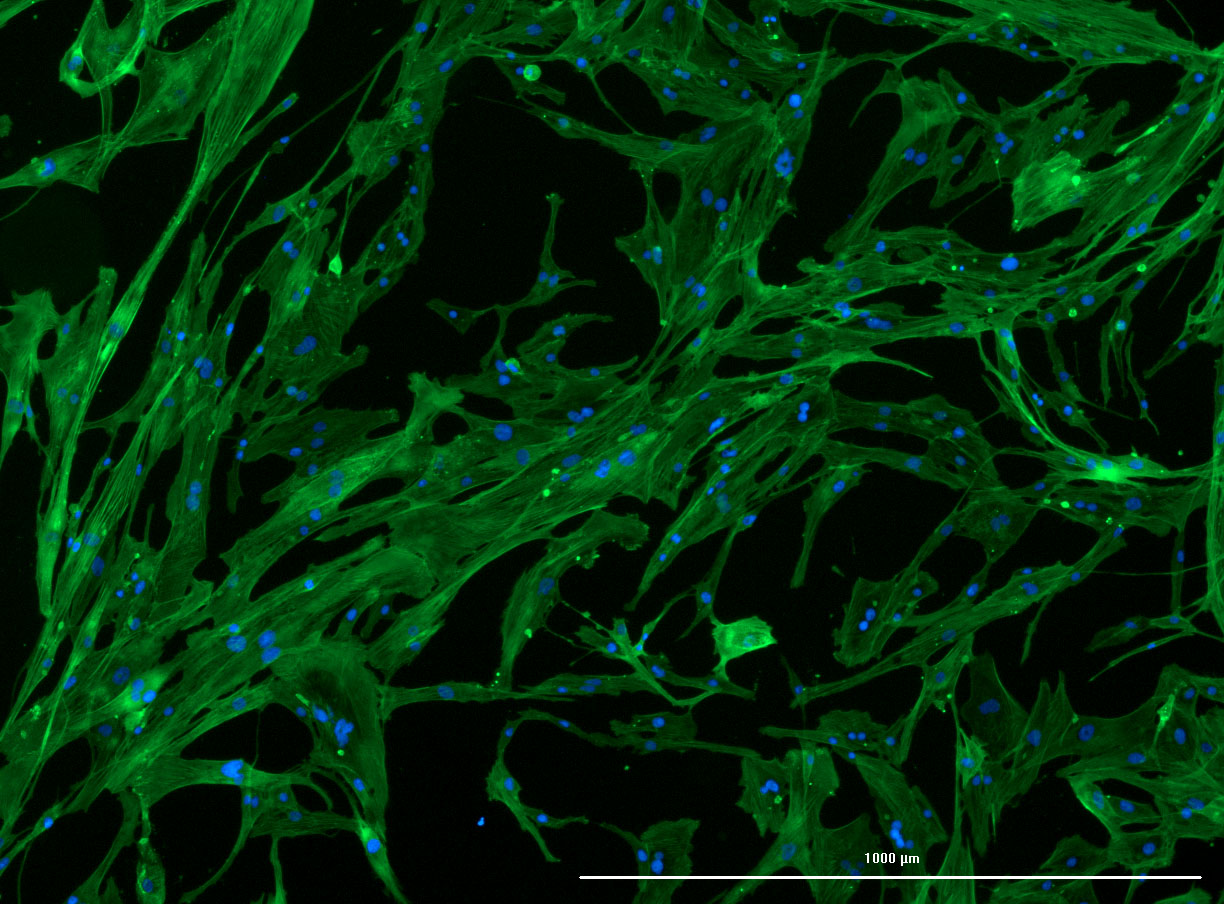
DAPI and Fluorescein Phalloidin staining of confluent fibroid cells P4 (although this is potentially misleading as the cells are very slow growing). 

Less confluent wells:

DAPI & Phalloidin PHGL Tumour Baby Cells

DAPI & Phalloidin PHGL Tumour Baby Cells

DAPI & Phalloidin PHGL Tumour Baby Cells

DAPI & Phalloidin PHGL Tumour Baby Cells

DAPI & Phalloidin PHGL Tumour Baby Cells

DAPI & Phalloidin PHGL Tumour Baby Cells 
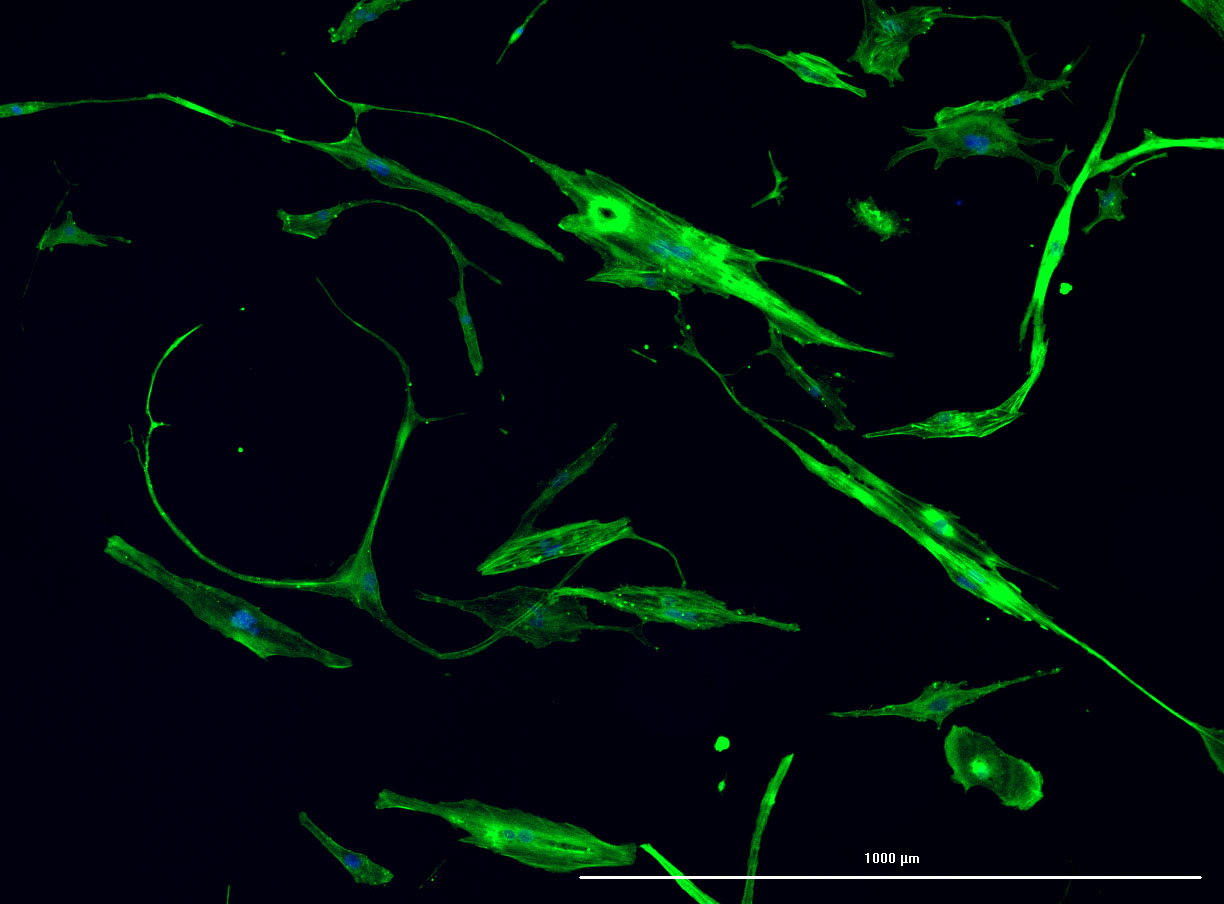
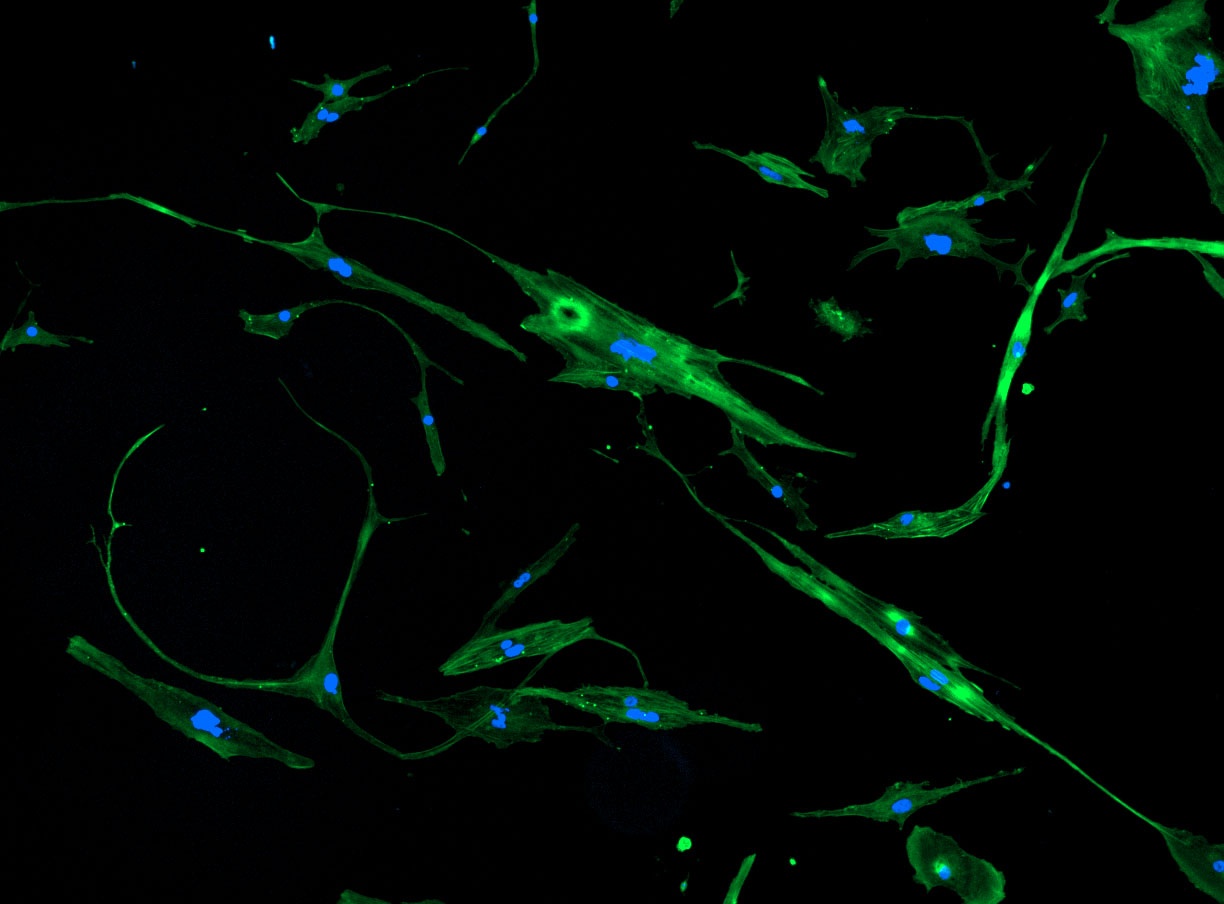
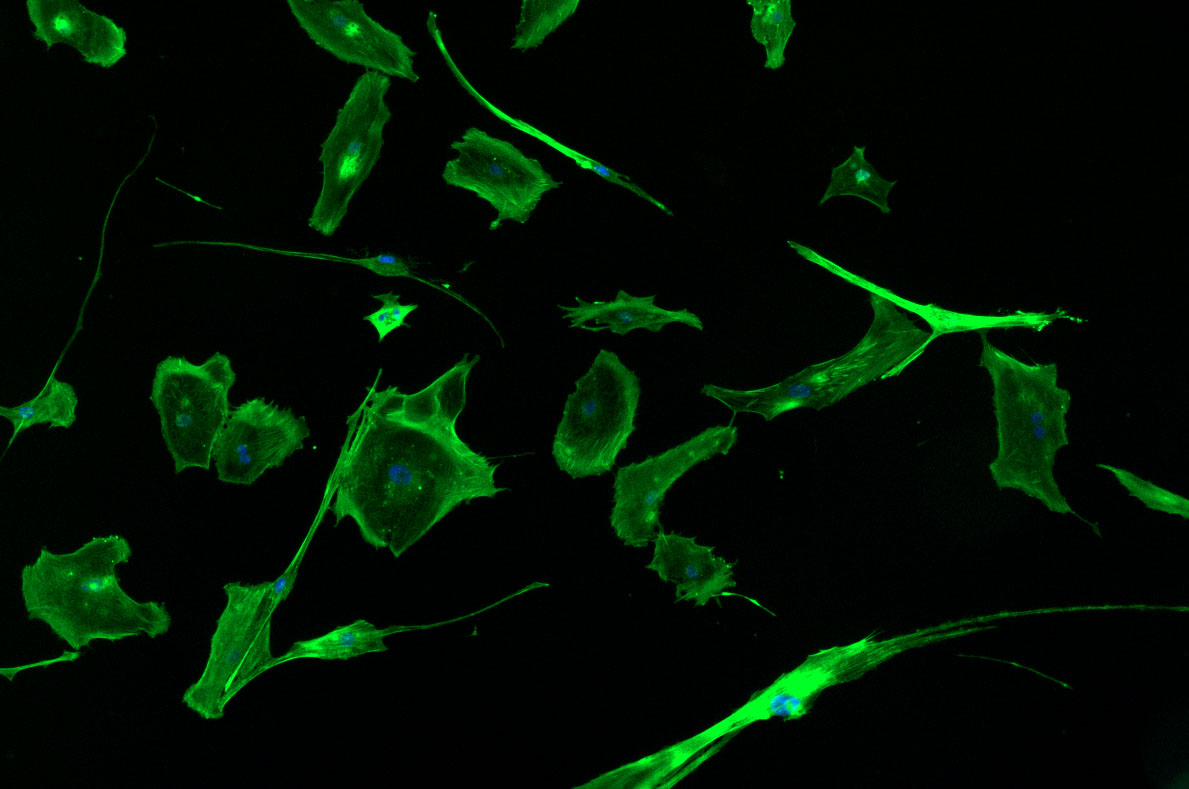
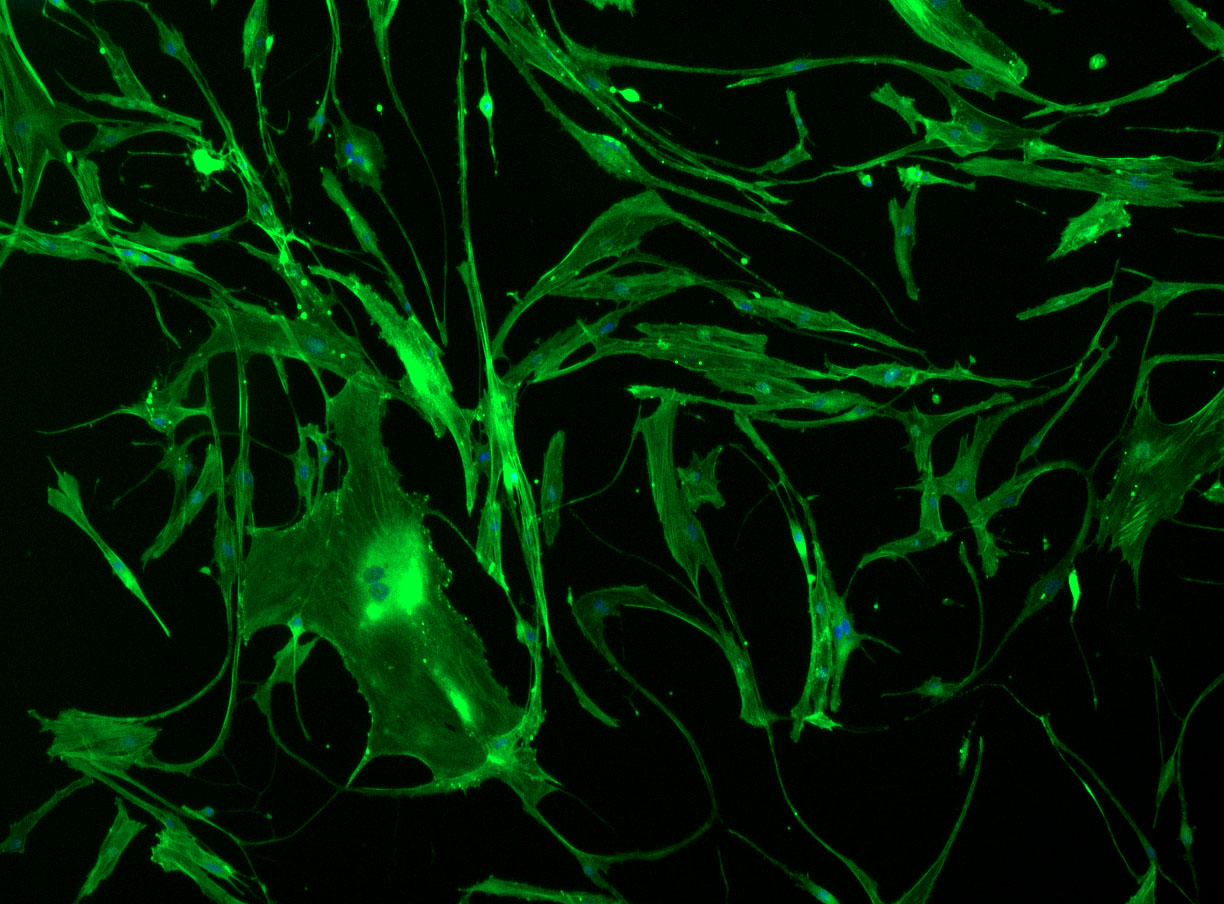
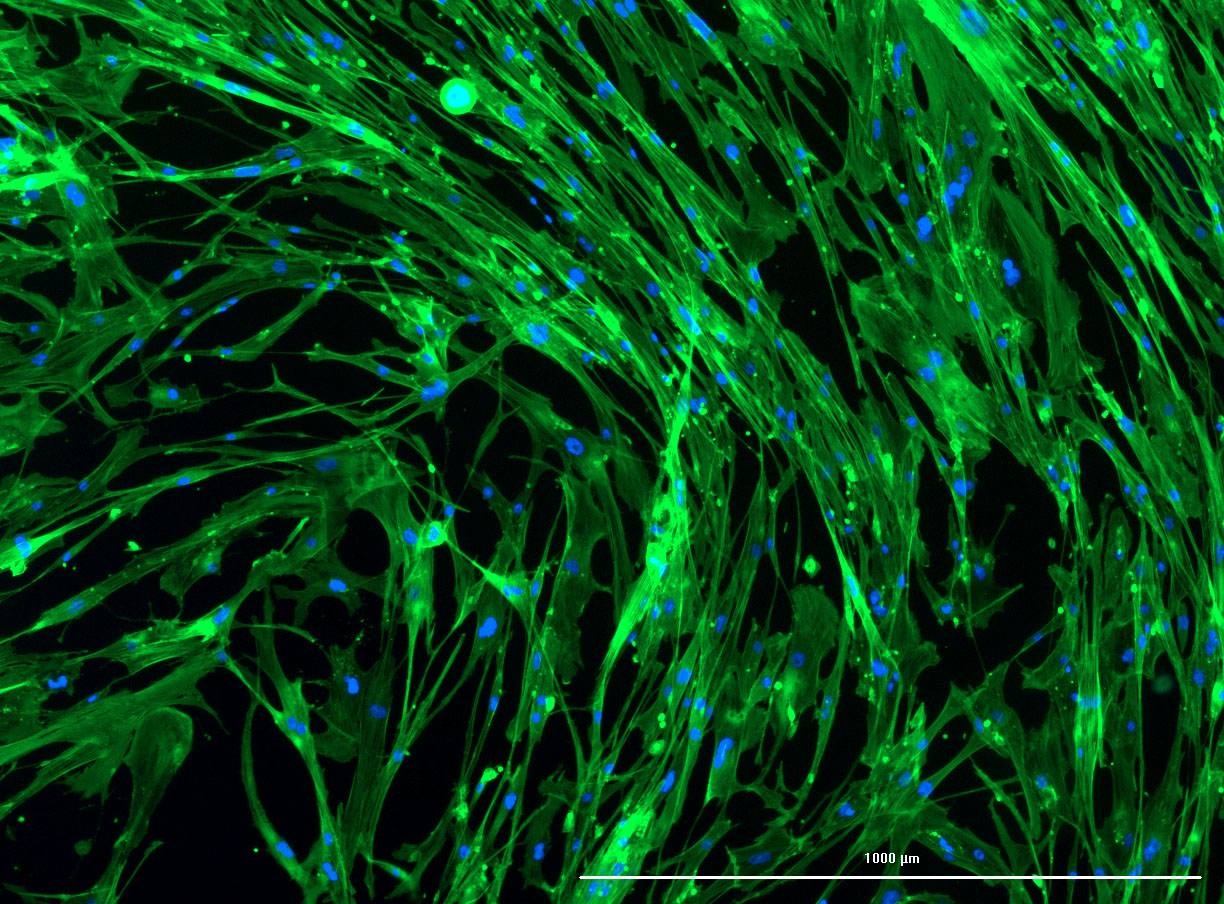
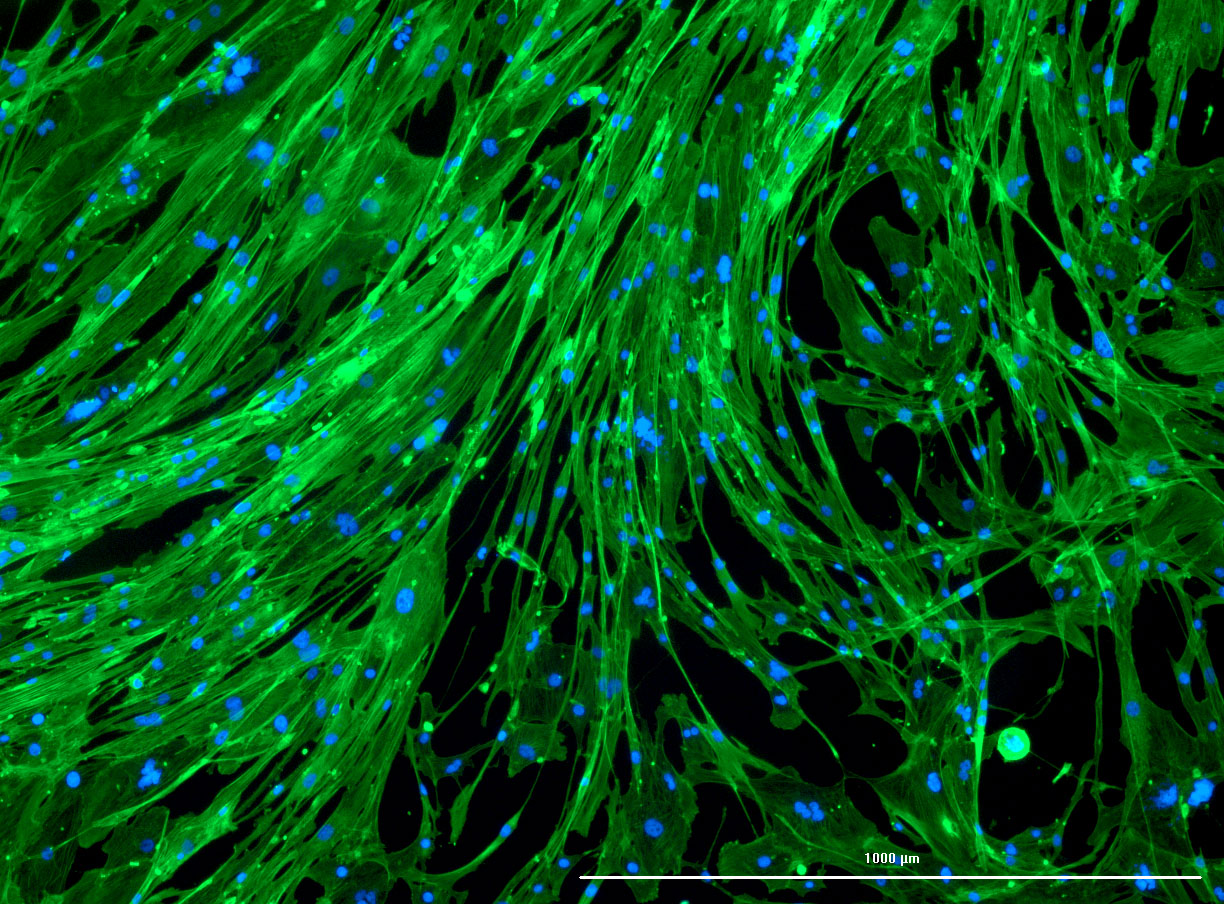
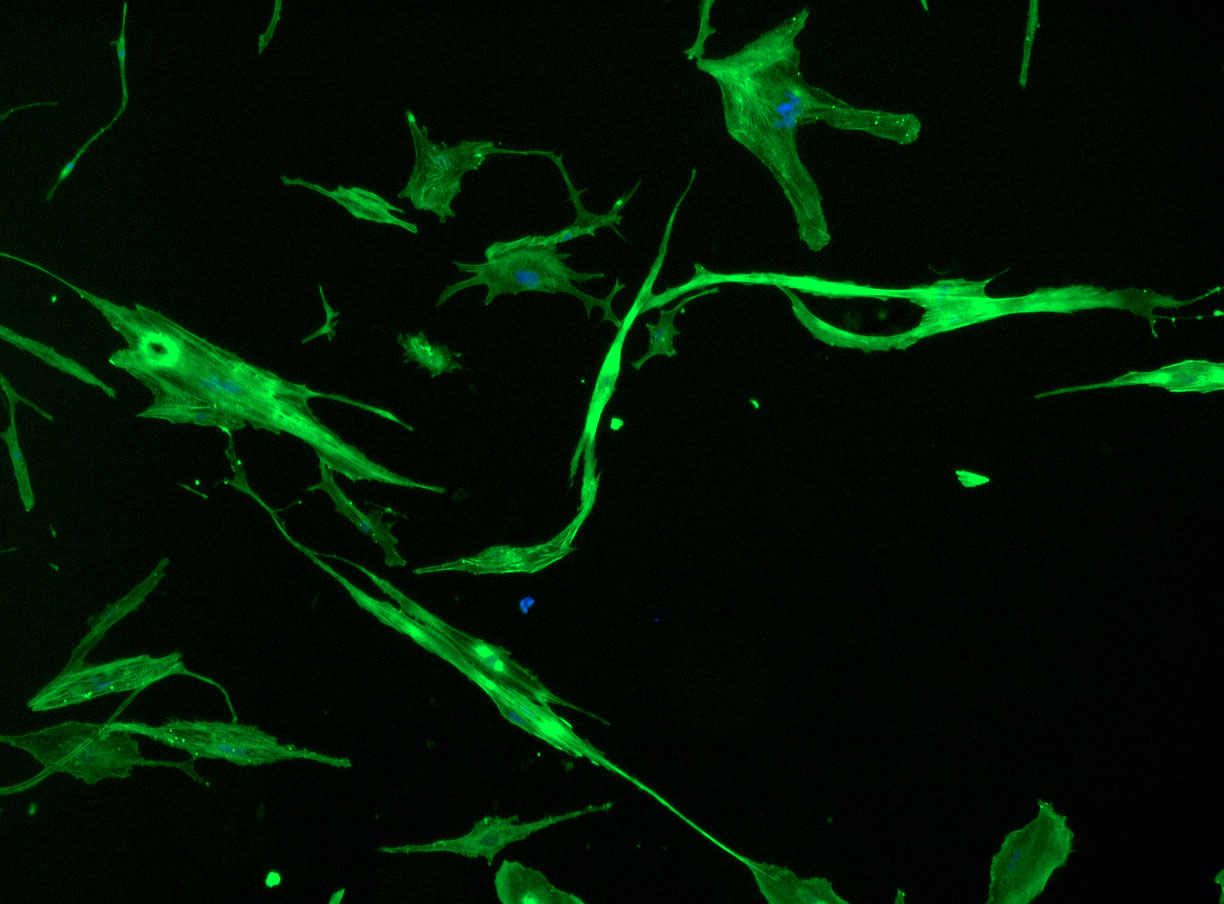
DAPI and Fluorescein Phalloidin staining of fibroid cells P4  which enables better visualisation of individual cells. 

Immunostaining Protocol

It is time to complete the immunostaining protocol with guidance from Jo-Maree. I must admit that with holidays looming, my note taking was a bit sketchy. I will need to follow up with Jo-Maree to record the correct details of DAPI and Fluorescein Phalloidin stain. This will ensure that I know how to prepare (and order) stocks in the future.

I already prepared a couple of wells at different cell concentrations ready for staining.  We had to delay the protocol, so some of the higher concentration wells are likely a bit over-confluent. It will be interesting to see how they look under the fluorescence microscope.

CELL FIXATION: ‘Dirty’ Biolab

Working in Fume HoodWorking with 4% PFA in Fume Hood

Prior to imaging, I fixed the cells in 4% PFA:

  1. Remove culture media (discard in waste container with bleach)
  2. Wash cells with PBS (discard in waste container with bleach) x 2
  3. Move cells to fume hood
  4. Add 4% PFA to each well for 15 – 20min at room temp (in fume hood)
  5. Remove 4% PFA solution (discard in PFA waste container in fume hood)
  6. Add PBS (make sure cells are covered or they dry out and produce poor images

IMMUNOSTAINING: At lab bench area

Lab Bench
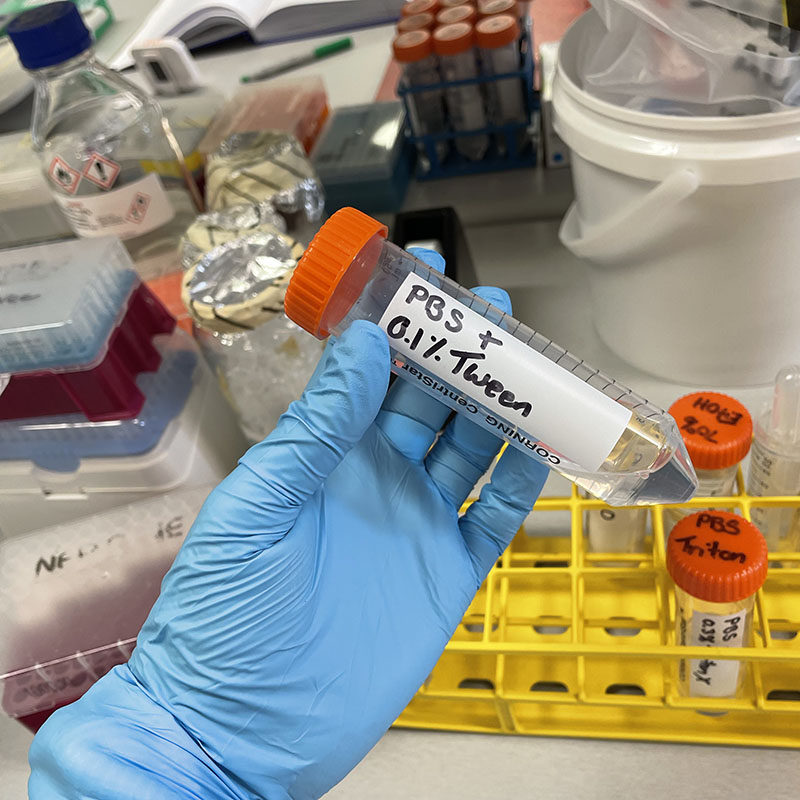
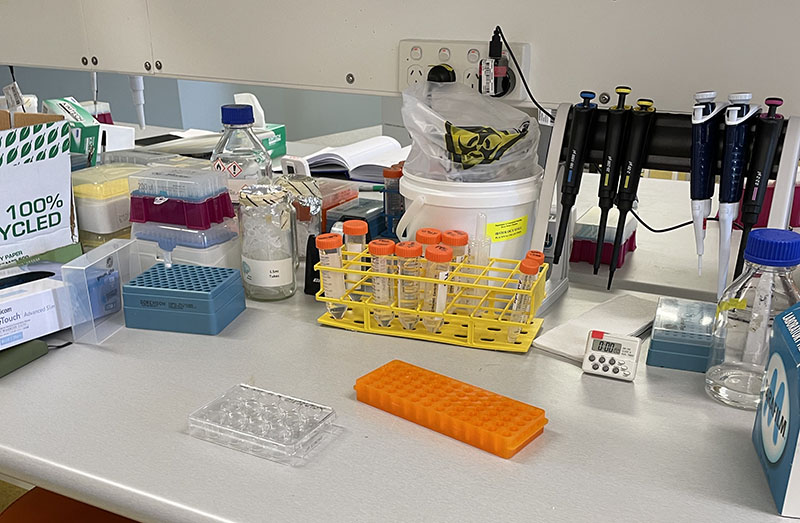
Working at lab bench in the Stroke Group area

  1. Remove PBS from each well
  2. Add 1mL 0.3% Triton X-100 (a strong detergent) to permeabilize cells (make cells permeable – this allows the phalloidin stain to enter the cell structure) for 10 min
  3. Make up DAPI (5mL PBS Tween and 1ul DAPI) and protect from light with aluminium cover
  4. Remove Triton X-100 and add 1mL DAPI solution to each well and incubate at room temp (with aluminum cover to protect from light) for 5 minutes
    Aluminium Cover
  5. Make up Flouroscein Phalloidin (1mL PBS sand 2μL Flouroscein) and protect from light
  6. Remove and discard DAPI solution
  7. Add 1mL PBS 0.1% Tween to each well for 5 min then discard x 3 (i.e. wash with PBS Tween x 3)
    PBS Tween
  8. Add Phalloidin stain to each well.
  9. Incubate at room temp for 1 – 2 hours
  10. Remove Phalloidin solution
  11. Wash with PBS Tween x 2
  12. Add 1mL PBS in each well
  13. Cover with aluminum foil to protect from light.
  14. Cells are ready for imaging. They can be stored in the fridge (with aluminium foil cover) until ready.


Growing my own cells in Petri Dishes

Following the successful growth of HBVPs in Poly-L-Lysine coated glass Petri dishes, I have enough of my own fibroid cells to repeat the process.

My cells continue to grow so slowly that I should be able to passage them into the Petri dishes and allow them to grow to confluence during the festive season break over 2 weeks .  Of course, I need to clear this plan with Jo-Maree. No one else is using the incubator, so it should not be too much of a problem.

As part of this plan, I will be growing my tumour baby cells in 90mm glass Petri dishes and 1 x 90mm crystal dish.  As per my previous experiment with HBVP cells, I need to coat the glass surface with Poly-L-Lysine solution to enable cell adherence.

I diluted the  Poly-L-lysine solution  with sterile MilliQ water (sterilised  14/12/21) to make up 40 mL total (10mL for each 900mm Petri dish x 3, plus 1 x cut glass crystal dish)

6mL PLL + 34mL MilliQ = 40mL PLL Solution

Coating

I added 10mL of the Poly-L-Lysine solution to each dish and then incubated them for an hour. [ The cut glass crystal dish was placed inside a 150mm autoclaved Petri dish to preserve sterility.]

Pll coating glassware
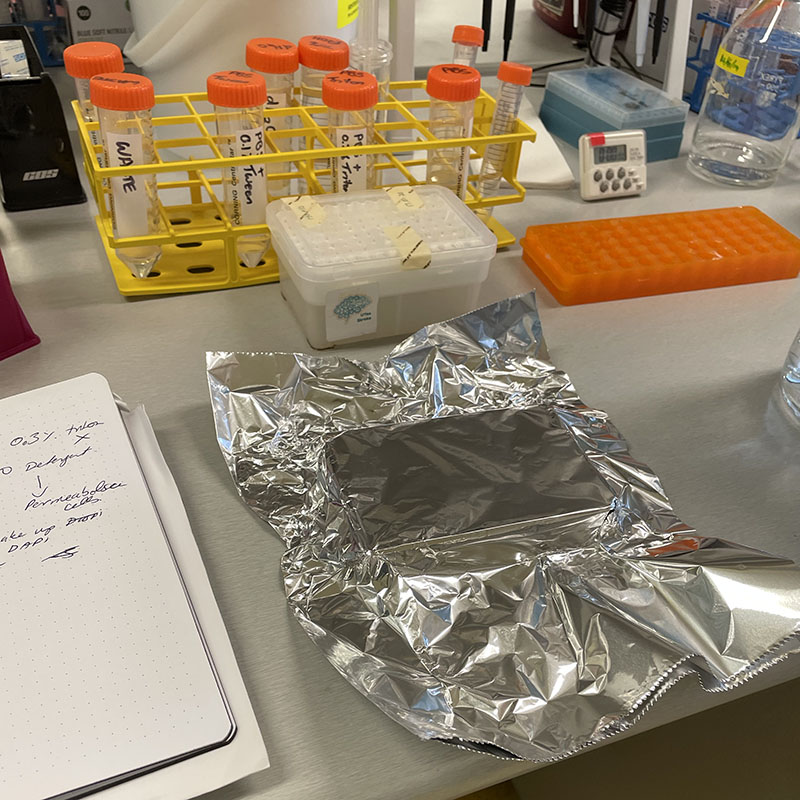
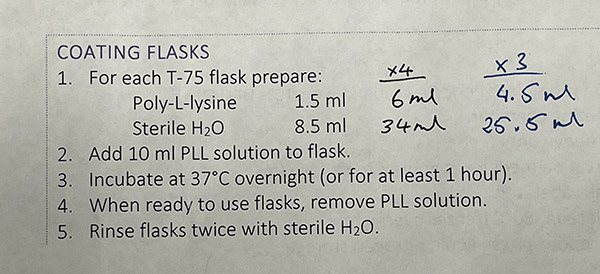
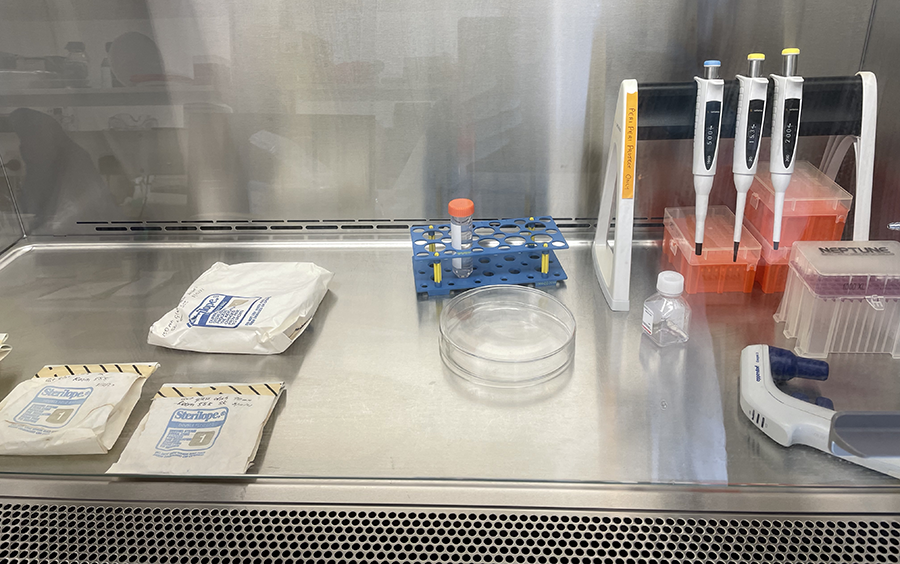
Unwrapping Petri dishes and getting ready to coat culture glassware with PLL. 

Pll coating glasswarePLL coated glassware in Petri dishes ready for incubation. 

Following incubation, I removed the Poly-L-Lysine solution and washed the dish with PBS. During cell passage of my confluent flask, I added 1mL of cell solution (from a 10mL suspension) and 5mL media. I placed the cut glass vessels back into a 150 mm Petri dish and into the incubator.

Cut glass dishes with cells ready for incubationCut glass vessels with cells ready for incubation. 

Fingers crossed that they survive the holiday break!

Immunostaining of fibroid cells

To gain some more insight into the cellular structure of my fibroid cells, I asked Jo-Maree to help me with immunostaining. Immunostaining refers to a staining method that uses antibodies to stain different proteins and structures within the cell. We are going to start with an easy protocol using two antibodies: DAPI and Phalloidin.

DAPI (4′,6-diamidino-2-phenylindole) is a very common fluorescent blue stain used to reveal the nucleus in cultured cells. It can penetrate the intact membrane of the cell. Thus, it can be used for staining both fixed and live cells.

Microscopic image of stem cells, Hues 9 stained with DAPI (blue)
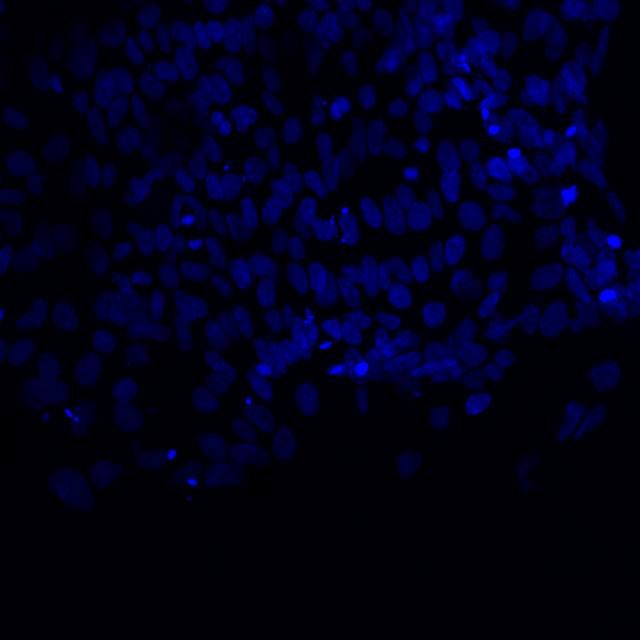
Microscopic image of stem cells, Hues 9 stained with DAPI (blue) by the UC San Diego Stem Cell Program.

BASIC LIVE CELL STAINING PROTOCOL

  1. Add DAPI to the complete culture medium used for cultured cells at a concentration of 10 ug/mL.
  2. Remove culture medium from the cells and replace with the medium containing the DAPI.
  3. Cover cells from light exposure and incubate at room temperature or 37°C for 5-15 minutes, then image.

Direct Addition: According to the biotium protocol, you can also stain cells by adding the dye directly to the cell culture and medium. However, this requires a 10X concentration of dye. 

  1. Add the dye to complete culture medium at 10 times the final recommended staining DAPI concentration – 100 ug/mL..
  2. Without removing the medium from the cells, add 1/10 volume of 10X dye directly to the well.
  3. Immediate mix thoroughly by gently pipetting the medium up and down. For larger well sizes (e.g., 24-well to 6-well plates), the plate can be gently swirled to mix.
  4. Cover cells from light exposure and incubate cells at room temperature or 37°C for 5-15 minutes, then image

STAINING FIXED CELLS/TISSUES:

  1. Add DAPI to PBS at 1 ug/mL.
  2. Add the PBS with dye to cells or tissue sections and incubate at room temperature for at least 5 minutes with covering from light exposure.
  3. Samples can be stored in a lightsafe covering (e.g. aluminium foil) at 4°C after staining and before imaging

From: https://biotium.com/tech-tips/protocol-staining-cells-with-hoechst-or-dapi-nuclear-stains/ with minor edits for simpliticy.

Since we are using phalloidin and fixing the cells prior to imaging, we need to follow some additional step to make the cells permeable.

Phalloidin Jo-Maree did not have any relevant stocks, Natalie kindly sourced a sample from another group. [I am always impressed by the generosity of functioning labs and how groups are happy to share stocks to enable other researchers to move forward.]

We are using Fluorescein Phalloidin as a counterstain to enable the visualisation of actin – a protein found in large quantities in the cytoskeleton and cell muscle fibres. As such, it  plays a vital role in cell muscle contraction and overall cell movement.

Interestingly Phalloidin is a toxin (specifically phallotoxin) derived from Amanita phalloides (death cap mushroom).

Amanita phalloides
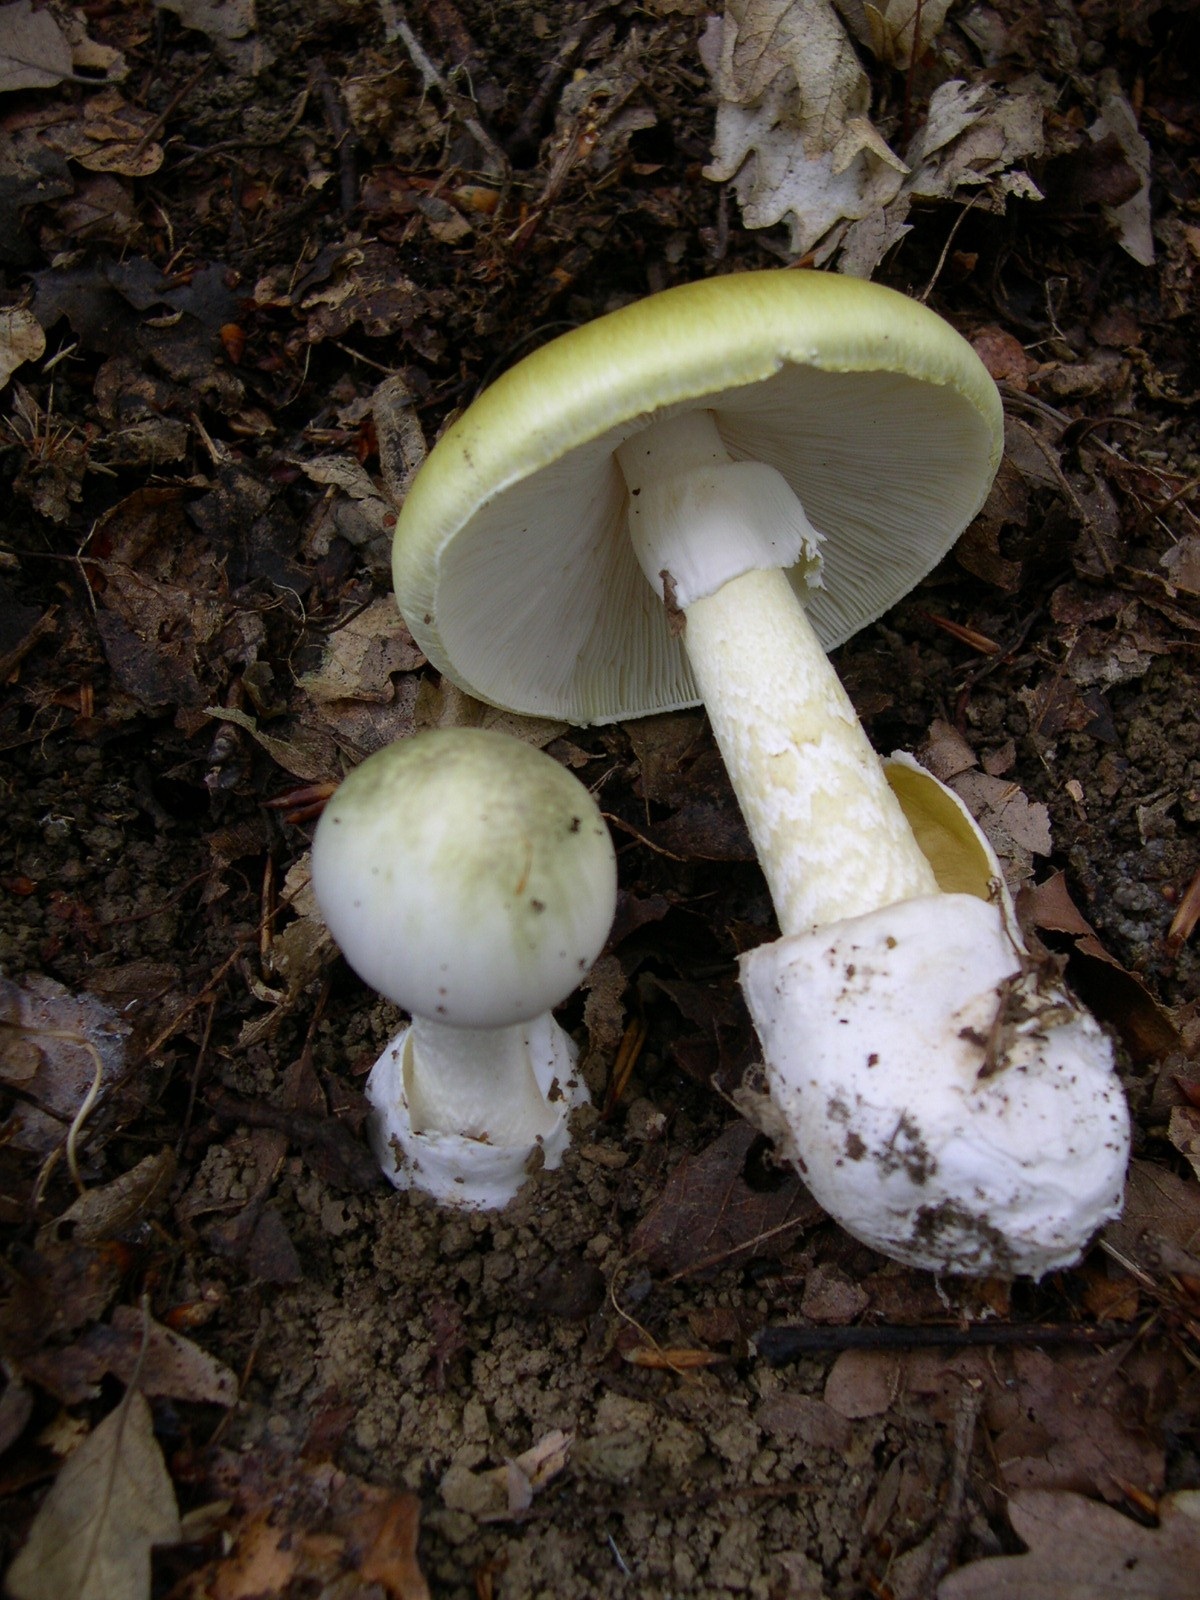
Image of Amanita phalloides via Wikimedia Commons

Phalloidin binds very well to actin filaments and is therefore very useful in visualising cell structure.

Phalloidin staining of actin filaments
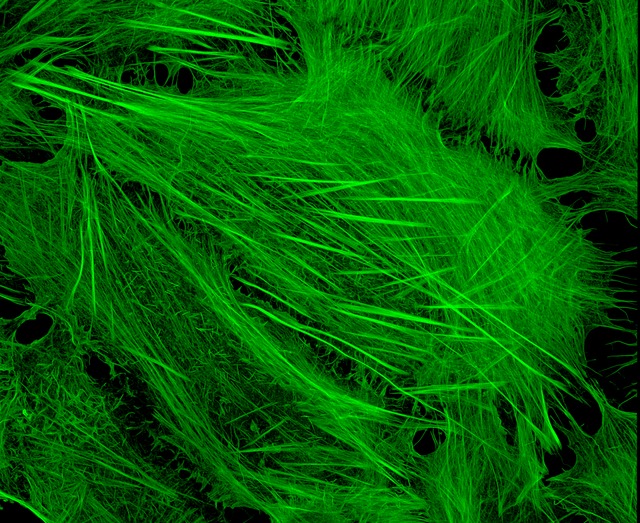
U2OS cells stained with fluorescent phalloidin taken on a confocal microscope by Howard Vindin

STAINING FIXED CELLS

  1. Fix cells in 3–4% formaldehyde in PBS at room temperature for 10–30 minutes.
  2. Remove fixation solution and wash cells 2–3 times in PBS.
  3. Add 0.1% Triton X-100 in PBS into the fixed cells for 3–5 minutes to increase permeability. Then wash cells 2–3 times in PBS.
  4. Add phalloidin-conjugate working solution. Incubate at room temperature for 20–90 minutes.
  5. Add DAPI DNA staining dye at this point.
  6. Rinse cells 2–3 times with PBS, 5 min per wash.
  7. Cover with lightfast material to preserve fluorescence

Adapted from:  https://www.abcam.com/protocols/phalloidin-staining-protocol 

Revised Ethics – Blood cells for iPSCs

Due to COVID supply issues, we are still having issues sourcing key reagents etc. for the project. As an alternative iPSC protocol, we are now planning on using blood cells. The main reason is that it is a regular and active protocol in the broader lab area with clear in-house expertise. This also works better conceptually for me than harvesting cells from a skin biopsy – after all blood is strongly associated with notions of kinship . It is also nice to move into the footsteps of my dear colleague Dr Trish Adams who used iPSC technology to turn blood cells into heart cells for the project Machina Carnis.

This does entail a further ethics amendment, but since we have prior approval for skin biopsy harvest, I do not foresee any major issues. I hope to submit this before holidays – ready for the new year!

Cut Glass Collection

As part of the residency project, I have started a collection of cut glass items. These were sourced from different second hand shops and build on an existing collection of items used for an exhibition at The  Edge at the State Library of Queensland in 2013.

I am particularly attracted to the patterns of the glass. A recurring central motif in many items is a star.

Cut Glass Dish
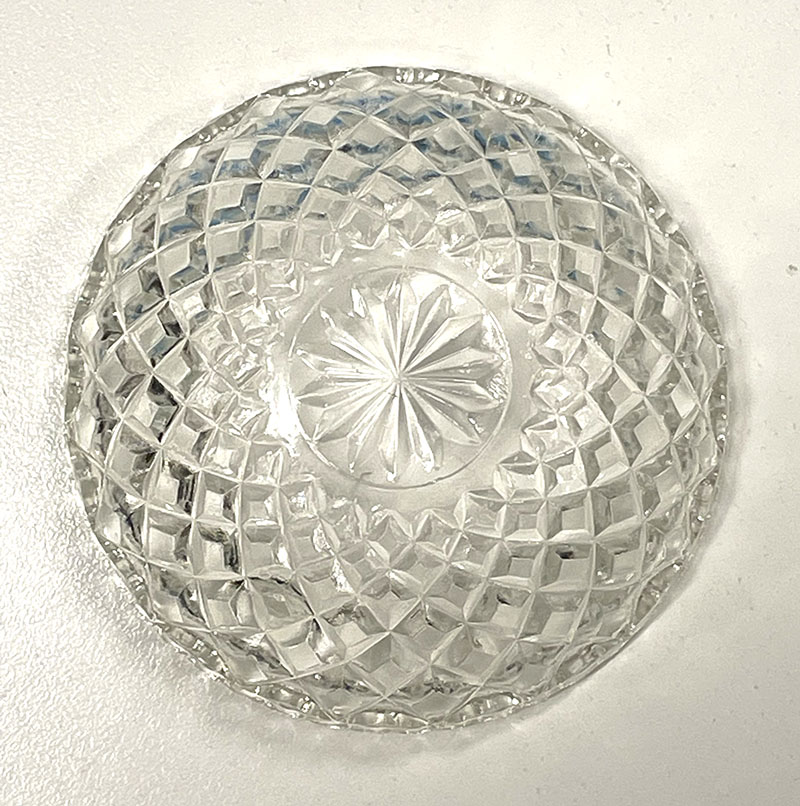
Clear cut glass dish – approx 12cm diameter with central star motif and radiating pattern.

This links to my current interest in deep time including the birth of the universe and emergence of complexity. The glass items also look wonderful when lit from rear.  As such, I am considering mounting them over a light source. However, this remains to be seen…

In order to grow cells in the dishes, they need to be sterilised so that they do not carry any bacteria or other organisms that could contaminate my cells.

I am feeling more confident in using the benchtop autoclaves independently so am preparing a batch for sterilisation today. As per previous work, they are placed in autoclave bags and sealed with tape. Once the bags are autoclaved, black lines indicate successful sterilisation.

Cut Glass Dish
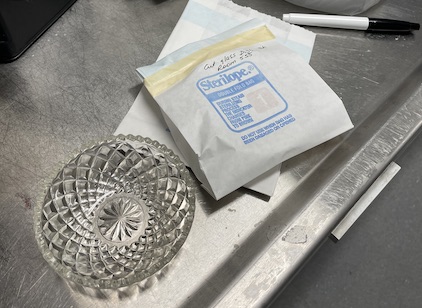
Cut glass dish and wrapped dish ready for sterilisation.

I have also sources some small glass vials which I am considering integrating into some of the future creative works. There are various shapes that I am planning to test.

Glass Vials
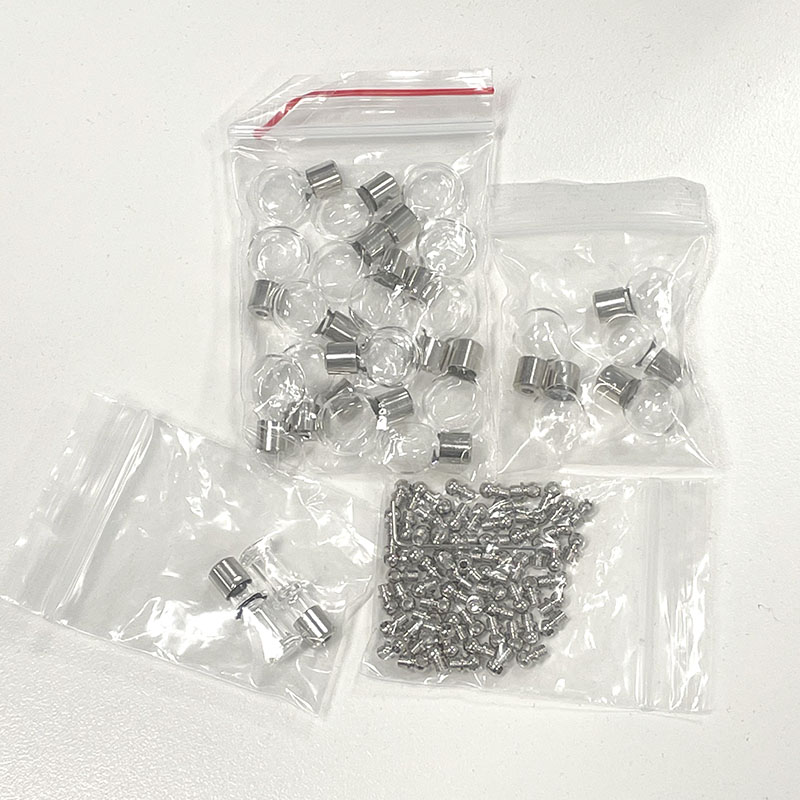
Selection of glass vials for cell culture trial including metal closures. 

Collection of Glass Items in Autoclave Bags 
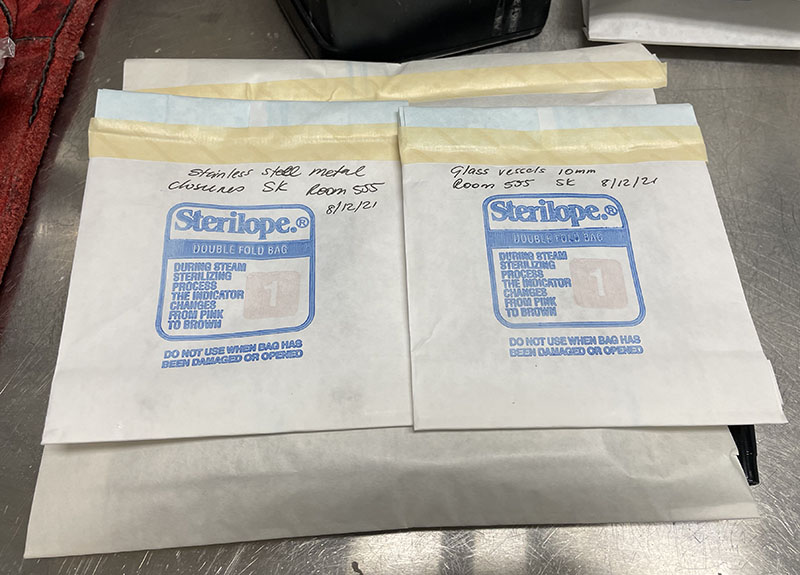
Glass vessels in autoclave bags ready for sterilisation. 

Finally, I have also prepared some additional 150mm and 90mm Petri dishes. The large dishes will be used as container vessels for the cut glass dishes to keep them sterile during cell culture.

Petri dishes and other glassware ready for autoclaving
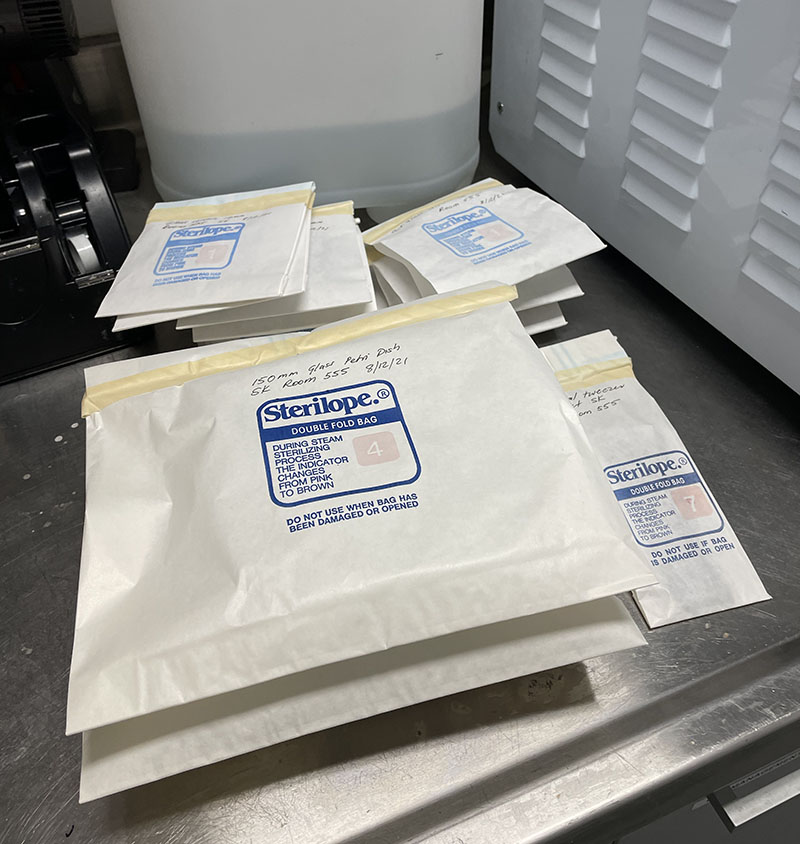
Petri dishes and other glass items in autoclave bags ready for sterilisation. 

I divided the batch into two runs. As per previous process, I used cycle 6 (134 degrees for 10 min). This enables me to process both glassware and metal.  It takes about 10 min for the sterilization process (but extra for cooling to handle materials).

Autoclave Instructions
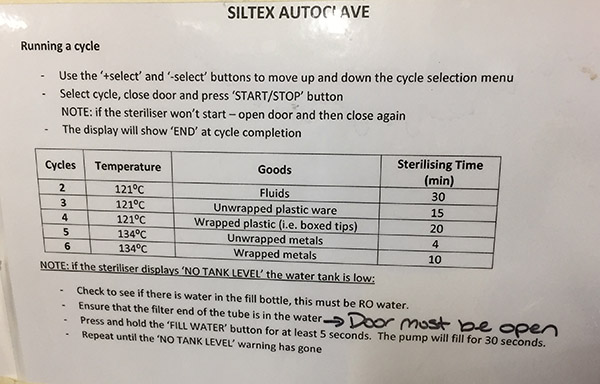
Autoclave instructions with cycle details. 

Autoclaved dishesAutoclaved bags containing sterilised Petri dishes. 

Autoclaved items stored in lab
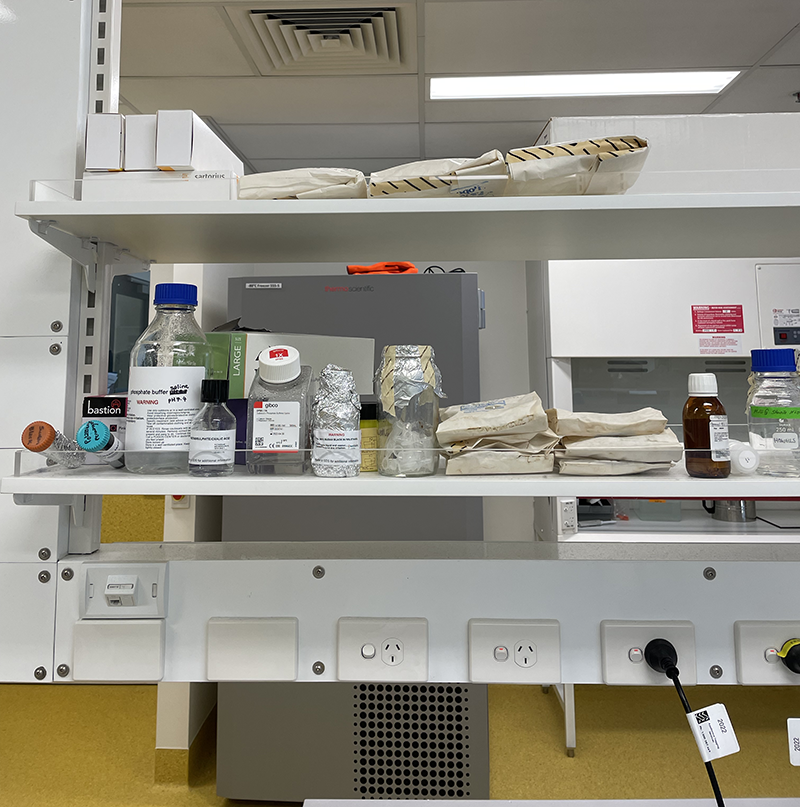
Autoclaved bags stored in lab area, ready for use.

Lockdown lingers…

Lockdown has lifted, but we have restrictions in place which limits access to lab areas unless absolutely necessary. Jo-Maree has kindly taken over caring duties and will pop in to feed my struggling fibroid cell colonies.

The HBVPs will be put to rest for now with scaffold tests fixed in 4% PFA. We may yet be able to stain them to determine if HBVPs were growing within the structure. Since the scaffolds are optimised for tissue/bone regeneration (and hence bone and tissue cells), they don’t seem to work too well with pericytes – so far anyway.

Since Jo-Maree had a stash of left over vials, we had planned to use Calcein to determine cell viability and visualise the cell growth along the scaffold structure as the scaffolds themselves seem to be non-fluorescent.

Calcein image via APB Biosciences
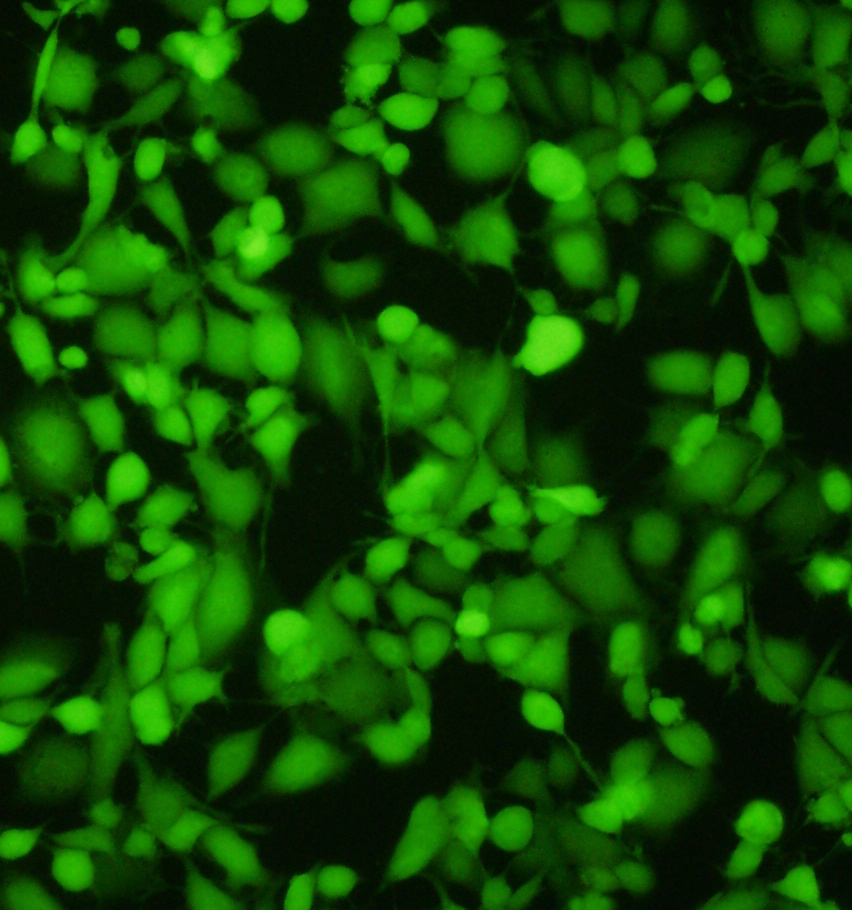
Impressive image of Calcein dye – live cells fluoresce a vibrant green – image via ABP Biosciences.

Since the Calcein dye works on live cells, we will need to reseed the scaffolds when lab-life returns to ‘normal’. This is fine as we will hopefully have enough fibroid cells by then to use for the scaffolds and also undertake fluorescent microscopy – i.e. use antibodies to reveal cell cytoskeleton details (e.g. actin filaments) and DAPI  blue-fluorescent dye for nuclei.

Fluorescently labelled cell via Leica
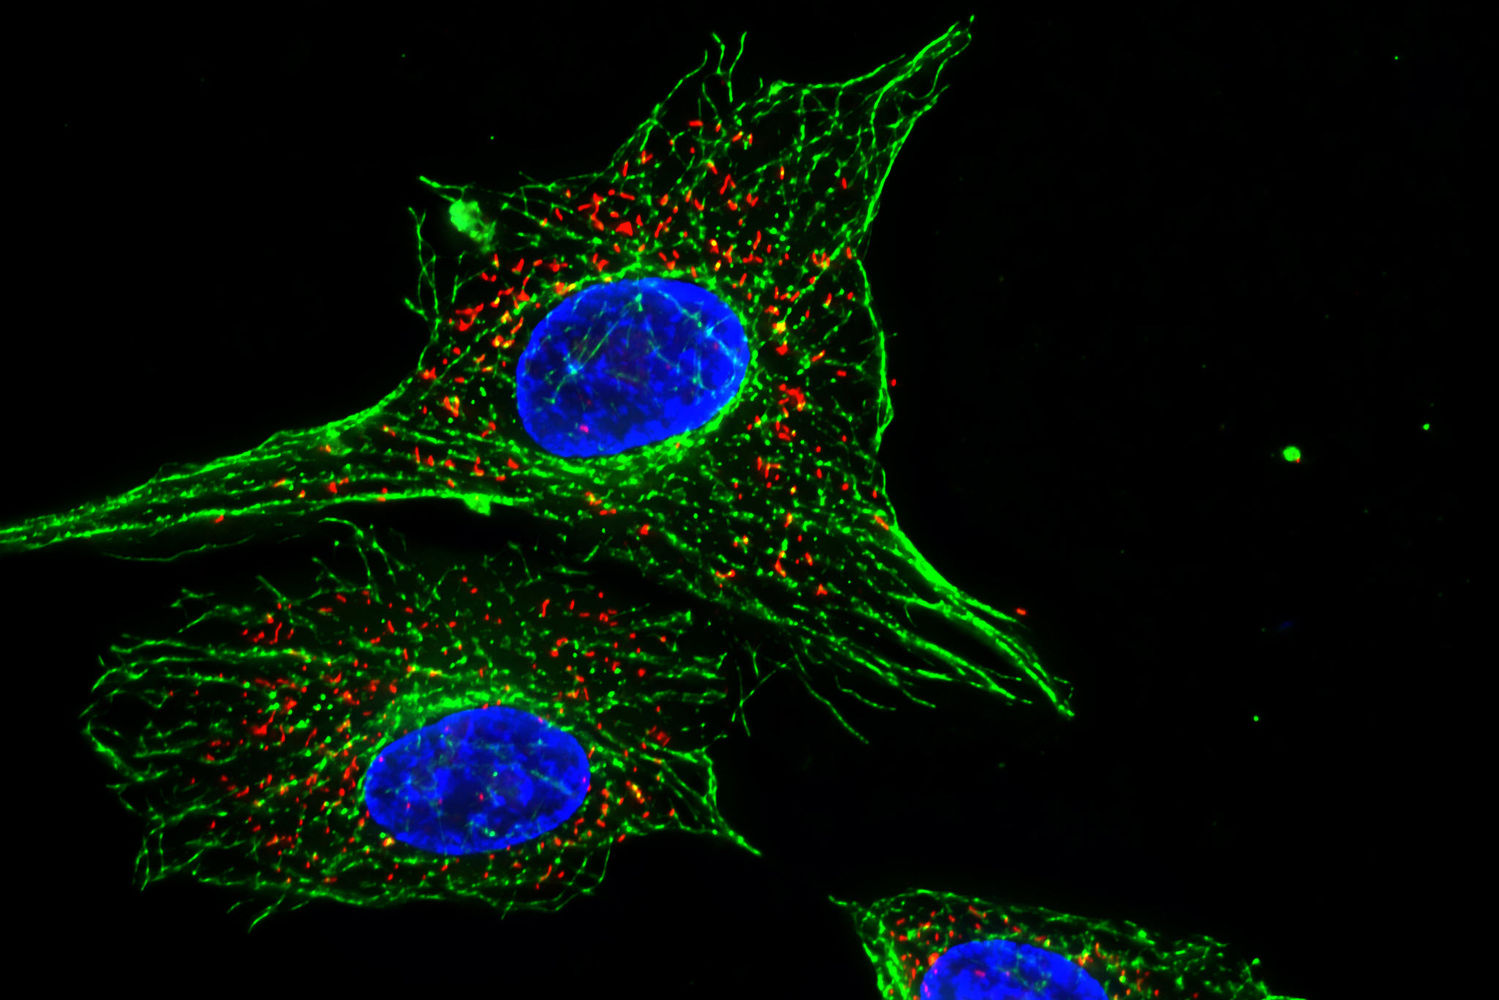
Image of fluorescent cells via Leica. 

Lockdown…

It has finally happened. We had our first major lockdown in response to the Delta COVID strain. I am hopeful that the estimated closure of non-essential venues (including UTAS) will stand at 3 days. Luckily I was ahead of the game and had already passaged and fed my cells in preparation for Friday teaching.  As such, they should be fine until I return on Tuesday.

May the force be with us!