Since the cells showed the first signs of attachment on the 20th of April [Day 8], I monitored the plates on a daily basis to see the emergence of more reprogrammed PBMC (R-PBMC) colonies (precursor iPSCs) forming on the base of the culture dish.
Plate #2 had colonies on the 20th, so there were some great looking cell clusters visible a couple of days later on the 22/04/22.
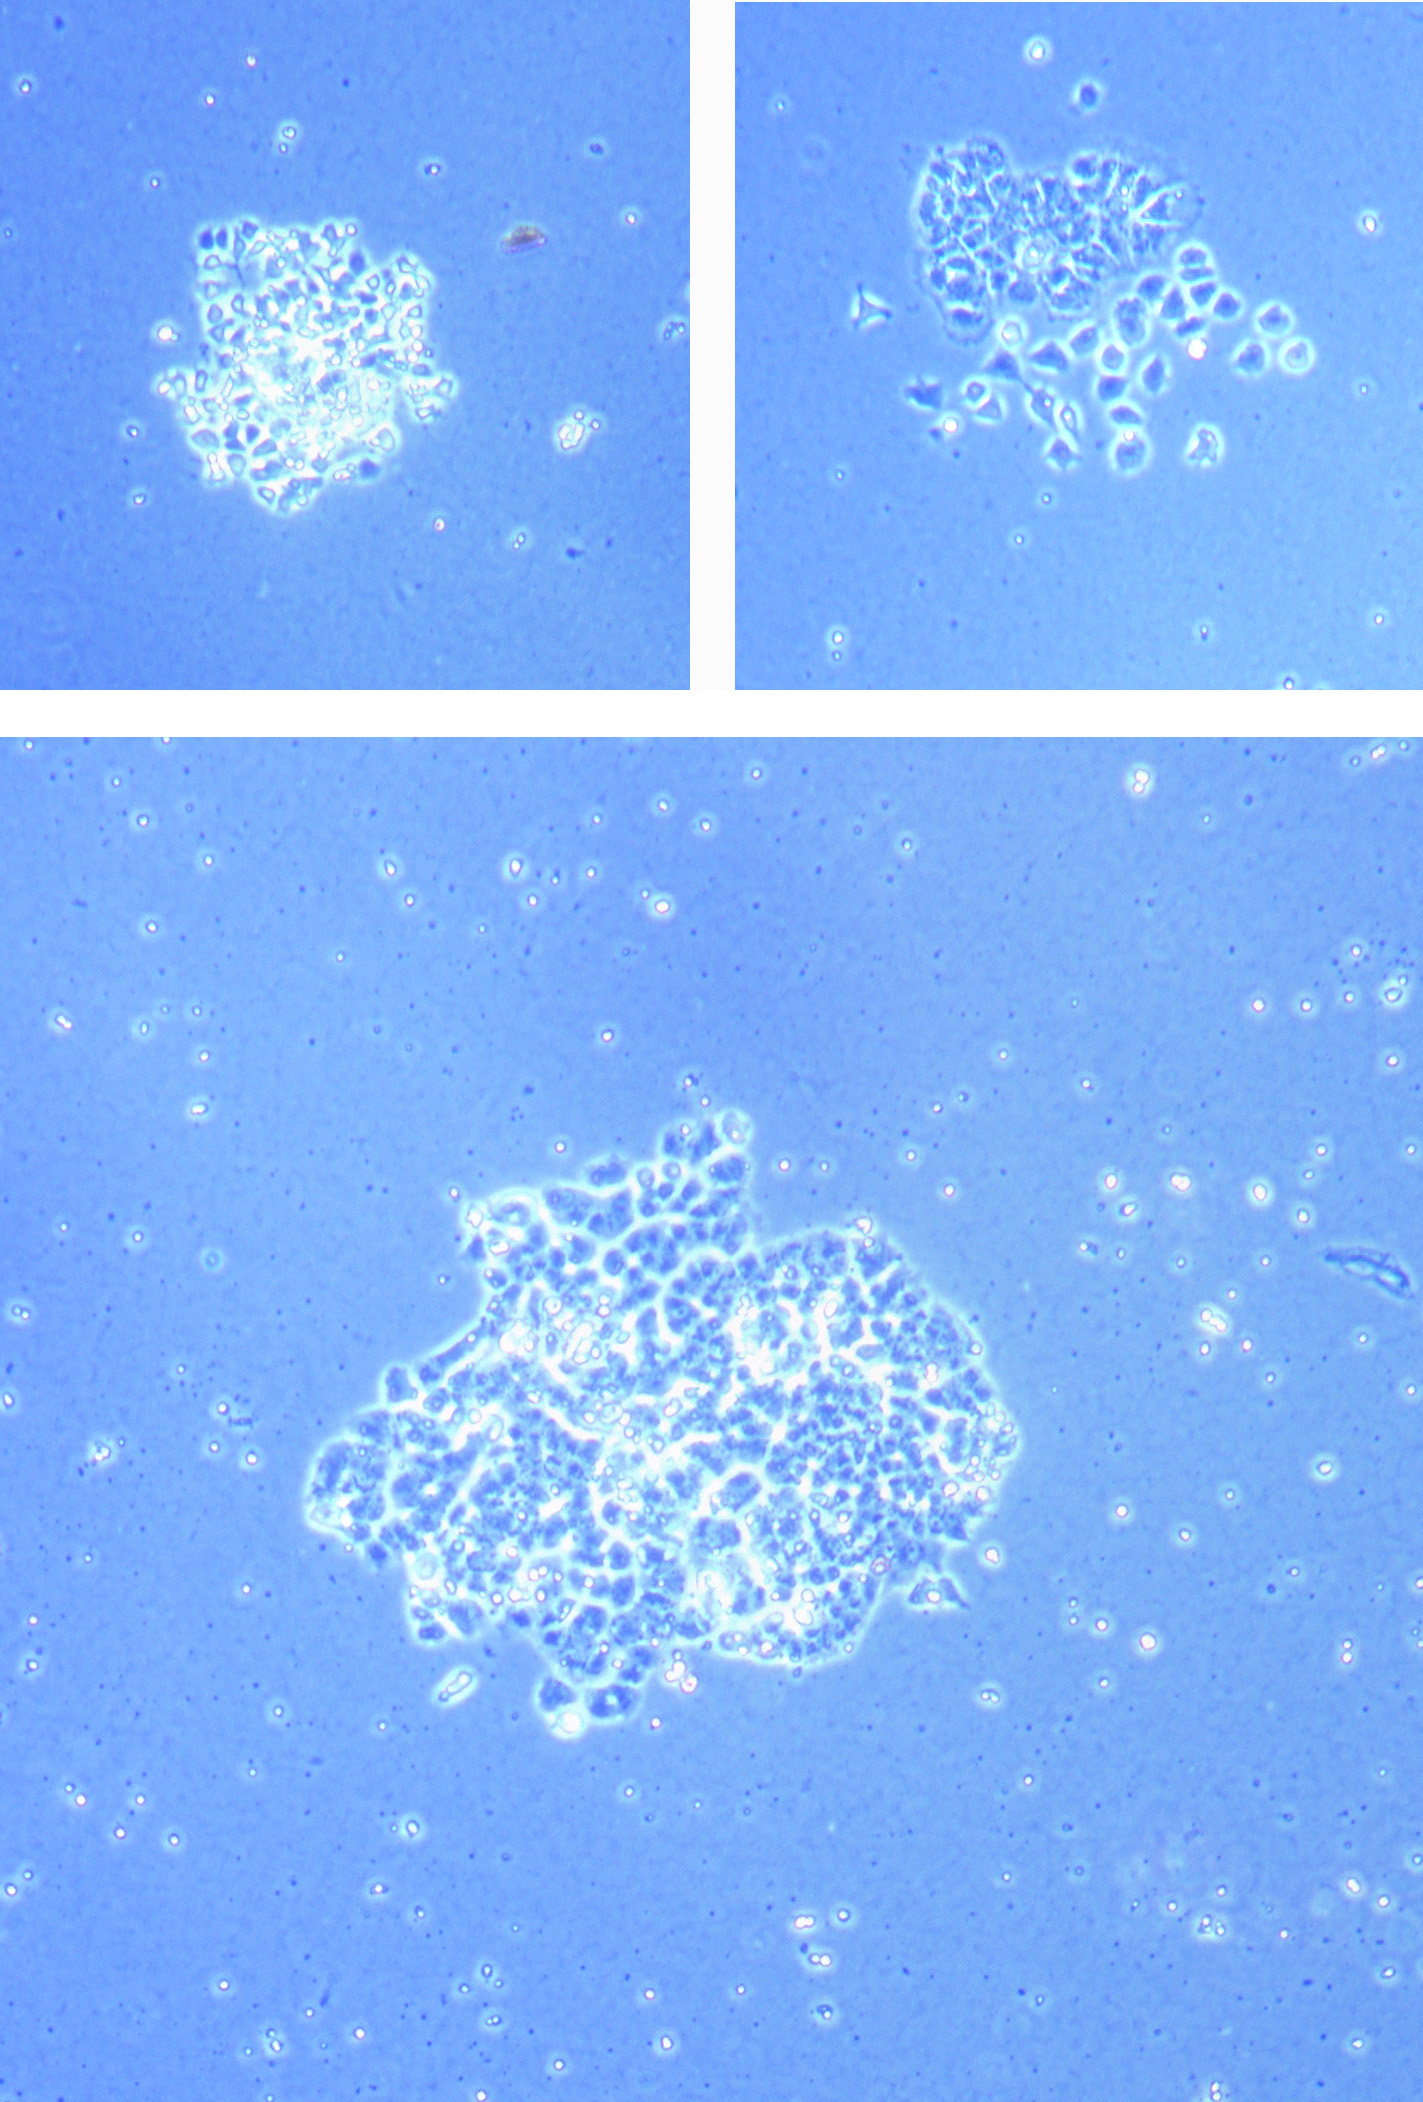
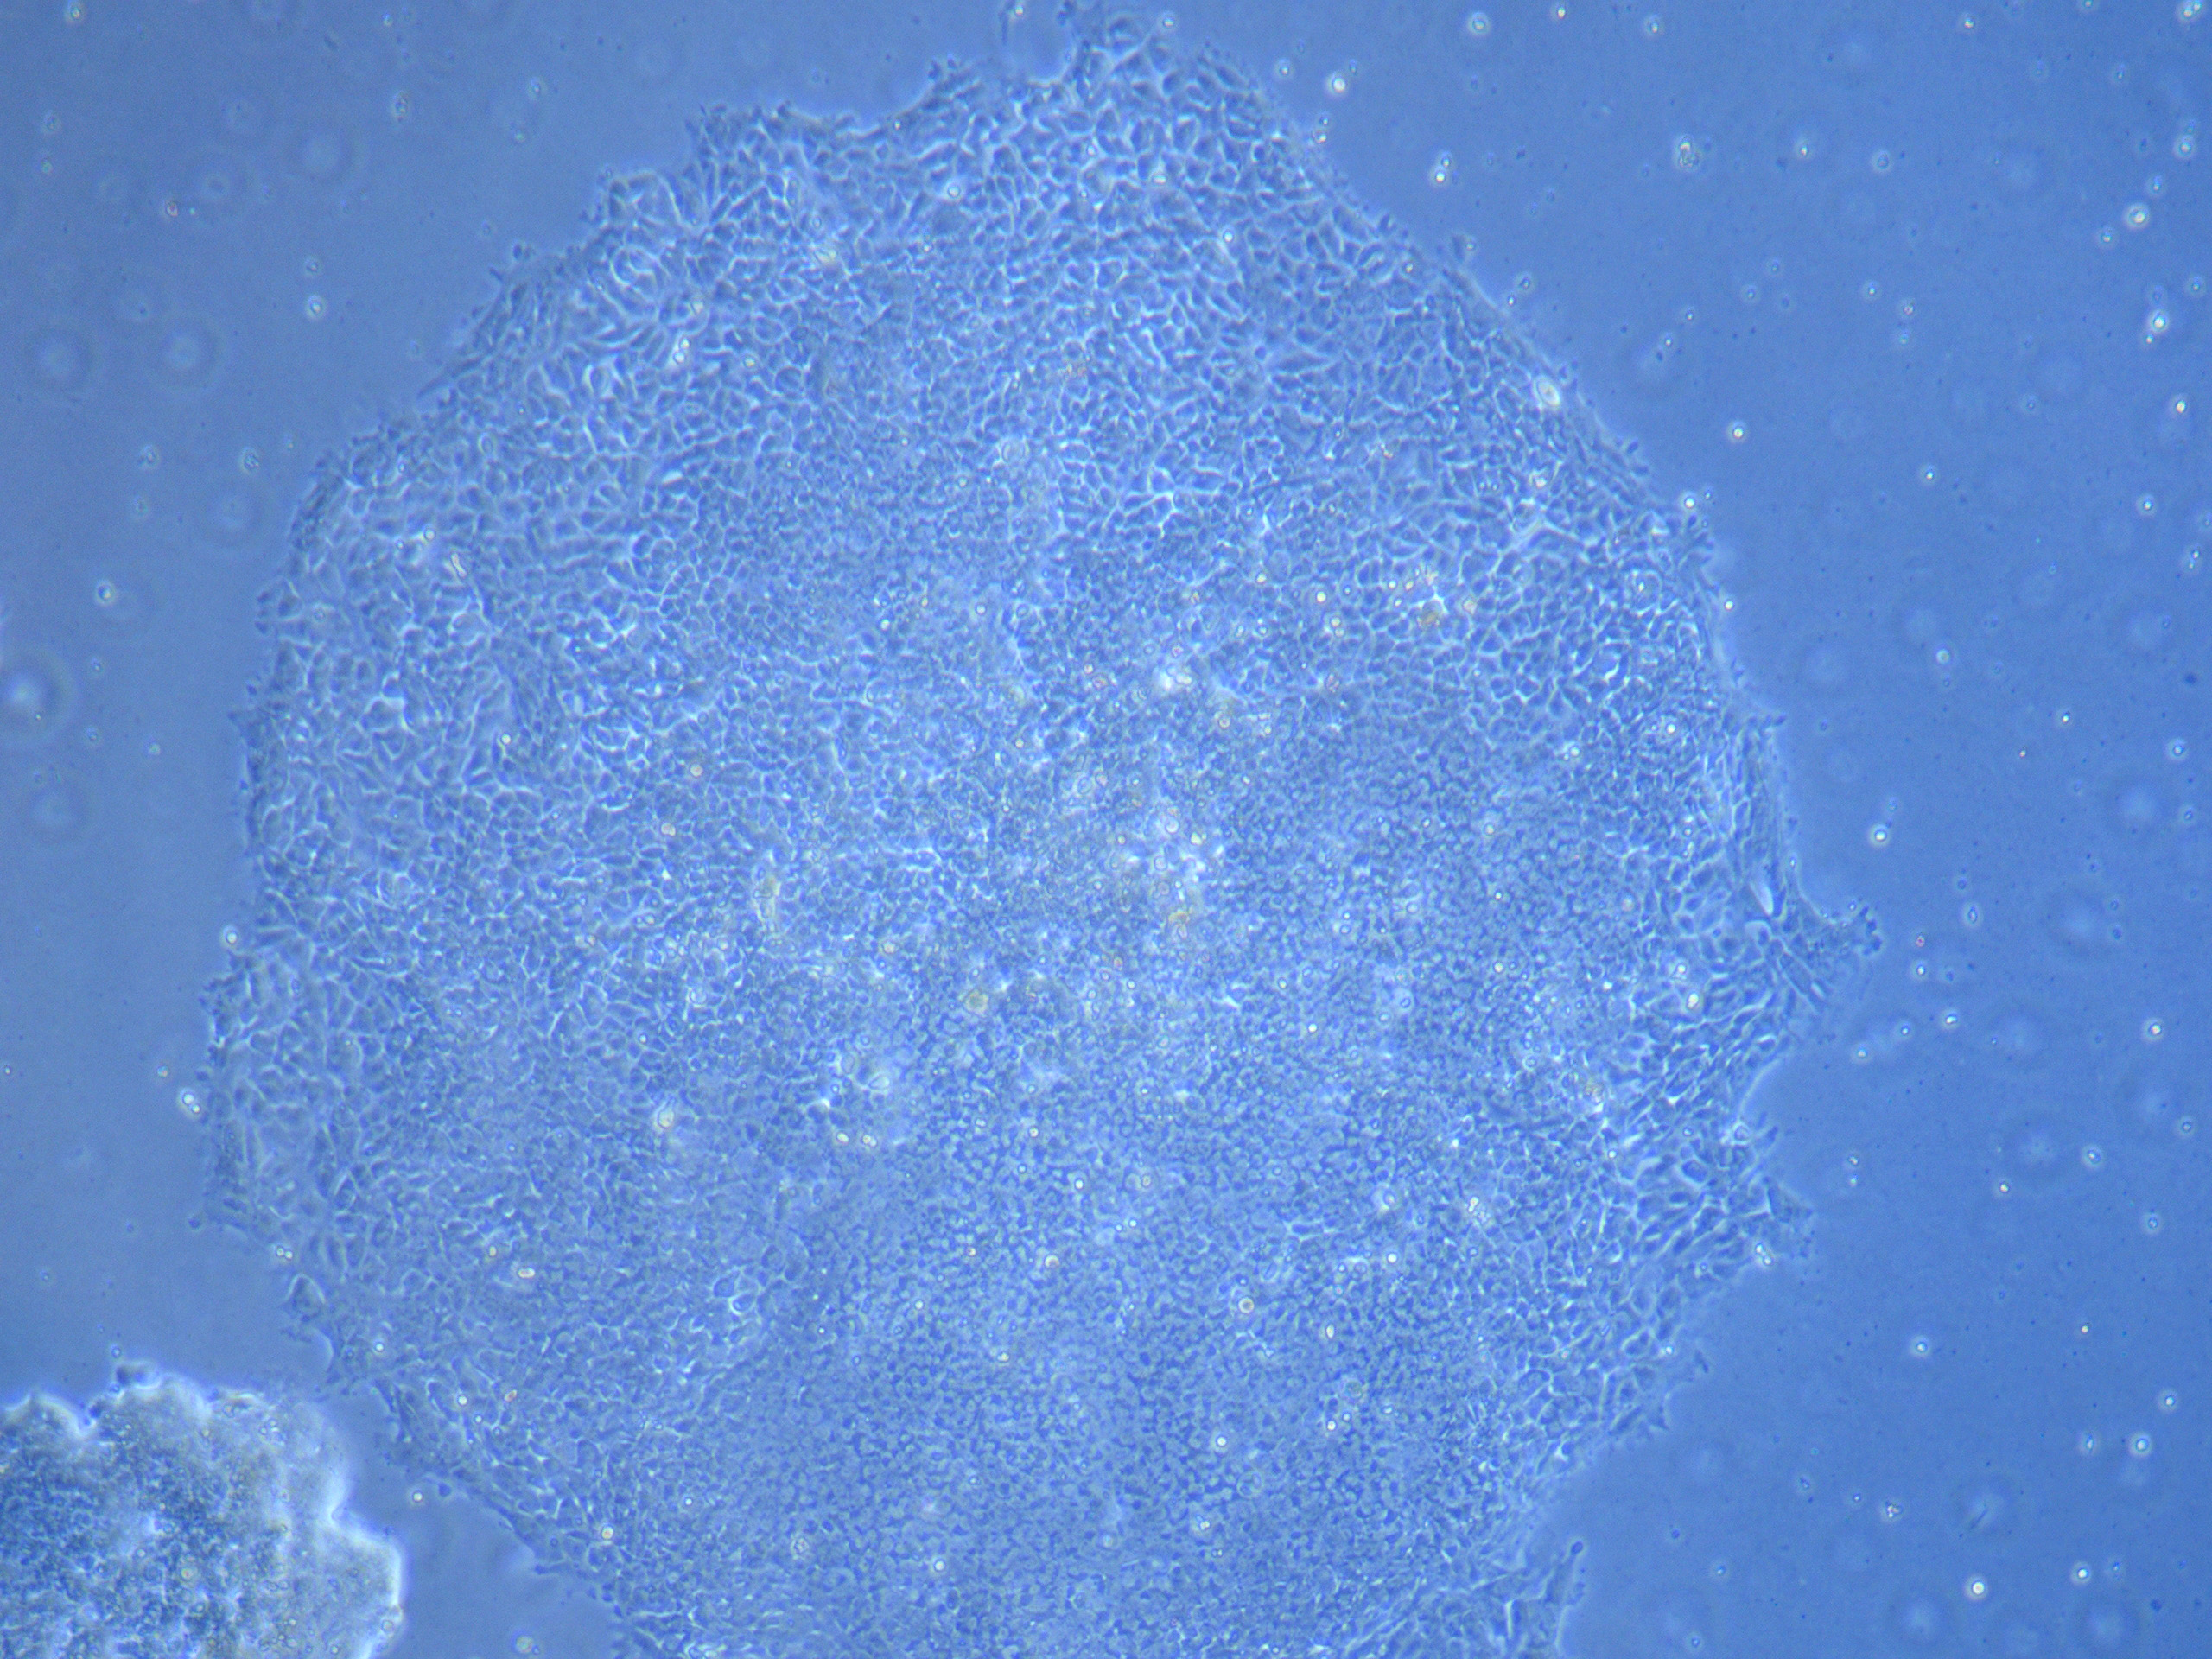
Good series of R-PBMC (precursor iPSCs) visible in Petri Dish #2 – 22/04/22
Petri Dish #1 was slower for colonies to emerge. However, by the 22nd of April, there were a couple of attached cell clumps .
A couple of R-PBMC (precursor iPSCs) colonies visible in Petri Dish #2 on 22/04/22
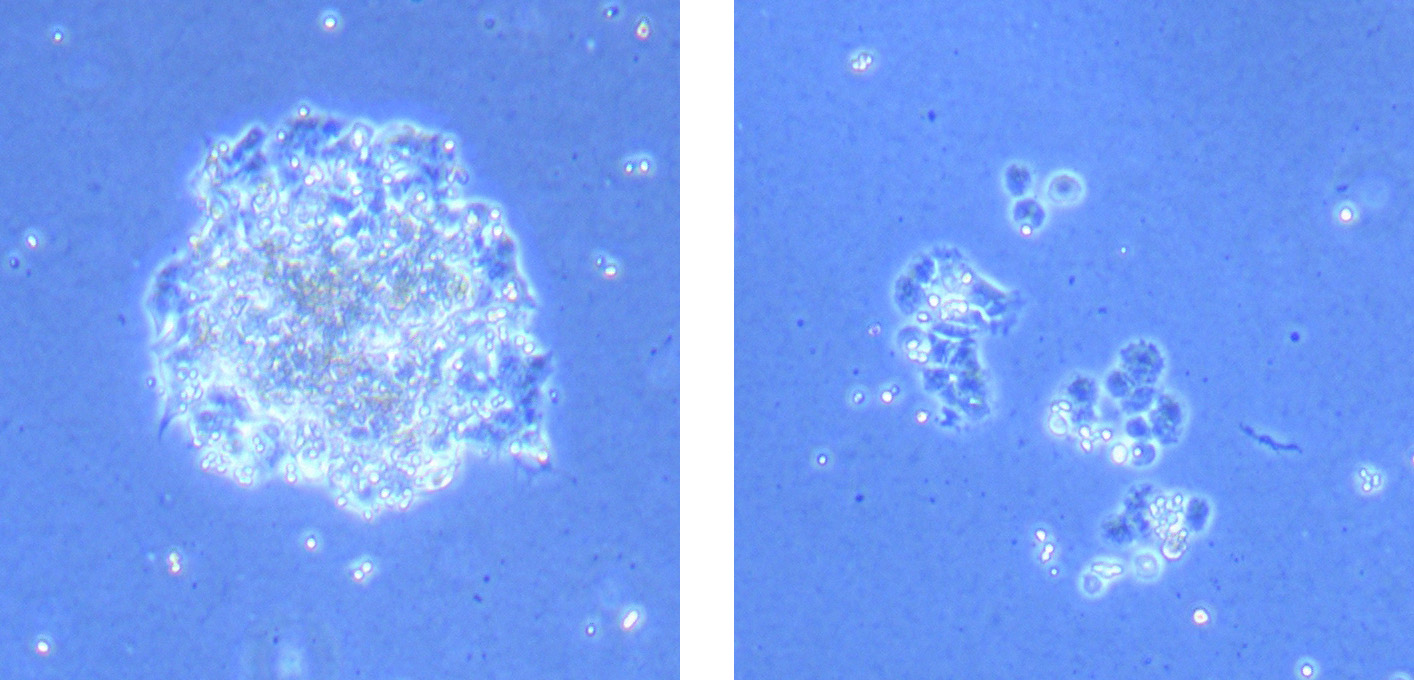
By the 24/04/22, the initial adherent cells were starting to proliferate well. While attachment and cell growth of any kind is always a good sign, we were keenly hoping to see the emerge of iPSC-like cells. These tend to clump together into small circular clusters.
Attached cells with non-iPSC-like morphology on 24/04/22 in Dish #2Cells with a more promising iPSC-like morphology in Dish #2 on 24/04/22
At this point the cells were still maintained in PBMC transition media, but by the 27/04/22, plates were looking good and we started to shift them to iPSC media. By 28/04/22 [Day 16], the cells are almost able to be classified as iPSCs.
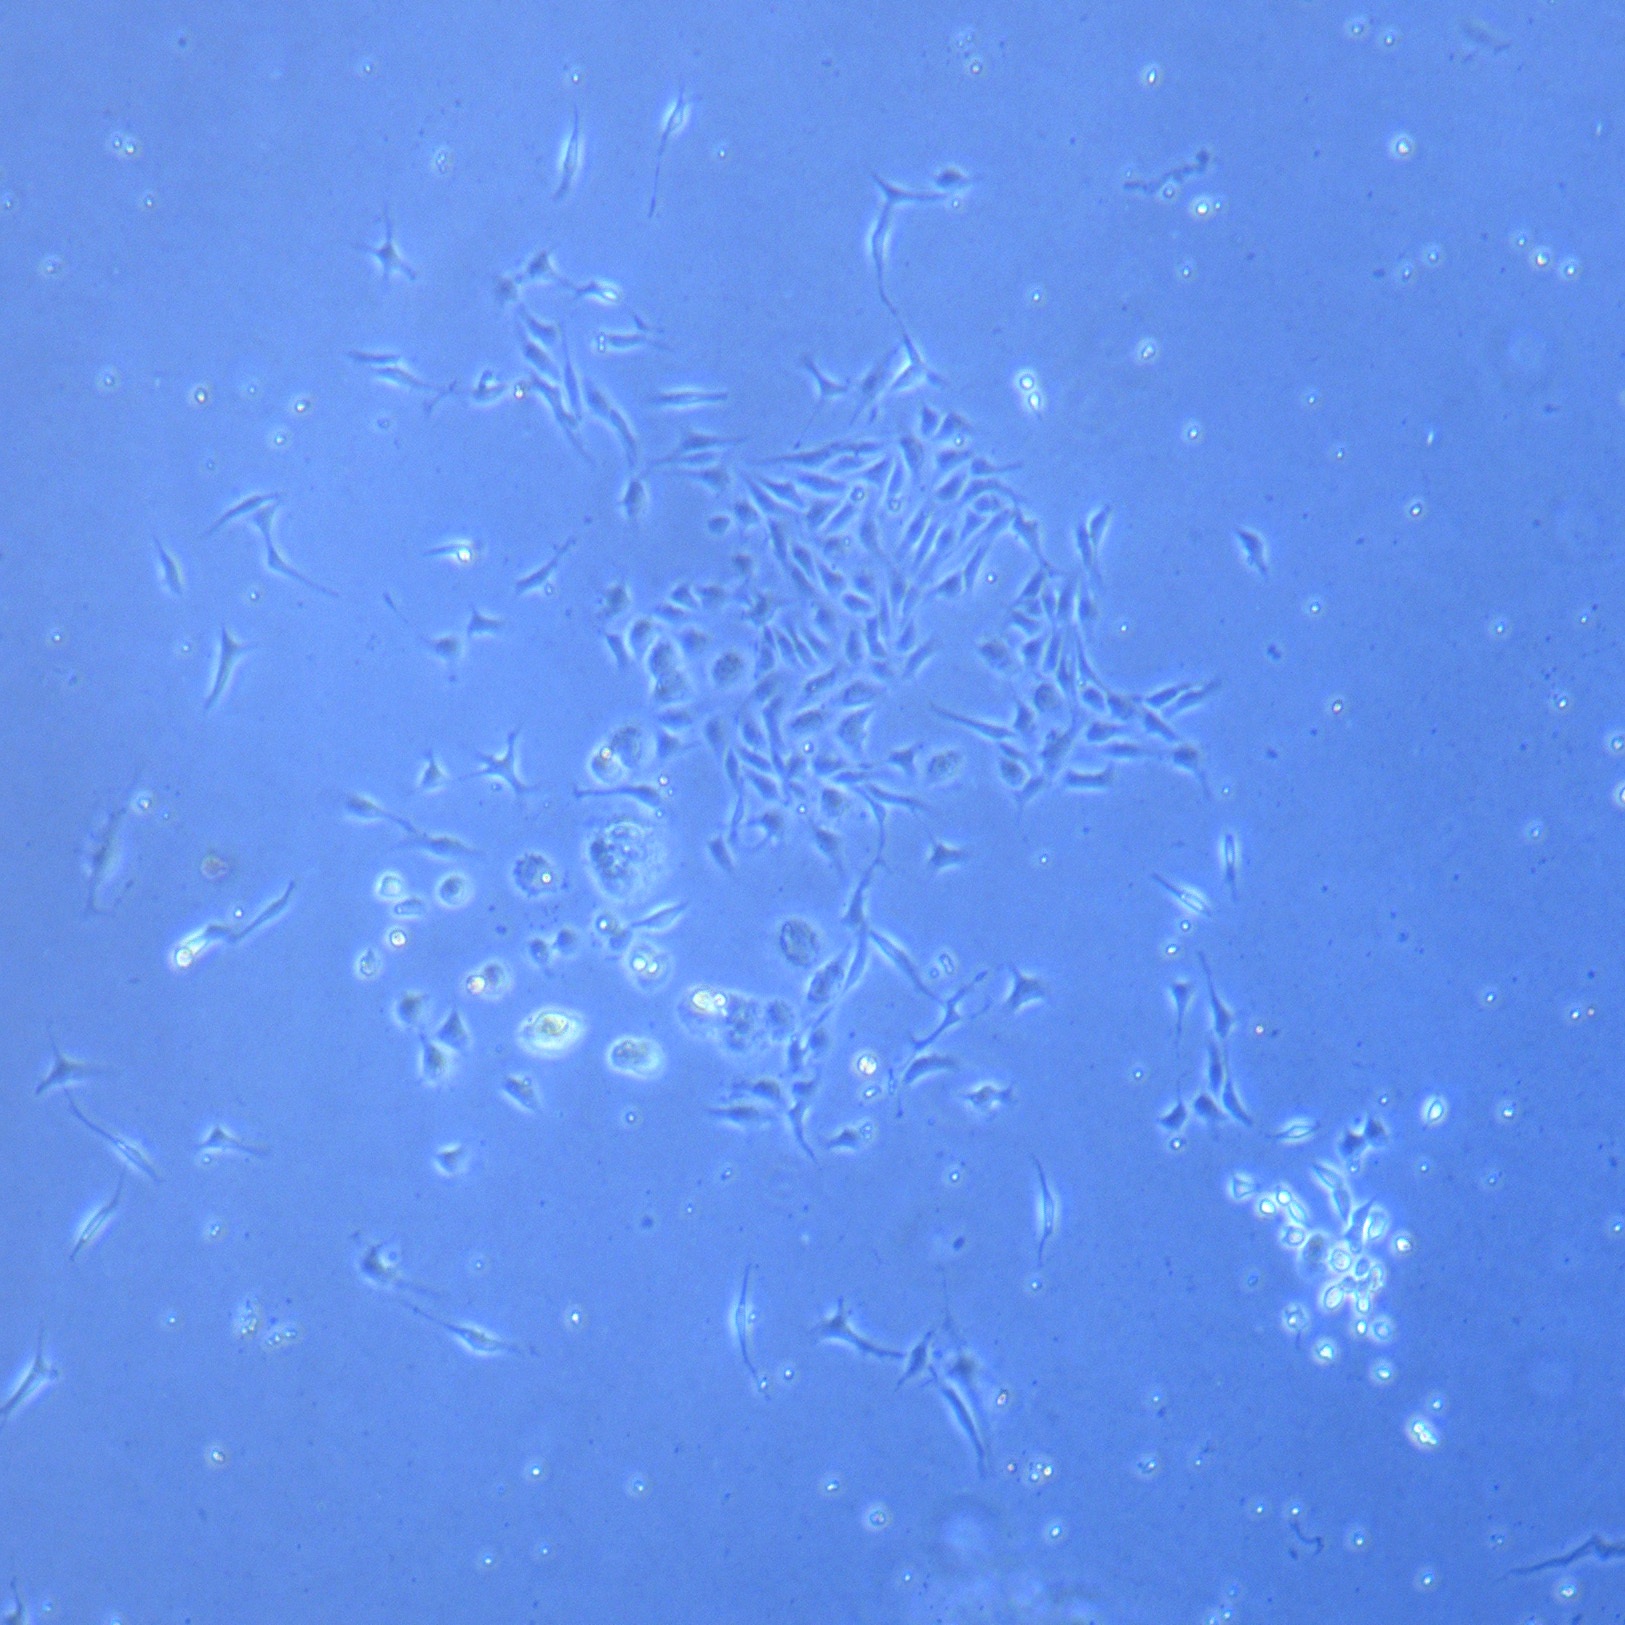
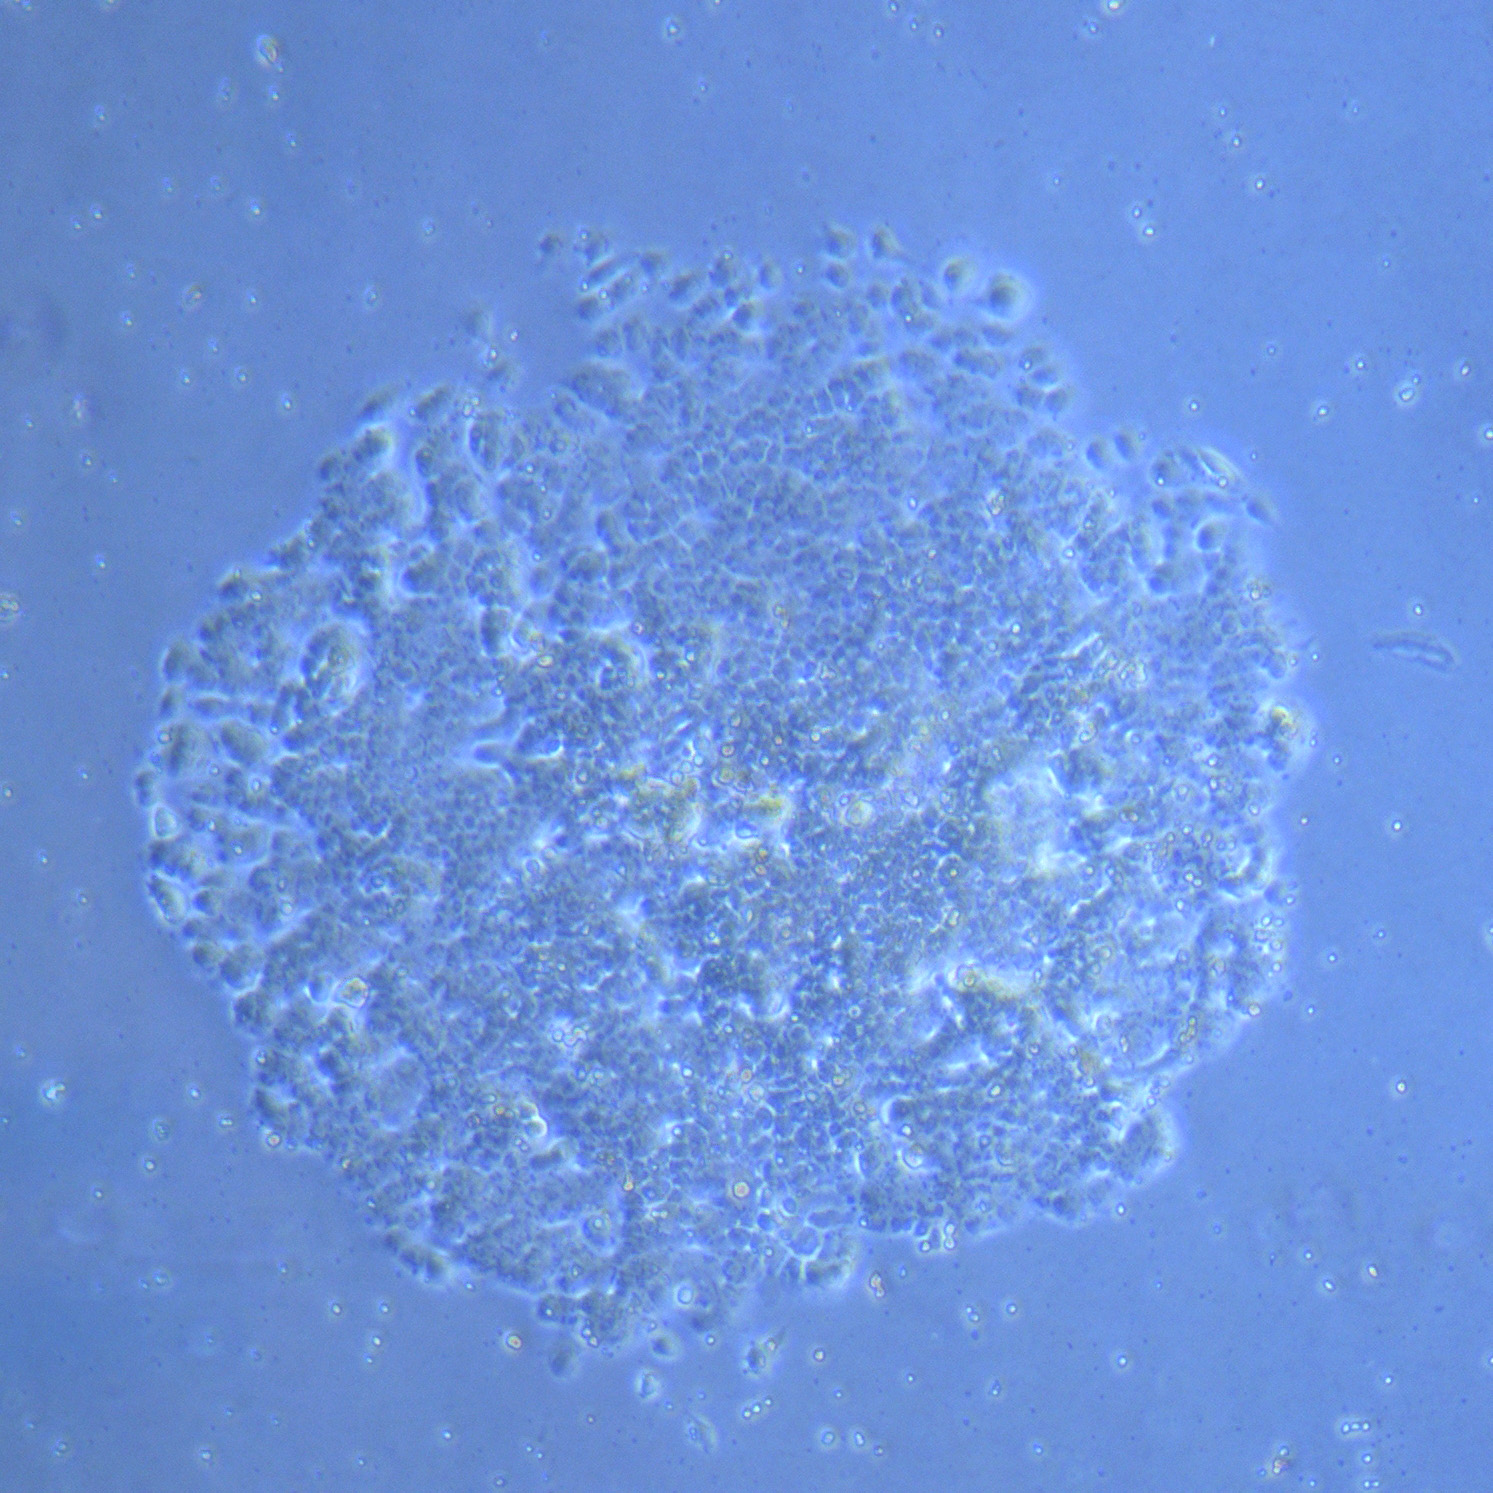
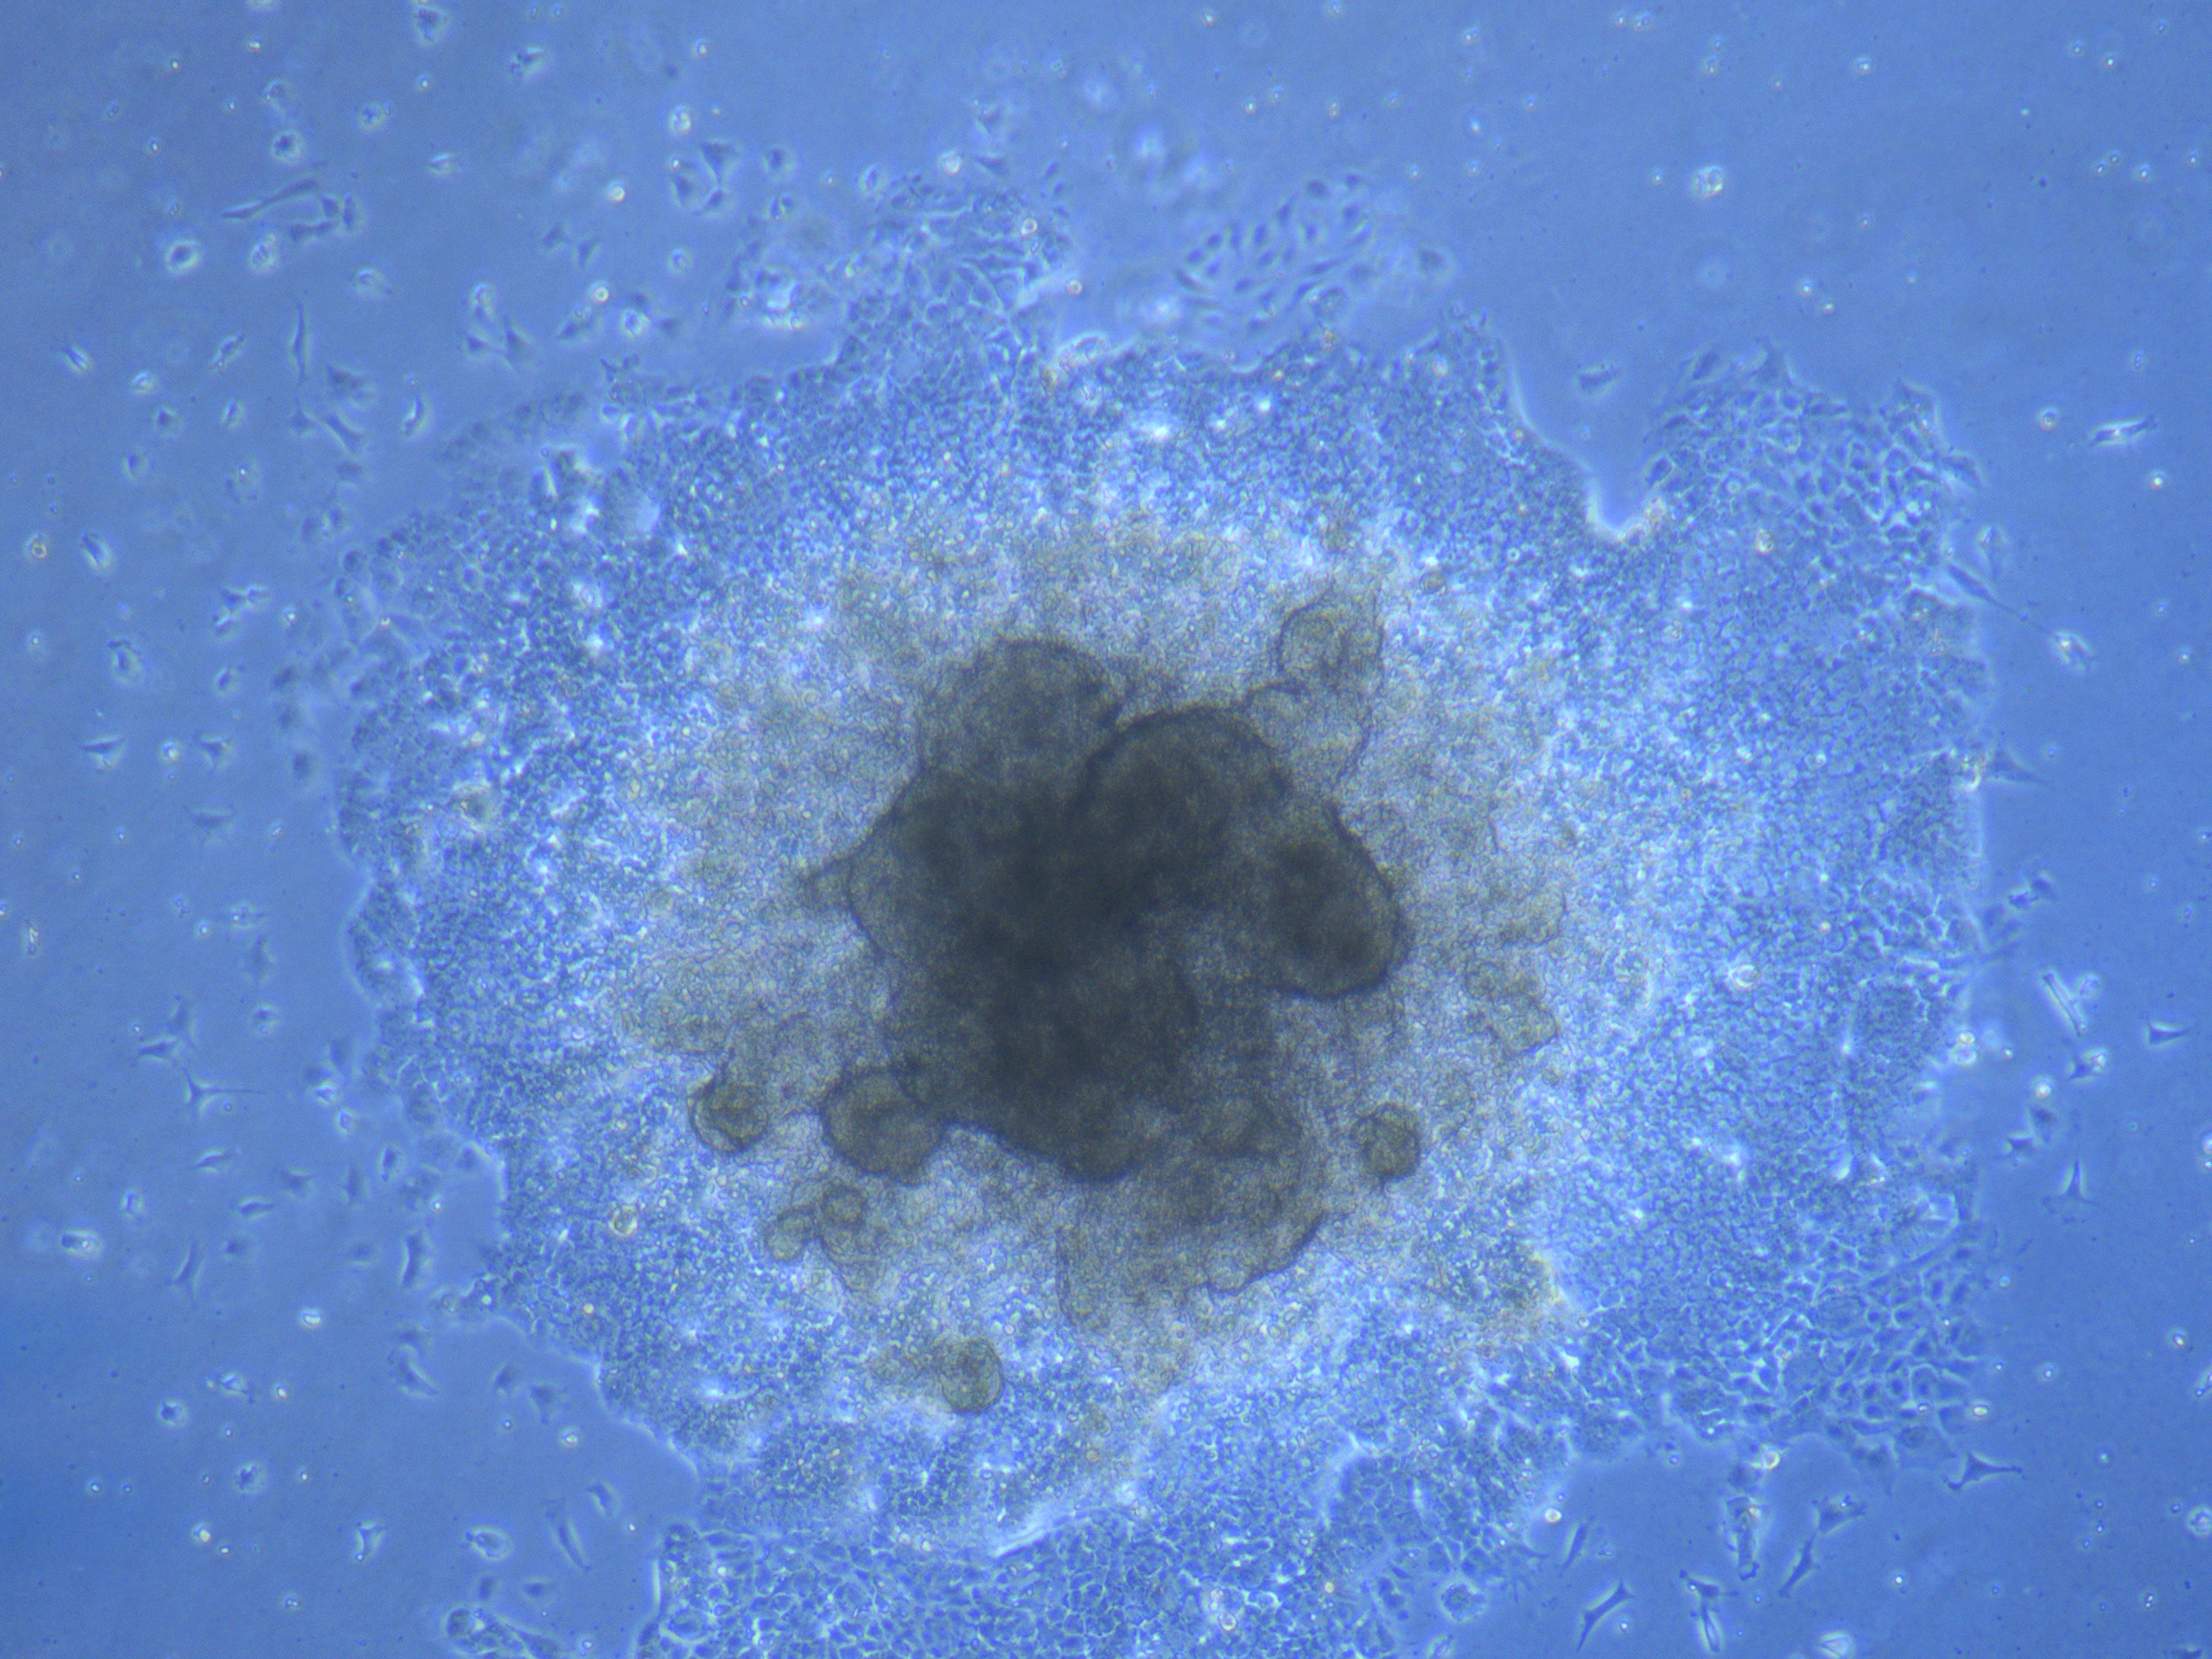
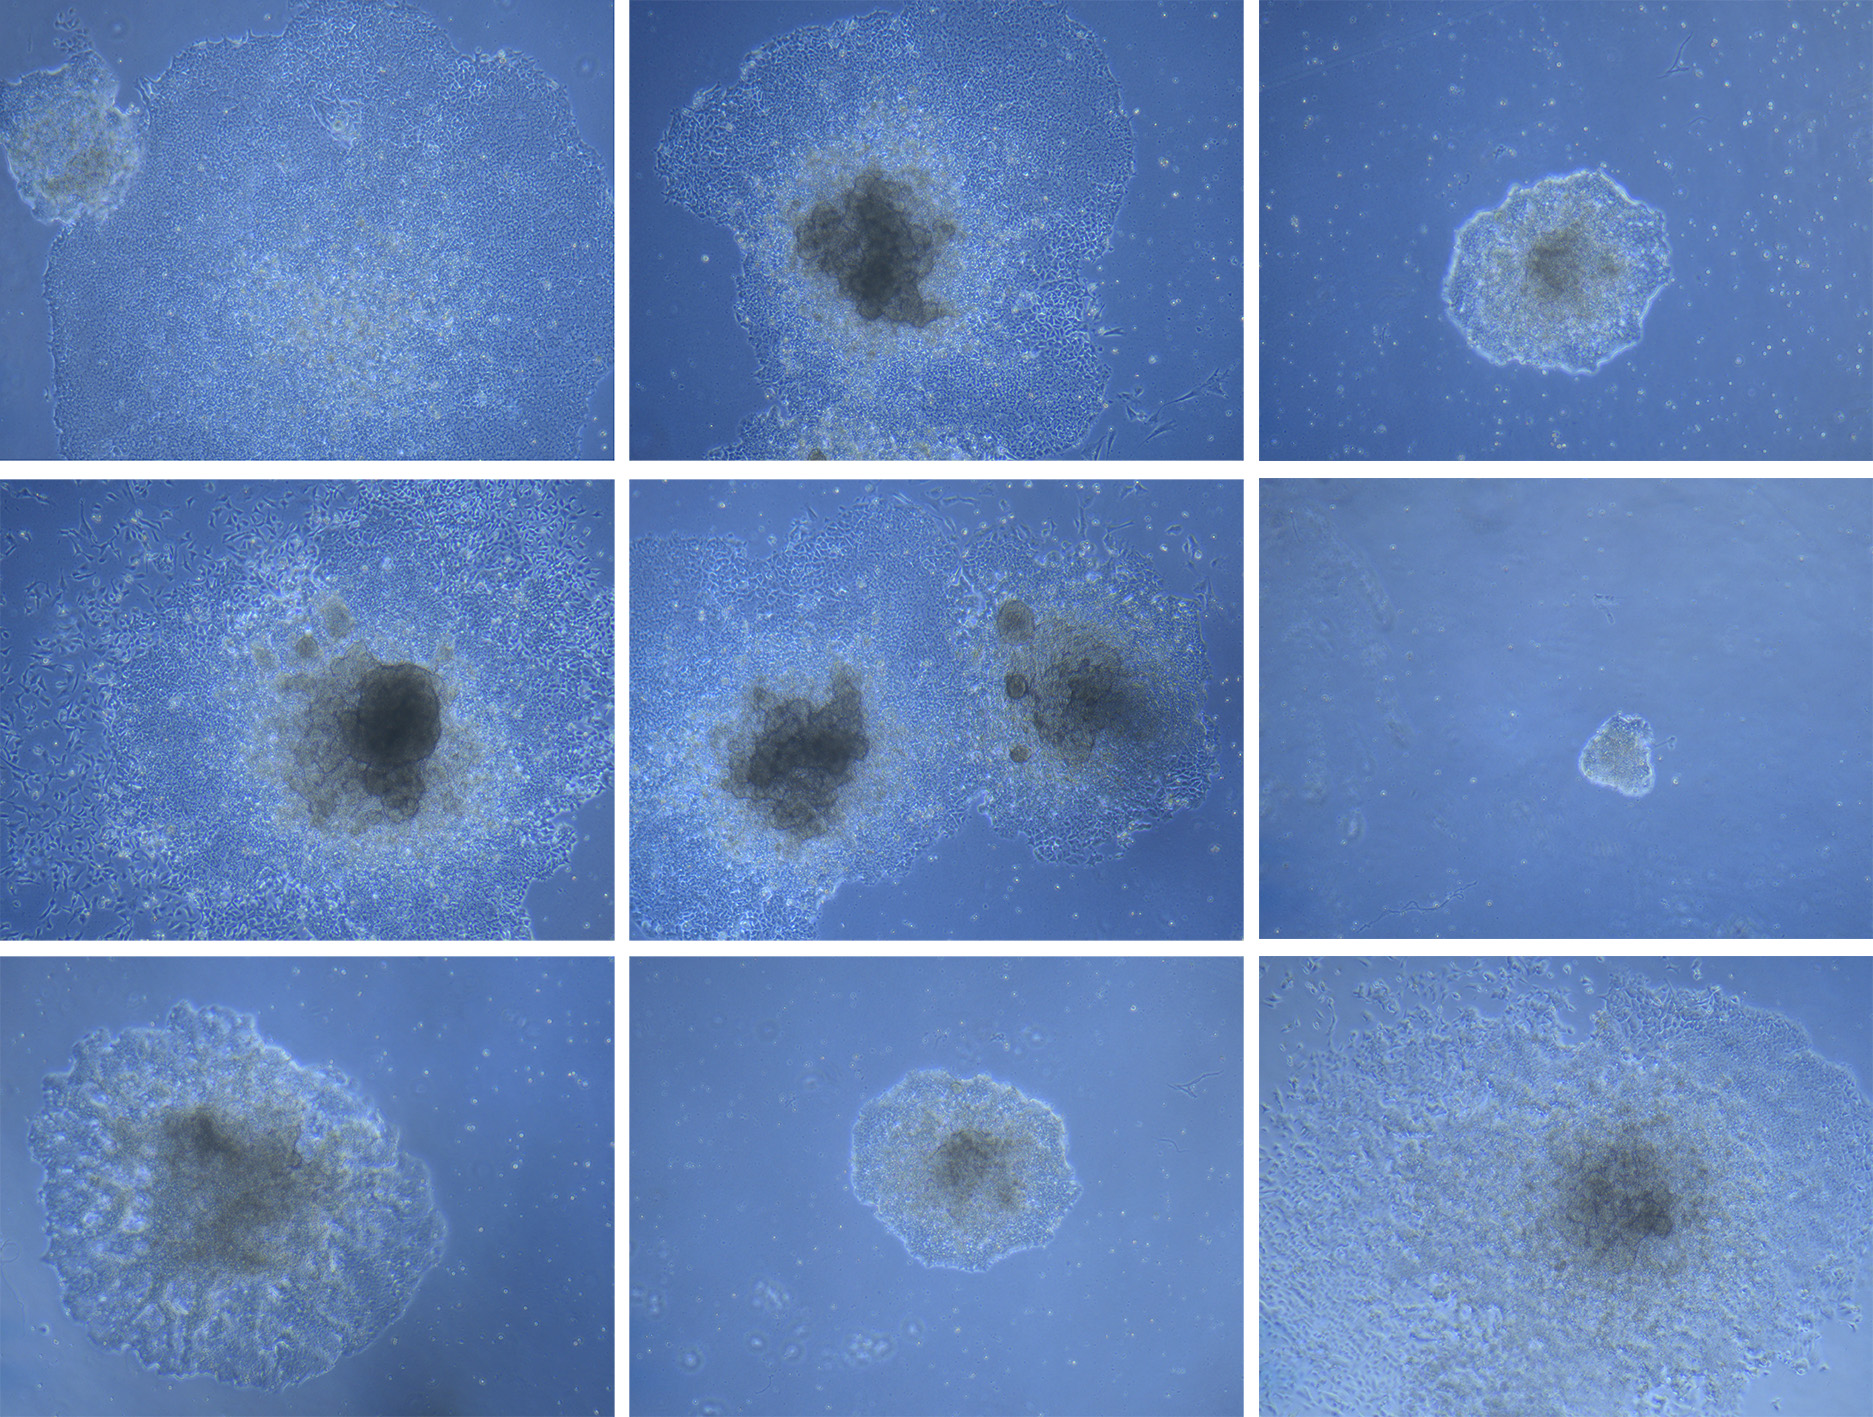
Large mostly uniform colony of precursor iPSCs on 28/04/22.More ‘yucky’ colony of precursor iPSCs with cell differentiation visible along the edges of the colony on 28/04/22.
A day later on 29/04/22, the colonies were well and truly growing with a mix of large and small colonies (and some undesirable cells types).
When we checked our dishes on the 20th April, we noted that one Petri dish (Dish #2) has definite attachment. This means that we can start transitioning to new media. The other dish (Dish #1) is lagging behind. This is not necessarily a bad thing, but it will delay the media transition for a couple of days. Hopefully the extra time will result in beautifully formed colonies 🙂
Dish #2 has attachment – i.e. small colonies of attached cells starting to form on the base of the Petri Dish.
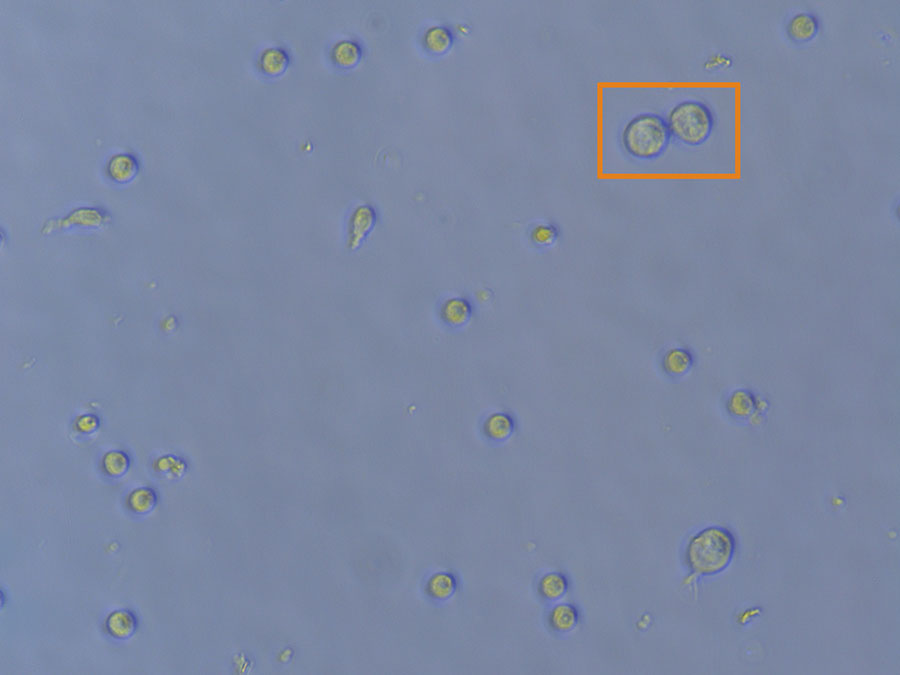
Observing the cells on 13/4/22 (24 hours after the transduction), Ash was confident that the virus had worked. While not scientifically verifiable, one of the potential indicators for success is the difference in size between standard PBMCs and ‘bloated’ PBMCs that suggest the cells have taken up the virus.
Microscope image of cells after transduction on 13/4/22. Larger cells indicating viral uptake are outlined in orange.
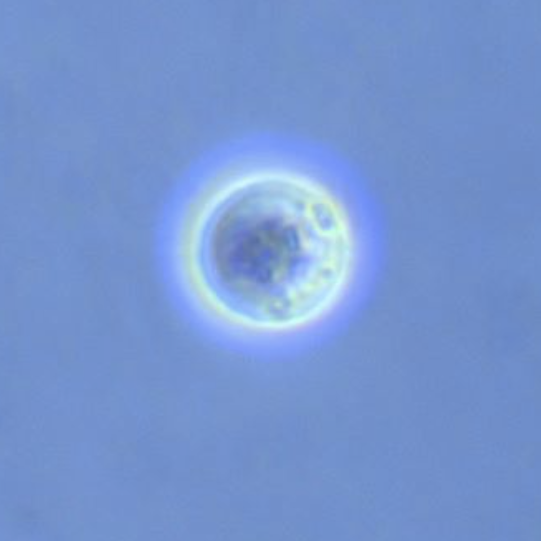
In addition to being larger, cells that may have taken on a viral load tend to have a speckled appearance. The bright halo also indicates that the cell is alive.
Microscope image of a large and speckled cell indicating that it has likely taken up the virus. Over the next few days, this cell may start to change and attach to the base of the culture vessel.
We transferred the cells to 2 x 60mm Petri Dishes coated with Matrigel. At this point, we just need to top up the cells with fresh media and wait (and hope) for transformation and attachment. We can also refer to the cells as RP (reprogrammed cells) rather than PBMCs.
Despite low PBMC cell numbers, due to my ineffective media change, we were able to proceed with the virus addition as scheduled. Ash is confident that we will still get a few colonies.
First we transferred the PBMCs to a new 24-well plate with fresh media. The reprogramming process, as outlined previously, is deceptively simple and involved adding a specific volume of each viral vector (total of 3 vectors) to the PBMC culture. Thankfully, Ash calculated the miniscule amounts required.
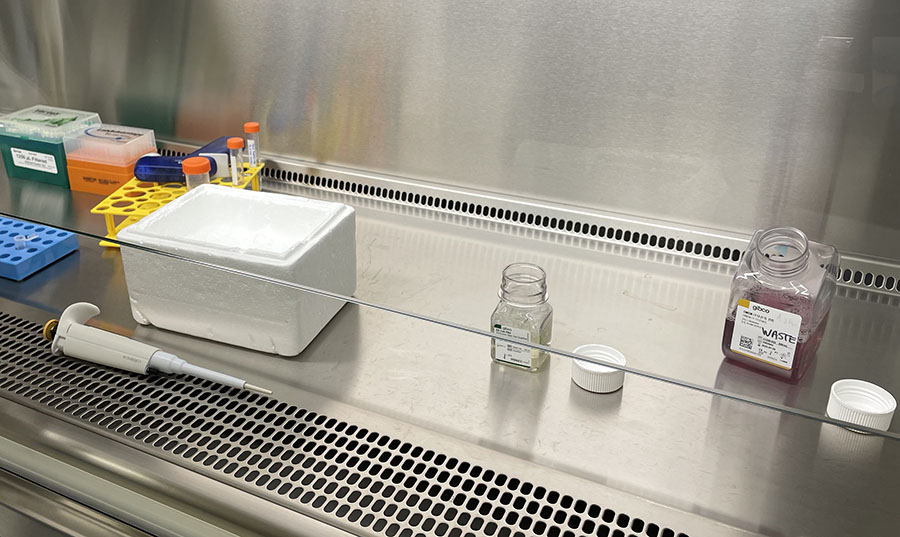
The virus must be kept cold. As such, the 3 vials were collected and kept on ice during the transduction process.
Virus vials on ice and in the biosafety hood ready for transduction of PBMCs
After the virus was added, the PBMC culture was placed back in the incubator for 24 hours.
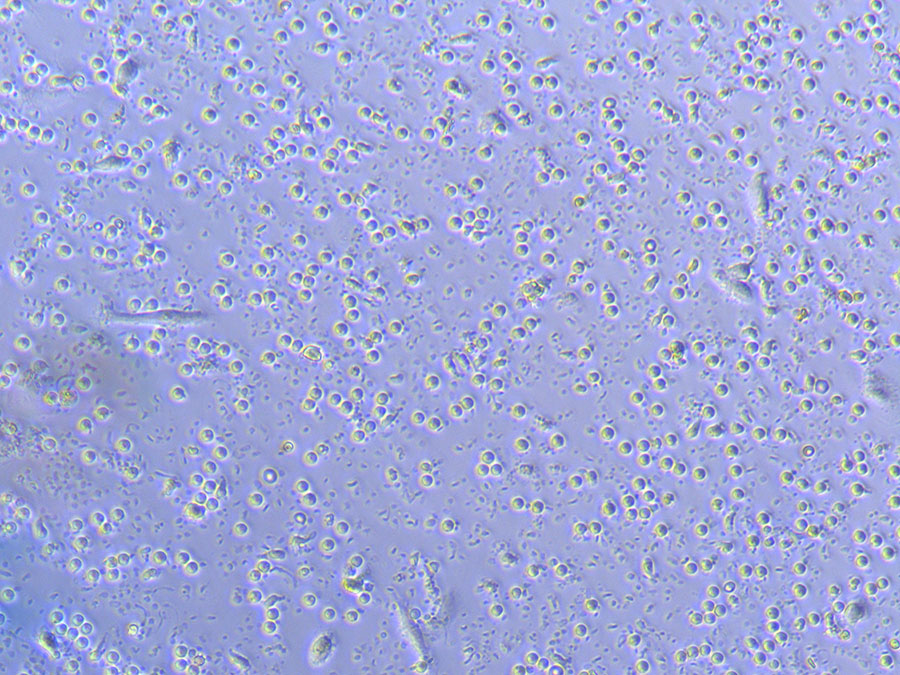
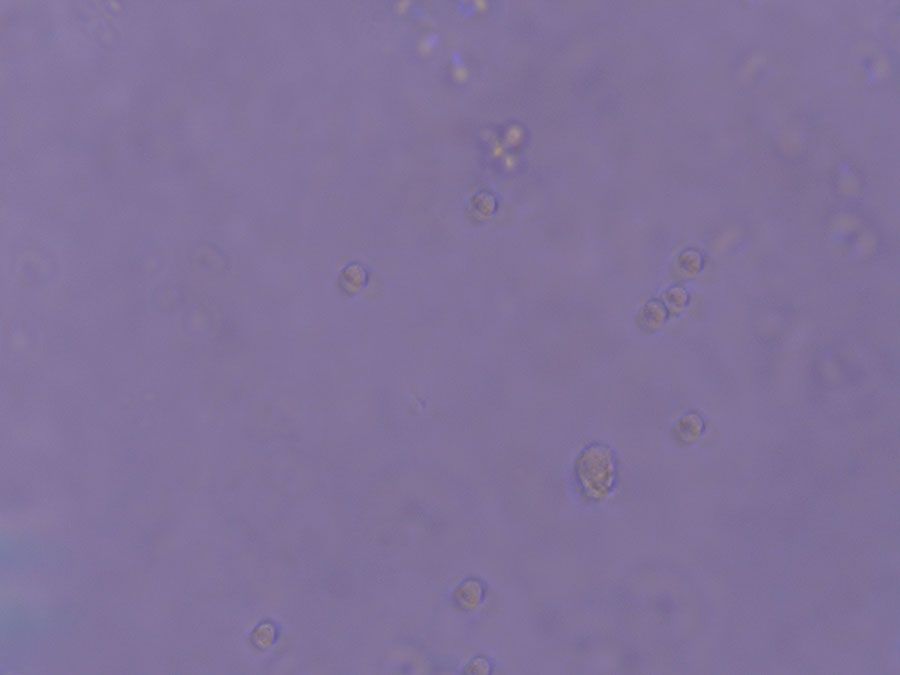
On Sunday 10th April, I did another media change for the PBMCs. The number of cells is definitely reduced. When I checked the previous well, there were a number of dead cells visible, so I have clearly left a lot of cells behind.
Light microscope image showing evidence of dead cells in the previous well. This illustrates that I was very successful at transferring all cells during the media change.
This shows the importance of mixing the cells well and checking that most cells have been transferred during the media change process. I will need to be really careful and follow Ariane’s instructions carefully to avoid further cell losses.
At this stage, we only have around 1.7 x 10⁵ cells (according to the cell count)!
Light microscope image of PBMC Cells taken on 10/4/22
On the positive side, there is no evidence of contamination and apart from low numbers, the cells seem healthy.
As per our scheduled timeline, we performed the first PBMC media change. This involved collecting and spinning the cells, then resuspending them in fresh media. While the process is quite straightforward, it is tricky working in a small well. I have a feeling that I did not mix well enough and may have left too many cells behind in the well.
PBMC Cells on 8/4/22 prior to media changePBMCs after media change on 8/4/22
There is a remarkable difference between the before vs. after photos, even though it is difficult to photograph cells in suspension just after they’ve been passaged. We will see how they are faring tomorrow…
At least, the frozen PBMCs are safely stored away in liquid nitrogen now!
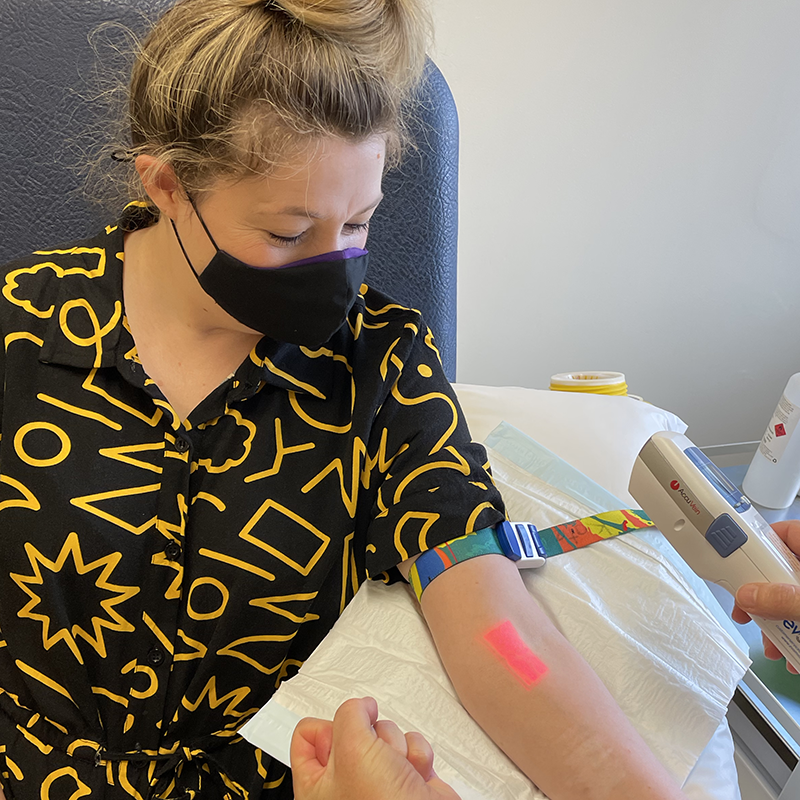
At the UTAS Medical Science Precinct, we are fortunate to have experienced phlebotomists on site to undertake the blood collection process.
Blood Collection
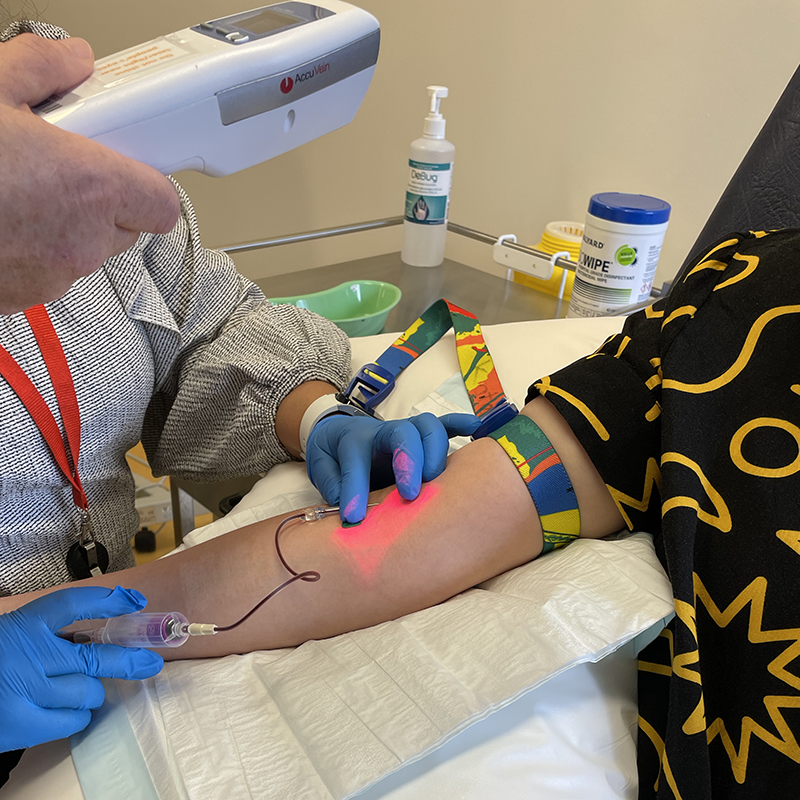
We started the collection process at around 9:30am. My first vein (left) was difficult to find, even with the use of a fancy vein illumination machine. However, my second arm (right) had a good vein for blood collection resulting in a 5mL sample for processing.
Image documenting first attempt to find a viable vein for blood collection.Image documenting successful collection of blood from right arm.
PBMC isolation
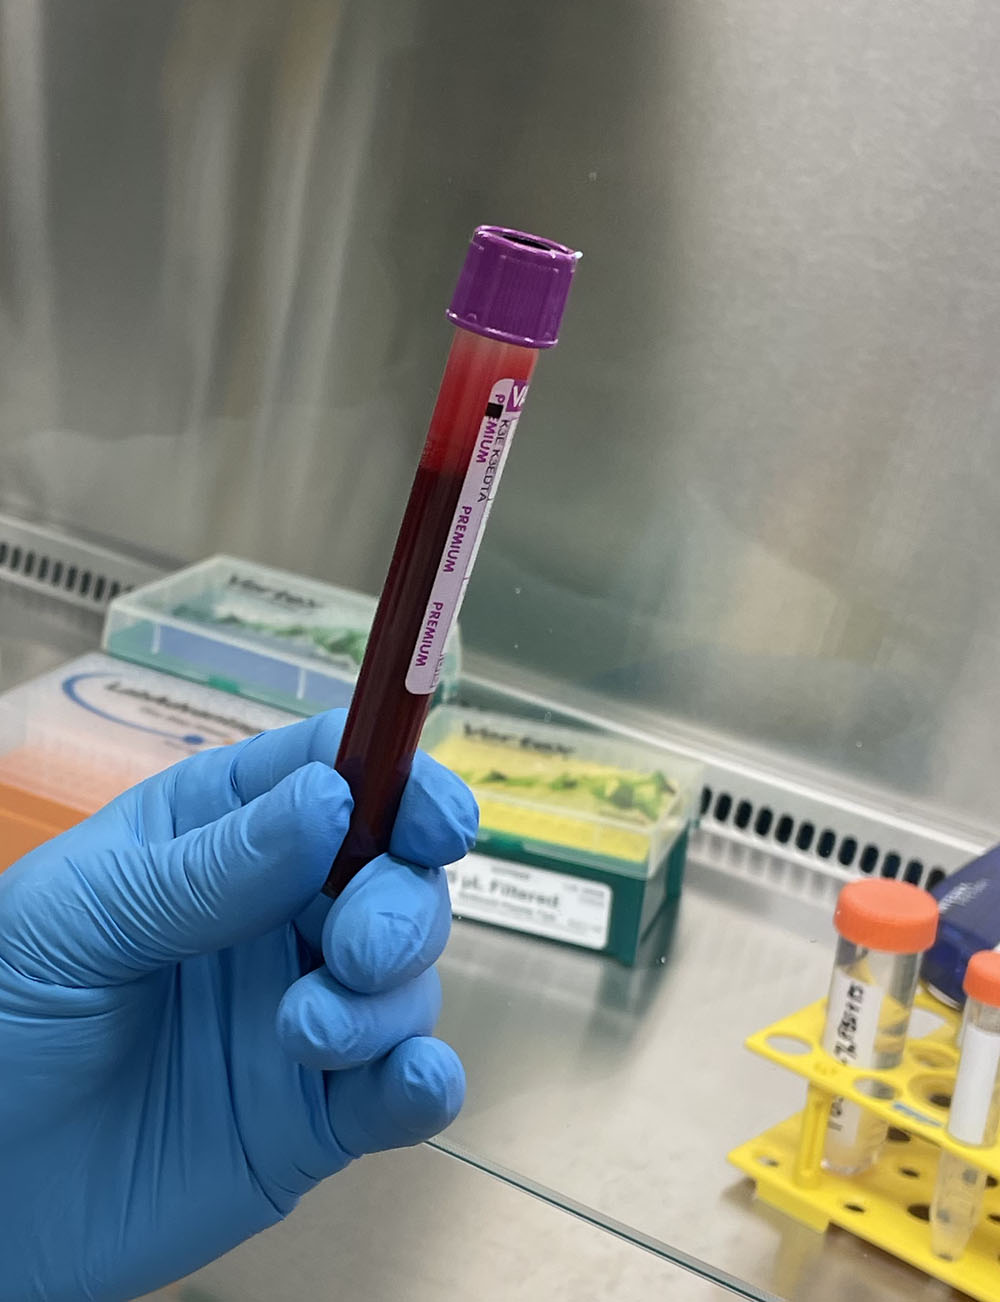
Blood sample in lab.
We transferred the blood to the lab and processed the sample straight away to obtain PBMCs.
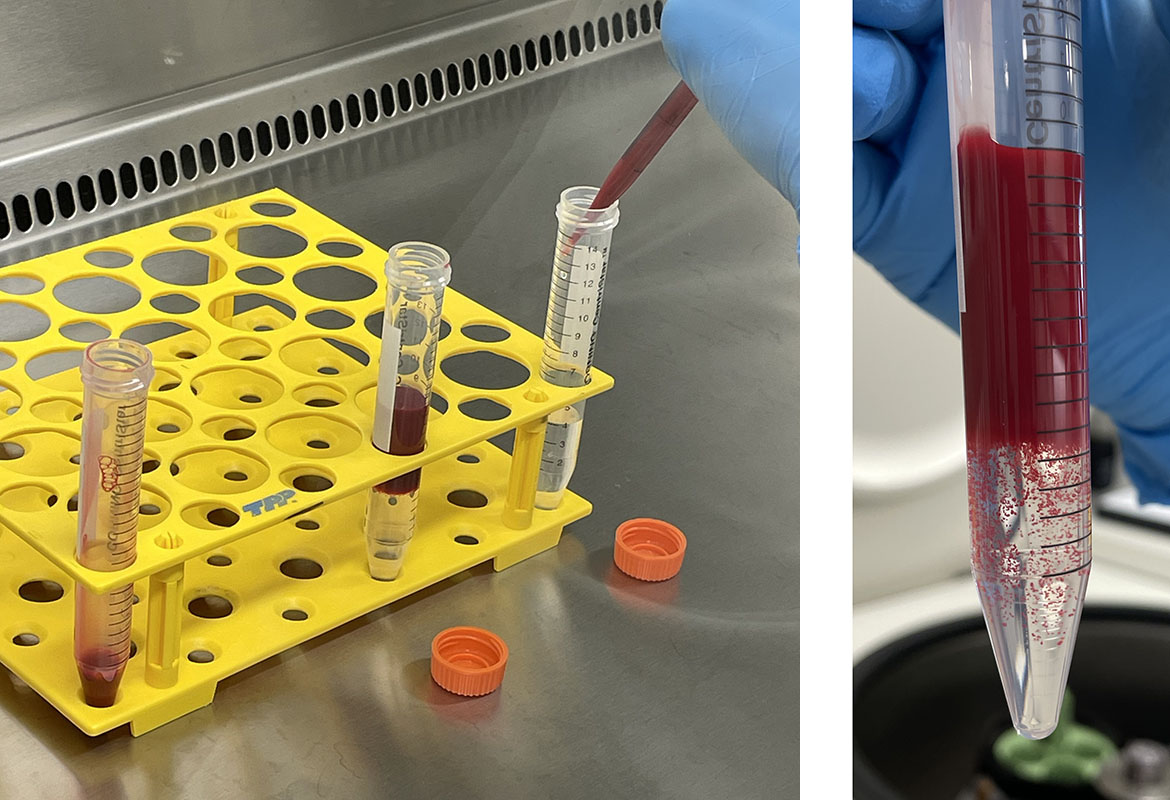
The first step involved diluting the blood sample with PBS (saline solution) to make it less viscous. This was then gently added to a tube containing Ficoll solution to form a clear layer of blood over the medium.
Blood added to gradient medium ready for centrifugation.
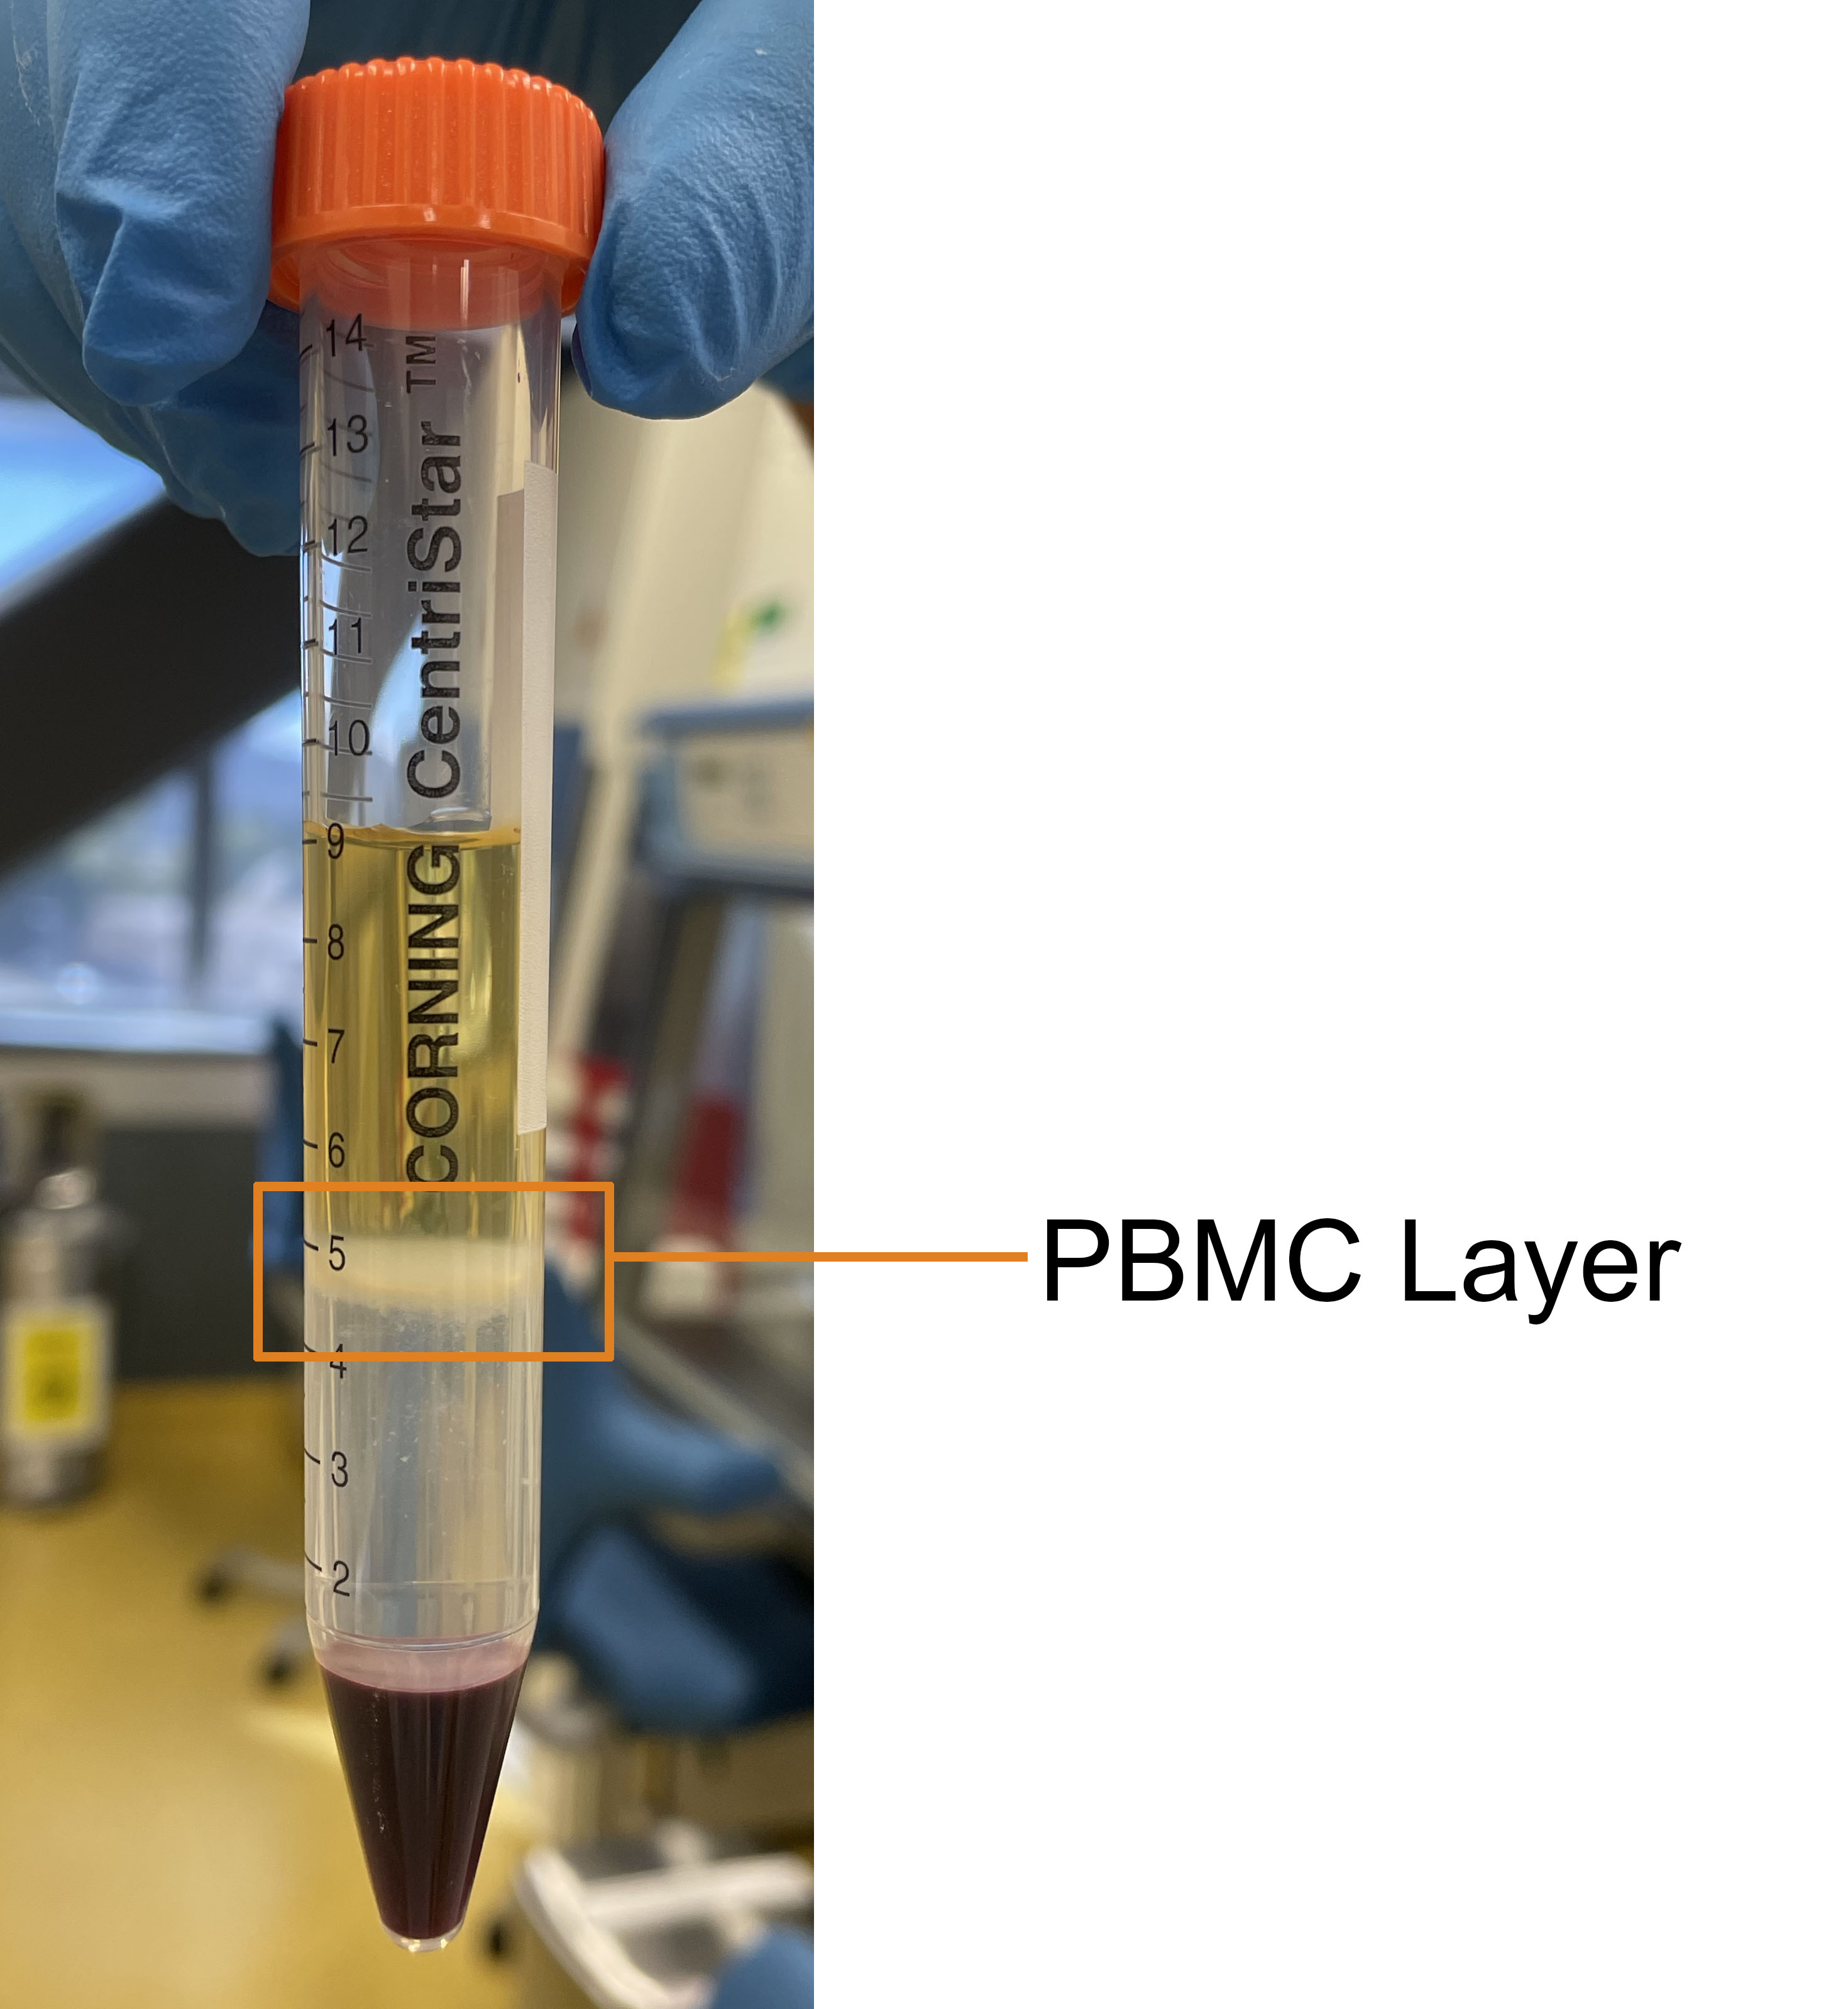
The tubes were then spun in the centrifuge for around 40 minutes which separates cell types and plasma in the sample.
Image of tube post centrifugation showing layers of separated blood. The PBMC layer is highlighted as a thin section between yellow plasma and clear separation medium.
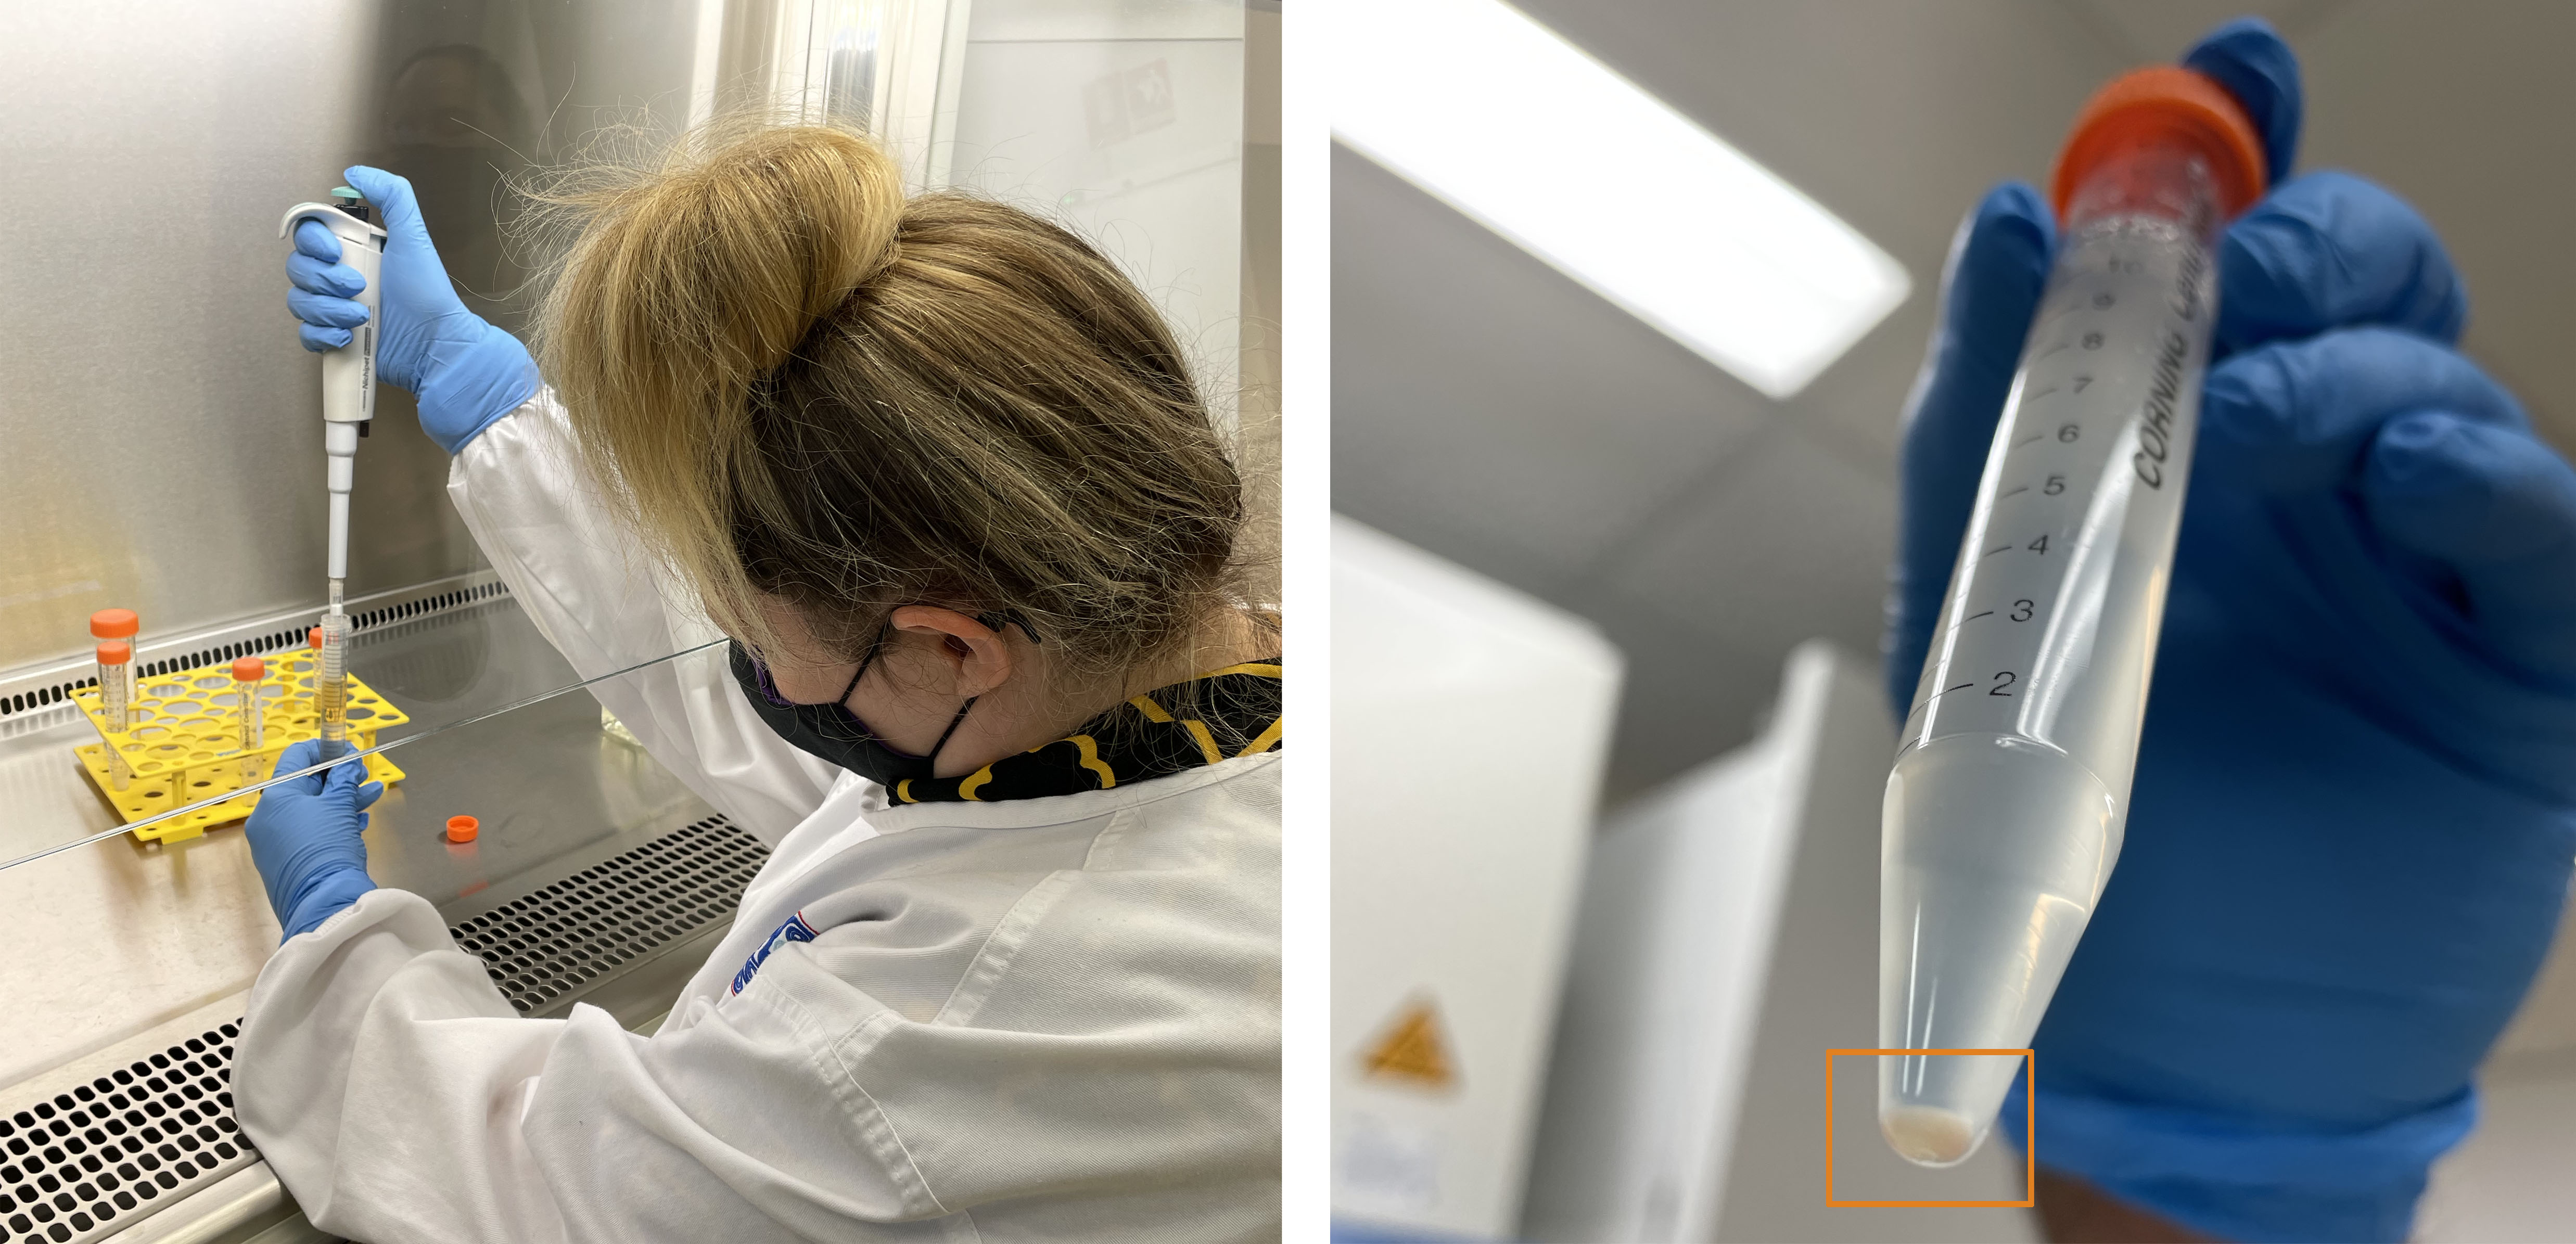
Following centrifugation, the PBMC layer was removed and washed resulting in a small pellet of PBMC cells.
PBMC collection and resulting cell pellet.
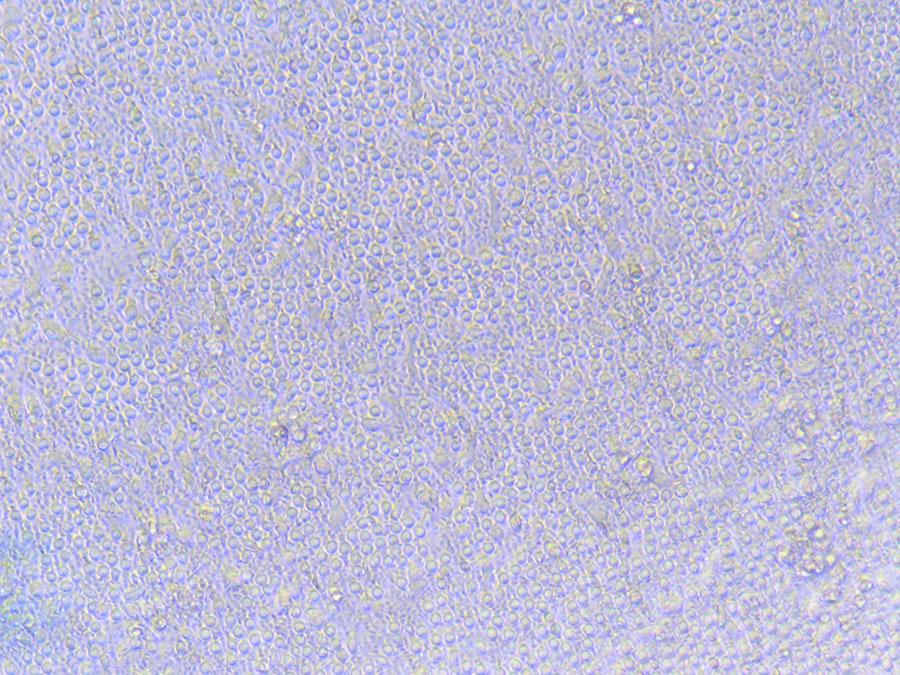
The pellet was resuspended in media and a cell count performed to determine the number of viable cells.
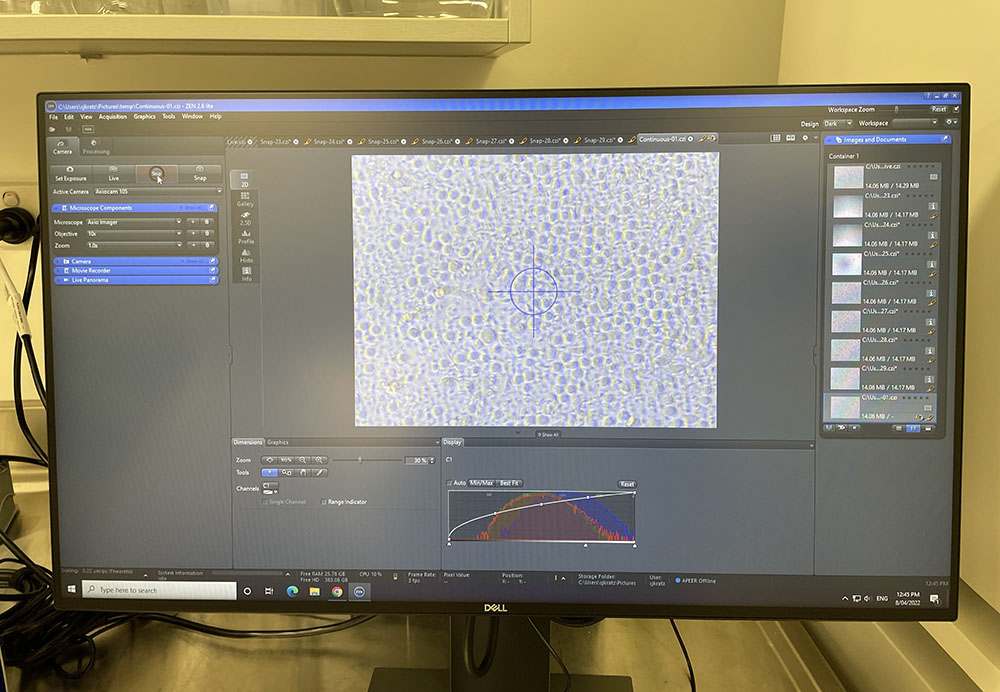
Image of densely packed PBMCs viewed under the light microscope.
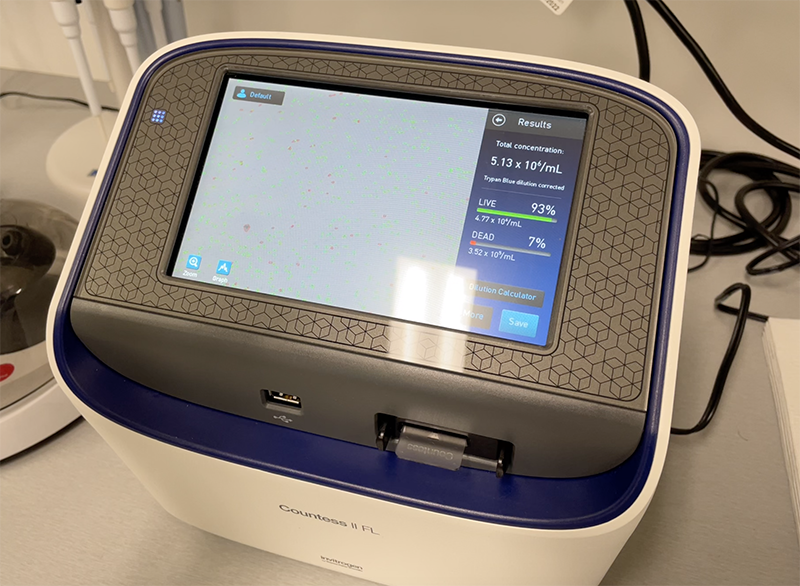
Following a cell count (using the automatic cell counter), there were around 5 million cells per mL in suspension.
Cell count showing cell count including live/dead cell percentage
Ash advised that we only need 500, 000 cells for the reprogramming (so around 100μl).
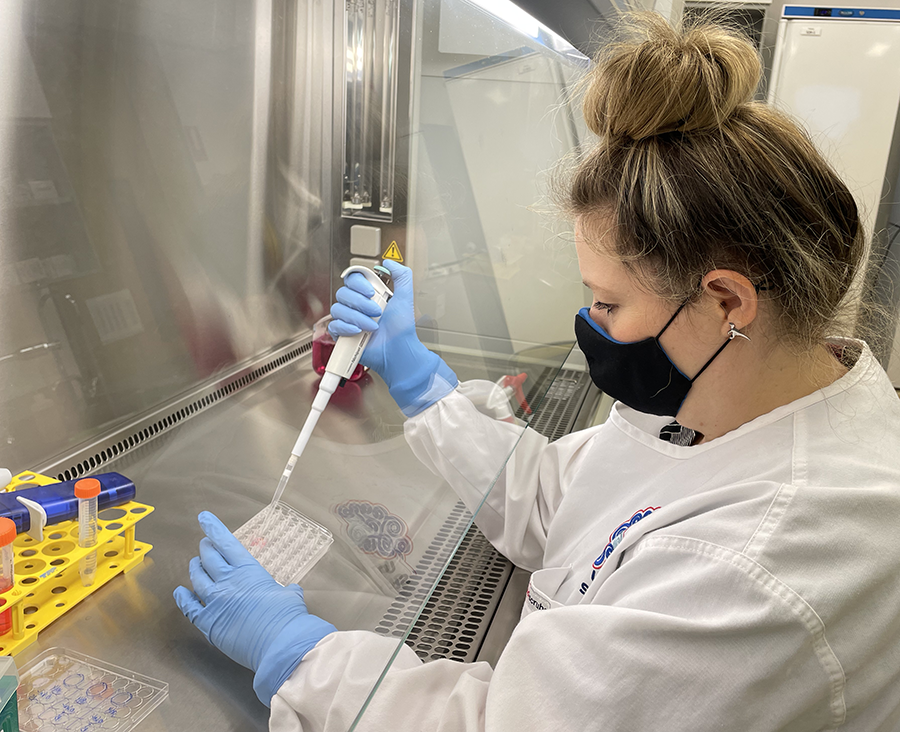
As such, we added100μl cell mix to 0.5mL media a well in a 48 culture plate.
Transferring PBMCs to 48 well culture plate
The remaining cells were resuspended in 2mL freeze media, aliquoted into two cryo-vessels (1mL each), and placed in a Mr Frosty Box (freezing container) in the – 70 freezer. They need to be transferred to liquid nitrogen in 24 hours. These frozen cell stocks operate as quality control and as a backup in case there is an issue with the reprogramming protocol (or lab mishap). Fingers crossed for a smooth journey to iPSC babies.
After a month of observation and some hands-on iPSC maintenance my training in reprogramming and stem cell culture is largely complete. I am still no iPSC ninja like Ash, but I have a good grasp on the basic processes involved. This means that we can now move forward with reprogramming my own blood cells.
The blood collection is set for the 7th April 2022. This will enable Ash to oversee the PBMC culture and transduction before he goes on holiday over the Easter Break. I will need to stick around, of course to maintain the cultures and wait for attachment (with help from the wonderful Dr Ariane Gelinas-Marion).
The basic schedule is outlined below:
Wednesday 6th April – Prep PBMC media
Thursday 7th April – Blood Collection and PBMC Isolation
Friday 8th April – PBMC media change
Sun 9th April – PBMC media change and cell count
Mon 10th April – PBMC media change
Tuesday 12th April – Add virus – PBMC media
Wednesday 13th April – Transfer to Matrigel Plate with PBMC media
Thursday 14th April – PBMC Media top-up
Saturday 16th April – PBMC Media top-up
Monday 18th April – PBMC Media top-up
Wednesday 20th April – Check for attachment – if attached top-up with Reprogramming Media.
Friday 22nd April – Media Change
Sunday 24th April – Media Change
As part of my reprogramming training, I have now learnt how to maintain iPSC colonies. Maintaining iPSCs is a bit different to standard cell culture, as it involves cleaning the plates (i.e. removing unwanted differentiated cells) or selecting specific colonies or areas as part of the re-plating process.
There are two standard protocols in use. The first method is the simplest and involves using a non-enzymatic dissociation reagent. This operates similarly to Trypsin in standard cell culture and dislodges cells so that they can be transferred to a new culture vessel.
The second (and more time-consuming) method involves using dispase to gently break cell adhesion and then manually selecting the areas for collection. A needle is used to grid the selected colonies into equal(ish) segments. These are then gently dislodged with a spatula and transferred to a new culture vessel.
While the UTAS protocols are not for public dissemination, the Stem Cell Catalogue has a good overview of standard/recommended iPSC maintenance.
Over the last month, I have been actively training in stem cell culture with expert Dr Ash Mehta. The training is important to ensure that I understand key protocols and also am able to demonstrate proficiency in cell culture methods. iPSCs are cultured in antibiotic free media, so contamination is a big risk.
As part of the training, I’ve tagged along to view the key protocols involved in reprogramming and iPSC maintenance. Since we are dealing with donor samples, I am not able to disclose images or details of these cells, but can provide a more general overview of some of the processes undertaken.
We started the training on the 24th February with the aim of allowing me to witness the full reprogramming procedure for current PBMC samples.
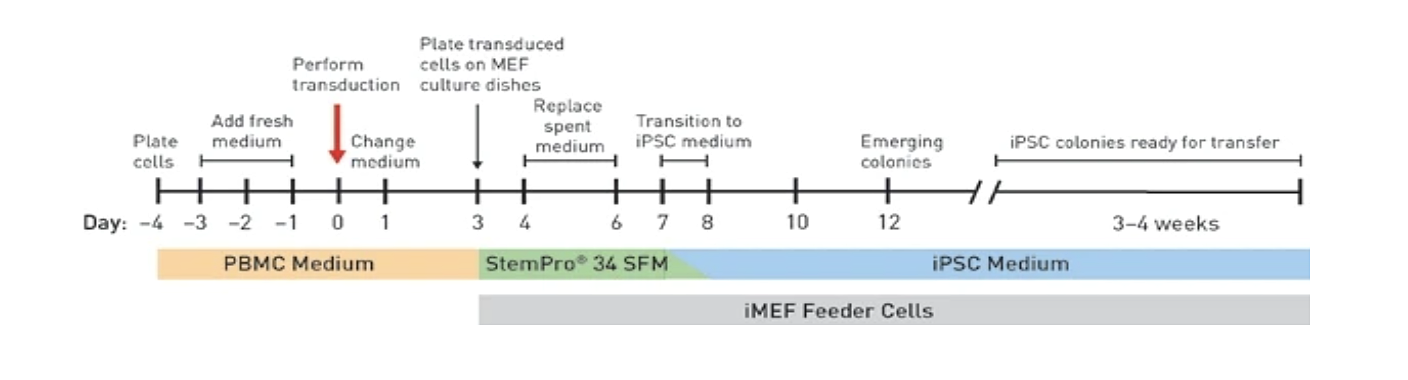
Reprogramming timeline screenshot from CytoTune-iPS Kit via ThermoFisher.
PBMC Culture – Step One
As visualised in the basic timeline, the first step involves culturing PBMCs in PBMC media for approx. 3 – 4 days prior to transfection. This ensures that they are healthy and growing well prior to reprogramming i.e. dividing, standard in appearance and free from any contamination. PBMCs have a small circular appearance. When they are ‘happy’ they also tend to group together in small clumps.
As outlined in my previous post, PBMCs refer to Peripheral Blood Mononuclear Cells. They are good to use for iPSC generation as it is easy to determine success as reprogrammed cells shift from circular non-adherent cells (free floating in media) to attached cells (growing on the base of the culture vessel).
Transduction [Adding Virus to Reprogram the Cells] – Step Two
After 3 – 4 days of PBMC culture, the cells are ready for transduction. This involves adding a set volume of three engineered Sendai viral vectors to the PBMC cell cultures. This is calculated via the following equation outlined in the CytoTune-iPS Manual:
The viral vectors are used to deliver and express specific genetic segments that effectively reprogram the somatic (differentiated non-germ cells) into iPSCs. The viral vectors are stored in a -70 freezer and must be kept on ice during the addition procedure.
Following the addition of the virus, the cells are incubated at 37°, 5% CO2 for 24 hours. It is important not to disturb them during this crucial stage.
24 hours following transduction, the media containing the virus is removed and the Reprogrammed Cells (RPs) are maintained in fresh PBMC media. Transfected cells often appear larger with dark spots in the interior of the cell and a ‘wobbly’ outer membrane. Some cells burst due to high viral load.
Side note: The CytoTune system uses a non-transmissible form of the Sendai virus (SeV) as delivery vector. SeV is a murine (mouse/rat) parainfluenza respiratory virus from the Paramyxoviridae family. Even though the virus is regarded as non-transmissible, it is important to work safely and sterilise all pipettes, tubes and culture vessels that come into contact with the virus with bleach. As such, viral work is carried out in a specific lab area with fully trained and authorised personnel.
Transfer to Matrigel Coated Plates and Await Attachment – Step Three
On Day 3 (post transduction), the cells are transferred to Petri Dishes coated with Matrigel – a matrix used for iPSC adhesion. Once attachment is visible (cells adhering to the base of the Petri Dish), the media can be shifted from PBMC media to a Stem Cell Reprogramming media such as StemPro or ReproTeSR Feeder-Free Reprogramming Medium.
By day 7 – 9, there should be stem cell like colonies visible. These colonies are circular with small and uniform cells. At this stage, the media is gradually changed to iPSC media, such as mTeSR plus or Essential 8 Media.
Side note: The media is expensive compared to standard cell media such as DMEM, so it is important to plan out culture protocols carefully to avoid waste.
Colonies Emerge – Step Four
By around day 12, iPSC colonies are ready for selection and expansion. They will need to be maintained meticulously to avoid differentiation. This involves regular passaging (splitting) coupled with the removal of differentiated cells to ensure iPSC colonies are preserved.