
Today, I undertook my first day of hands-on lab training. To reduce workload for my kind hosts, I tagged along with 3rd year B/Med students. As part of a unit, they are doing a study into the effects of EGCG (Epigallocatechin Gallate) – an active ingredient in Green Tea which may have positive impacts on stroke patients. For their study, they are testing the EGCG with HBVP pericyte cells. The protocols covered today include: cell passage, cell counting and preparing 96-well plates with consistent cell numbers.
It was good to get back into the lab and go over the basics again. Here is a short summary of the basic protocols involved in cell culture (with some additional insights from Jo-Maree in italics).
CELL SUSPENSION
- Put on gloves and ensure they cover the sleeve gap of the lab coat. [Gloves are required for working in the lab. Lab glasses are required for general lab areas but are not mandatory when working in a laminar flow cabinet as the glass offers protection].
- Turn on UV light in laminar flow hood (10 mins) to sterilise the interior working area. [Some hood have an automatic turn/off function that enables users to easily sterilise after use. Because these hoods are manual, group users tend to sterilise before use]
- Turn off UV and turn on light and blower to start the sterile airflow.
- Organise equipment, consumables and media (1 x fluid waste vessel, 1 x pipette waste vessel, pipette and pipette gun, pericyte media, PBS– and TrypLE . Spray all items (including gloved hands) with 70% Ethanol before placing in hood. [Do not place cells in front of waste vessels as this increases contamination due to laminar flow. PBS– refers to phosphate buffered saline. The — is shorthand for PBS without Calcium (Ca2+) and magnesium (Mg2+) . These minerals help cells adhere to the surface of the culture flask. As such PBS — (without Ca2+ and Mg2+) is used when passaging cells (splitting them into additional flasks). PBS++ (with Ca2+ and Mg2+) is used to promote cell adhesion. TrypLE is a form of trypsin (a digestive enzyme that detaches cells from adhering to the flask surface). TrypLE is milder and works well with HBVP cells.]
- Aliquot media from shared stock and place in heating bed. [The lab has a metal heating bed instead of a water bath. This is a new development and was implemented to reduce the likelihood of contamination as water baths (37 degrees, warm and moist) are perfect breeding grounds for bacteria and a known source of potential contamination in cell culture).
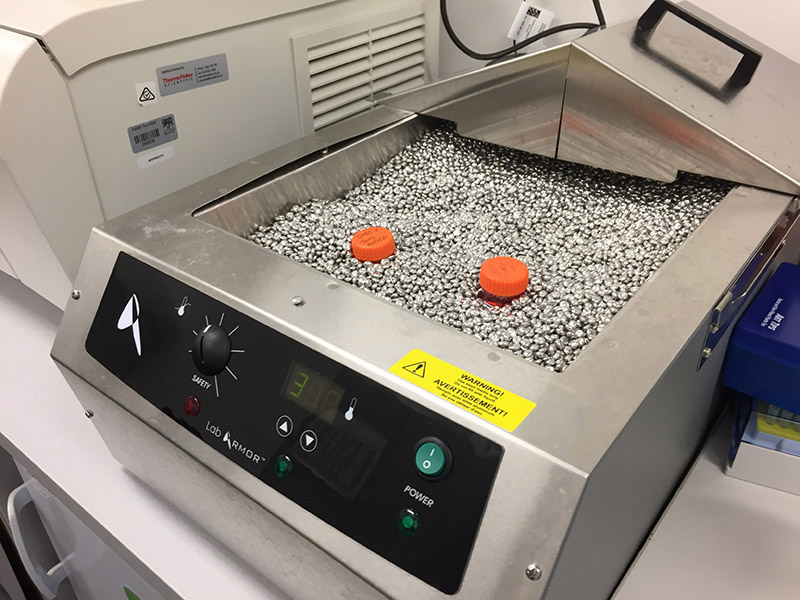 ‘Water bath’ using metal pellets to warm media to 37°C (body temperature) – very cool
 - Collect cells from incubator and view under the microscope. Check cells for any contamination or odd changes in morphology. [The HBVP cells used today were plated on Friday and are at passage 4 (P4) meaning that they have been split 4 times (although full passage numbers are not disclosed by cell suppliers). Today they were approx. 80% confluent (i.e. they have filled approx. 80% of the available space on the surface of the flask). It is important to not let cultures grow to 100%, as this impacts on cell growth and behaviour. Similarly, cells should be maintained at 30 – 40% min as too few cells also impairs growth. The lab also tends to use cells up to P8 or P9 only to ensure reliable results.]
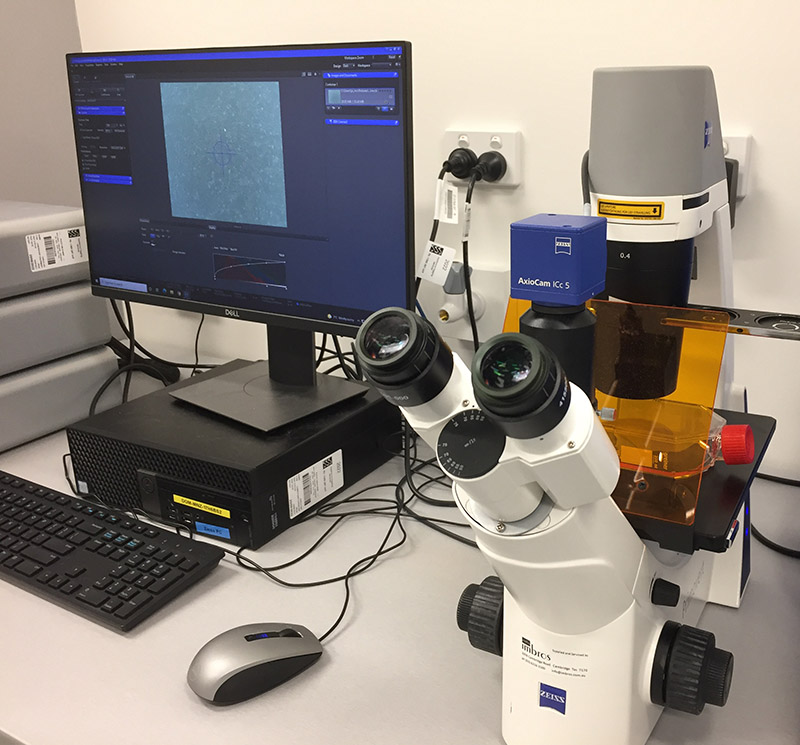 Microscope connected to digital capture
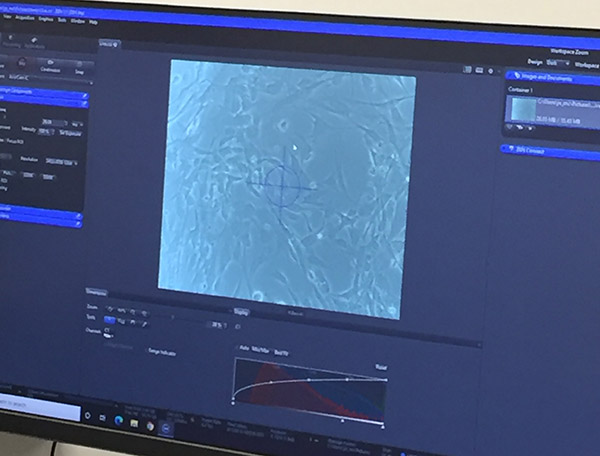
Microscope view of cells displayed on the computer screen - Review cells for any contamination or odd changes in morphology.
- Spray flask with 70% ethanol and place into laminar flow hood.
- Remove nutrient medium [This can be poured off into the liquid waste vessel, if following correct technique.]
- Add 5mL PBS– to culture flask using 5mL pipette.
- Gently rotate the flask to wash the cells.
- Remove (pour off) PBS solution.
- Add 5mL TrypLE (trypsin) and place flask in incubator for 5 min.
- After 5 min, check that cells have detached.
- Add 10mL complete nutrient medium. [The nutrient medium contains fetal bovine serum FBS which neutralises the trypsin and stops cell digestion].
- Add cell solution to a 15mL tube.
- Spin cells in the centrifuge at 200G for 10 min (room temp). [It is important to add a counter balance when using the centrifuge.]
- Check that there is a small cell pellet in the base of the tube.
- Spray tube with 70% ethanol and return to laminar flow cabinet.
- Gently pour off liquid into the liquid waste vessel.
- Resuspend cells in 2mL complete nutrient medium.
CELL COUNTING
The cells are now ready for counting using a traditional haemocytometer – a glass slide with two chambers with a grid of 9 x 1mm squares used to count cells.
- Set up haemocytometer by adding the coverslip. [It helps to breath on the slip to create a good seal]
- Remove 20 μL of cell suspension. Remove from hood. [You can place this on a piece of parafilm as it does not need to remain sterile.]
- Add 20 μL Trypan Blue to the 20 μL cells and pipette gently to mix the two solutions. [Trypan Blue stains dead cells as the dye can penetrate through the dead cell membrane. This is used as a mechanism to help count viable cells only].
- Add 10 μL to each chamber.
- Since HBVP cells are relatively large, count the cells in the large four corner squares. [When counting cells have a system to avoid doubling up on cells i.e. count top and right only of overlapping cells. Also check to make sure cells are evenly dispersed. If they are clumped together, you will need to suspend cells more thoroughly – i.e. mix with pipette]
- Add all cell counts from the corner squares together: 127 + 104 + 116 + 133 = 480 ÷ 4 (number of squares to get an average) = 120 x 104 x 2 (due to dilution with Trypan Blue) = 480 x 104. This is 4.8 x 10⁶ (so 4.8 million cells in the 2mL suspension).
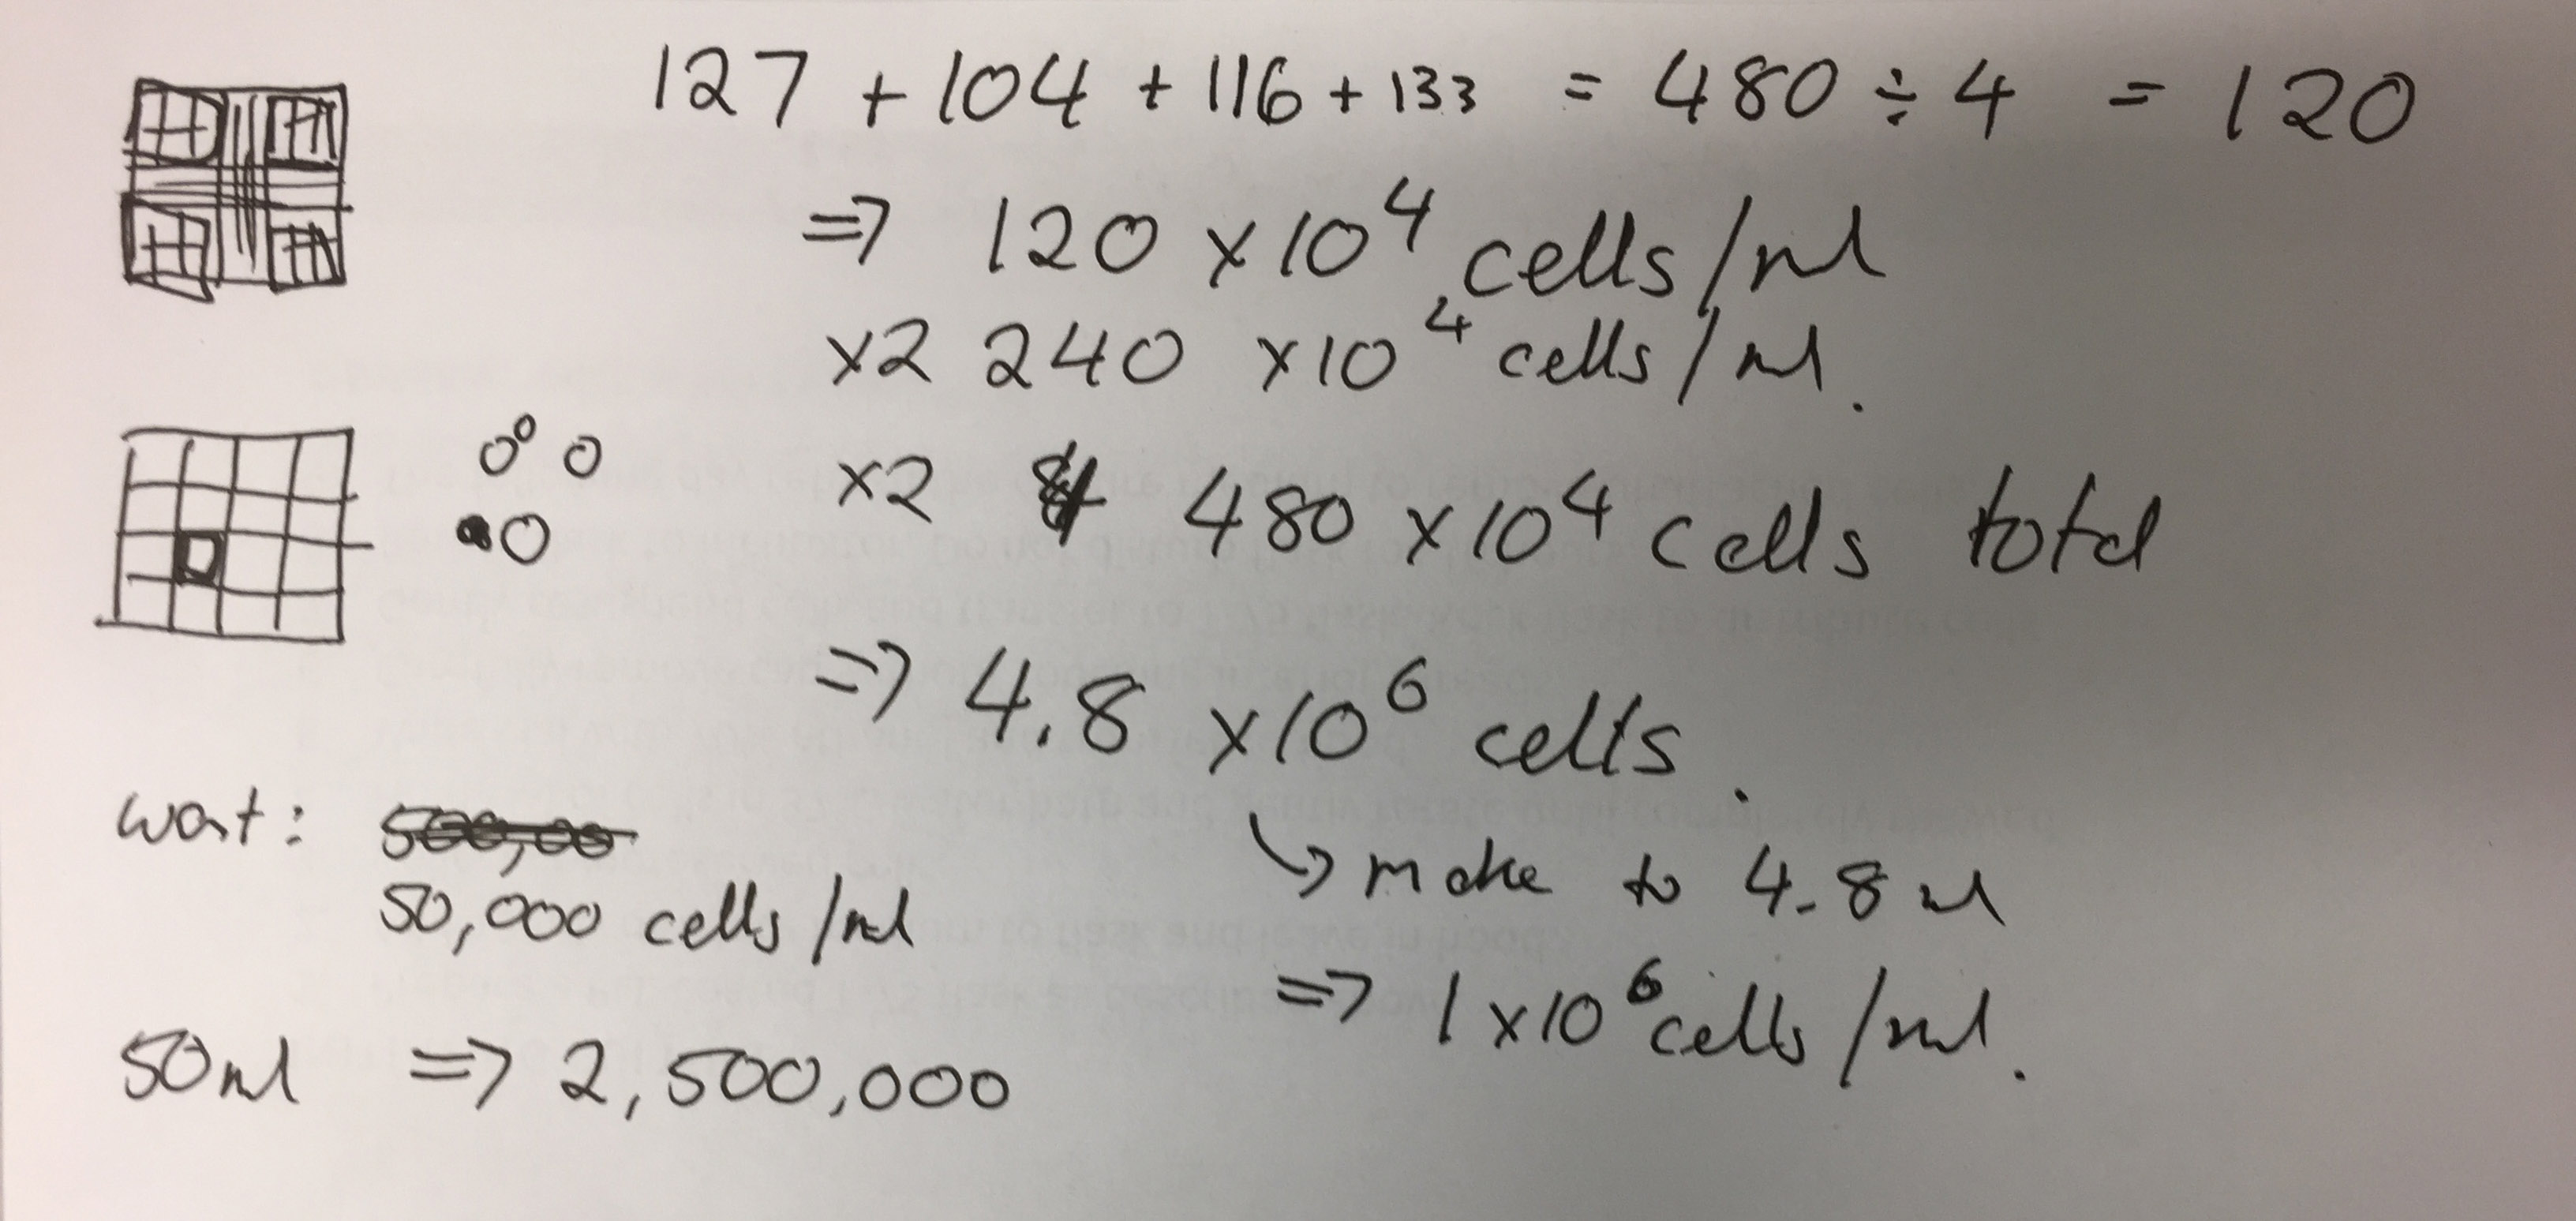
Photo of Jo-Maree’s calculations - To make it to 1x 10⁶ add 280μL to the 200μL.
The students set up 96 well plates with 100μL @ 5000 cells per well as part their protocol.
CELL PASSAGE
- Add 1mL of the 1x 10⁶ cell suspension to a new flask. Add 9mL fresh warm complete medium and gently rotate the flask to disperse cells.
- Remove cells from hood and place them in the incubator. [The cells will be confluent within 48 hours].
- Remove media, used pipettes and waste vessels from the hood.
- Place pipettes and pipette tips in biohazard bins. [If bins are full, take to dirty autoclave station and loosely secure bag with autoclave tape.]
- Add liquid waste to bleach to kill any remaining cells. [After 24 hours, all organisms are destroyed and the remaining liquid can be safely disposed of.]
- Place waste vessels in bleach bucket in sink area. [After 24 hours, these can be washed and left to dry for re-use].
ON A SIDE NOTE:
Poly-L-lysine is the correct coating to promote cell adhesion on glass surfaces. Jo-Maree has some in stock, so I am all set to work with my Petri dishes as part o the initial cell culture training.